A step-by-step guide for grassroots efforts to
A publication of the Reef Ball Coral Team
ã
2006, Reef Ball Foundation, Inc (images ©
by original owners)
890 Hill Street • Athens, Georgia 30606
Phones:
941-720-7549 • 770 752-0202
The Reef Ball Foundation is a Public 501(c) 3 Non-Profit Organization
www.reefball.org,
www.reefball.com,
www.artificialreefs.org
Step 1: Determine Project Goals,
Budget/Resources and Timeline
Determine Additional Reef Function Goals
Determining Budget And Resources
Step 2: Determining if it is Better to Rehabilitate An Existing Reef or
Build a New Reef
Rehabilitating An Existing Reef
Square Area of Bottom Impacted
Cubic Volume of Reef habitat Lost
Coral Head Size and Density (non-impacted adjacent areas)
Diversity of Corals/Fish/Invertebrates/Other Impacted
Number of Coral Colonies Impacted
Step 4a: Determining Sites for Surveying
Fish Only Rehabilitation Projects
Soft Corals & Hardy Hard Corals, and non-coral reef builders
(oysters, blue mussels, kelp, etc)
Sensitive Hard Corals (Tropical
Coral Reefs)
Water Depth/ Lighting Level Range
Step 6: Base Substrate Creation (Artificial Reef)
Step 6a: Determine which artificial reef type or substrate type for
planting coral fragments
Step 6b: Base Modules: Number, Sizes and Layout
Step 6c: Construction of Modules
Step 6d: Deployment and Anchoring
Step 8: Gathering Imperiled Corals, Fragmenting, Propagation and
Planting
Formal Definitions of Coral Team Certification Levels
Selecting and transporting imperiled corals
Coral Propagation Table Operations
Glossary of Reef Ball Coral Team Terms
Appendix B: Reef Ball Construction Training Manual
REEF BALL TYPICAL CONCRETE SPECIFICATIONS
This manual is NOT an all inclusive or broad based coral reef restoration manual and is specifically written for grassroots organizations and others who are interested in the Reef Ball Foundation’s Coral Team methods for reef rehabilitation.
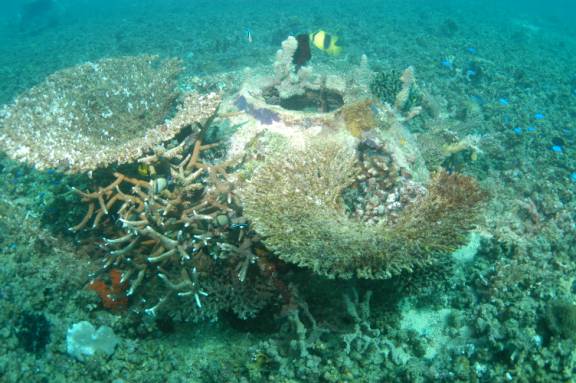
Simply stated, we restore lost void space using prefabricated artificial reef modules or natural substrates with indentations to accept standardized coral propagation plugs. The combination of providing base reef structure with planted coral speeds up re-establishment of a natural reef. Our methods and techniques are a combination of the best science, practitioner (marine aquarist), and field team work and have taken over 10 years to develop in thousands of projects. These unique field processes allow for rapid and efficient propagation of thousands of corals in short timeframes while minimizing underwater effort. It is not unusual for a team of 5 divers to be able to rescue, propagate and plant 500 coral colonies a day with supplies costing less than US $1 per coral colony. The process is conducted by a certified Coral Team, made up of a mixture of experts and volunteers that are both local and international with the goal of transferring global technologies and techniques to the local level for continued rehabilitation efforts.
On the advise of Gregor Hodgson, Executive Director of the Reef Check Foundation, we have selected the phrase “reef rehabilitation” rather than reef restoration to emphasize the point that even with rehabilitation efforts, it is impossible to fully restore a reef once lost because coral reefs are unique, dynamic and complex living systems. Rehabilitation, therefore, is not a cure all and conservation efforts should be maintained both on a system wide level and all the way down to the local level…even to individual coral heads. As you read this manual, keep in mind that rehabilitation is only a single tool available to aid coral reefs among many conservation tools and approaches.
For scientists and professionals looking for a broader
scoped coral reef restoration manual, Bill Precht served as editor of the book, “The Coral Reef Restoration Handbook: The
Rehabilitation of an Ecosystem Under Siege. That was released in May 2006. You can find information on this at: http://www.pbsj.com/Press/Releases/NewBook/index.asp.
If you are taking the time to read this manual, you also
have a deep interest in things that affect coral reefs. This being the case, we strongly urge you to
join the CORAL-LIST maintained by NOAA, primarily for scientific exchange of
thought on issues affecting coral reefs.
For more information see
http://coral.aoml.noaa.gov/mailman/listinfo/coral-list
The Reef Ball Foundation coral rehabilitation methods were developed to allow efforts by non-scientists and therefore are very conservative in approach. They are also designed for efficiency in terms of both cost and diving effort. In order to use volunteers and in keeping with our non-profit mission statement, it was necessary to impose a set of ethics and principles so that non-professionals can be involved with the process without the possibility of systemic failures or unexpected consequences.
The process is suitable for use by restoration professionals too, and in this case the ethics can be relaxed based on the skill sets of the professional. For example, volunteers might be limited to working with coral fragments no larger than what fits into a 35 mm film canister whereas professionals might choose to work with larger fragments. We divide our ethics into the following areas: 1) Reef Ball Foundation Ethics (we never break these rules and suggest that the only people who should are scientific researchers or professionals). 2) Skill Based Ethics (Coral Team members must pass through formal certification levels to be allowed to perform various tasks), and 3) Bad/Best Practices (just a set of observations, some very specific to our methods, on what works and what seems not to work).
Also note that the Reef Ball Foundation did not develop these propagation technologies (although we have improved many)…these were developed by scientists and marine aquarists. What the Reef Ball Coral Team did was to provide a system to take this science and apply it to the real world in a way that allows mass propagation and planting of corals, with minimal effort and cost, in a highly reliable way. This manual is one way of sharing these techniques, participating on one of our projects is another way.
It is important to understand the way the Reef Ball Foundation organizes its “Coral Team” to understand the methods used.
Basically, the Reef Ball Coral Team is a worldwide group of individuals that have participated in at least one Reef Ball coral rehabilitation project and earned a certification level (there are 5 specialties and 5 levels within each specialty based on the individual’s knowledge, skill, and ability). These people include coral professionals, scuba divers, aquarists, consultants, marine biologists, and a wide range of backgrounds but they share an interest to work on coral rehabilitation projects.
Whenever a local group wishes to start a project, we have a Coral Team activation and alert the entire worldwide team. Team members then apply to participate in the project. Coral Team Leaders select the appropriate team based on the compensation (or costs) involved to participate and on the skill sets needed. The teams bring together skills from coral reef restoration efforts around the world, and the processes and procedures in this guide are practiced. New techniques are often tried and if demonstrated successfully by monitoring they can be added to our reef rehabilitation guide. When monitoring bears out processes that are unwise, adjustments are also made. This manual is therefore a living breathing document and therefore it is always best to obtain a recent version to get the latest tips and techniques.
This feedback allows the Coral Team to continually improve the processes and to expand the range of species that can be effectively propagated with success. Additionally, when team members return to their local countries they help to spread the techniques they learned and encourage best practices in rehabilitation efforts.
==>>IF YOU ARE READING THIS MANUAL FOR THE FIRST TIME, WE SUGGEST YOU READ THE GLOSSARY OF REEF BALL CORAL TEAM TERMS, FIRST, TO BE ABLE TO DEAL WITH THE TERMINOLOGY IN THIS MANUAL.
Step 1: Determine Project Goals, Budget/Resources and Timeline
Setting Project Goals
The best reef rehabilitation projects start with a pre-defined set of project goals. These goals will be used to help determine everything from project scope to monitoring plans. If your project has written down these goals clearly it will be much easier for The Reef Ball Foundation to help guide you to achieving your goals.
If you have not formulated the project goals, this is where you must start.
Here are some real life example goals from our clients:
Ø To restore damage caused by a ship grounding
Ø To create a scuba diving site that is educational for divers
Ø To build a barrier reef to protect our beach from damage
Ø To have a program for our hotel guests to participate in reef rehabilitation efforts
Ø To provide for better fishing for our village that is not so far away
Ø To make a sustainable farming area for marine aquarium fish collection
Ø To make a recreational fishing site
Ø To help restore reefs that were destroyed by a hurricane
Ø To demonstrate our company’s environmental commitment
Ø Because we have been forced to mitigate damages we caused to a reef.
Ø To have an exciting environmental project for our group.
Ø To create an educational snorkeling trail
Ø To rescue coral that is going to be damaged when we build a dock.
Ø To rescue coral that is in the path of an impending dredge operation.
Ø We want our artificial reef to develop into a natural reef faster.
Ø We want to plant corals as part of an environmental educational awareness program for our school.
Ø To conduct experimental research
The list of potential goals is enormous, we have documented over 1,000 reasons to make, rebuild or rehabilitate reefs. Most projects will have multiple goals, which is better as long as they are clearly prioritized. In most cases, you will be able to set your own goals. Remember, you don’t necessary have to know how to accomplish you goal just yet, one just needs to be able to articulate what one wants to accomplish. Occasionally, you will want our assistance such as in the case of complicated projects, when you need consensus amongst multiple usage groups, or when you just need an expert opinion.
Determine Additional Reef Function Goals
It does not matter if one is going to build a new reef, or rehabilitate an existing reef, one must determine the desired function of the reef. This includes human uses that already may be incorporated into your goal setting document. But it may also include additional biological or physical function such as serving as a juvenile fish nursery, biological bottleneck elimination, protection of natural reefs (for example by diverting diving or fishing pressures), erosion control, fish spawning site, or enhancement of a specific marine creature (Such as lobsters, threatened corals, octopus, or specific fisheries).
These factors will all come into play as you determine your final approach. Some functions will require very specific solutions. The point is that as long as you have defined your own project goals and will design your project to achieve them, that some additional goals, often purely to help the environment, are often possible without additional effort or cost as long as you are aware of these possibilities.
Determining Budget And Resources
Nearly all rebuilding or restoration efforts are constrained by money, time or other resources. The amount of resources you have available, may for example, depend on a grant, a court settlement, a corporate budget or on donations and volunteers. Whatever they are, write them down with whatever constraints or opportunities that can impact budget changes. As with any project, having more resources will mean you will be able to do a better job…but is it almost always possible to make some positive impacts even with little or no budget.
Often, your resource budget will limit your rehabilitation options or project scope whereas other times it may just mean you will have to do more of the work yourself or with volunteers. Sometimes, there are budget and timeline constraints. For example, you may have an annual rehabilitation budget or on-going revenue streams that can be directed to coral reef improvements. In this case, you may have to look at more of an on-going effort instead of a specific project.
In 99% of damaged coral cases, limited resources are cited as the reason for ineffective or lack of rehabilitation efforts. In the 1% of damaged coral cases where abundant funding does exist, it is usually wasted on time consuming and less effective traditional rehabilitation methods or the funding gets tangled in bureaucratic red tape. Often, funding ends up being re-directed to other uses. That’s one of the main reasons the Reef Ball Foundation has focused on developing restoration options that are efficient, and methods that can be employed by grassroots organizations. After reading this manual, it is our hope that the next time someone or something destroys your favorite reef that you will feel empowered take action regardless of your budget.
Timeline
To compete step 1, one must determine the timeline. Is it an emergency that requires immediate attention to rescue corals that have been damaged but are not yet dead? Or, is it a case of a distant or long-term reef loss where you hope to make long-term rehabilitation efforts? Perhaps there are specific weather constrains such as monsoon or hurricane season and you want to complete work before they start. Perhaps you just don’t want to work during those times.
Season is an important variable. Artificial reefs can be built year round, but are best deployed during calmer seas. Coral propagation and planting aspects cannot typically be done when water temperatures exceed 30C (86F). In fact, the best time to plant a coral fragment is when you are entering a cooler season because the fragments don’t have to deal with as much summer algae growth. In climates with wet/dry seasons, it is best to plant when you are entering a dry season because there is less runoff impacting corals. However, adult coral colonies can generally be re-stabilized year round. In pure tropical areas, seasons for algae growth and temperature changes may not follow a spring summer fall winter pattern and you will need information on this to make the right rehabilitation choices. Often, just knowing when the corals spawn in your area will give you the information about when it is best to plant fragments. Just after spawning and for a few months following are typically ideal planting times.
Step 2: Determining if it is Better to Rehabilitate An Existing Reef or Build a New Reef
Now it gets to be a little bit trickier. One needs to review the findings in step 1 & 2 to determine if it is best to rehabilitate an existing reef or to build a new reef.
Rehabilitating An Existing Reef
In a purist world, one would rehabilitate existing reefs that have been physically damaged or when whatever conditions caused the damage are no longer a threat. Working within a damaged or degraded reef does provide some challenges. For example, if you are going to be deploying artificial reefs as your base substrate for planting fragments, careless deployment techniques could damage the remaining natural reef.
So, an important first consideration is the logistics of the reef to be rehabilitated. Are there a lot of open areas or large scars that will make it easy to do the rehabilitation tasks without threatening the natural reef left?
Working within, or at least close to, existing reef systems has a lot of rehabilitation advantages such as easy access to imperiled corals for brood stock purposes. The less distances corals must be transported for processing in the fragmentation nursery, and coral propagation table the less stress they will undergo during the processes required to propagate and plant them. Additionally, the closer your rehabilitation efforts are to the original damage (especially If you make a speedy rehabilitation) the more likely you will be providing habitat for the originally displaced marine life that depended upon the reef before it was degraded. When working close to a natural reef, one can nearly always assume water quality and environmental conditions are right for coral fragment planting. One is also more likely to find favorable bottom characteristics for base substrate deployment.
That said, building close to a reef would increase the possibility of coral predators attacking your newly planted coral fragments. Read up in the glossary under coral predators to see what you can do to minimize this. Building close to a reef may not meet your goals either such as in the case of reducing diving pressure from the natural reef.
Building a New Reef
If you can’t rehabilitate the exact location of the damage, then your efforts would technically be building new reefs although the proximity to a natural reef might be quite close (or quite far away).
Let’s consider some reasons not to rehabilitate the exact damaged area.
Depending upon the type of damage, it might not be desirable to work within the damaged area. For example, we have seen a nuclear submarine grounding that dug a 10-20 feet deep and wide channel through limestone rock….and by the time the funds were allocated for rehabilitation (some 3 years later) there was an abundant fouling community…complete with some small corals on the sides and bottom of the underwater canyon created. Would you really want to build something new there? There was no doubt that there was a loss of ecological function, but in this case building nearby at a selected suitable site might be more prudent.
Also, consider why the original reef was damaged. Perhaps its location made it more venerable to human activities? Obviously, it may not be best to rehabilitate a reef in the middle of a boat channel in an area near a beach that is constantly being renourished year after year it that was the cause of the damage.
But what are the disadvantages to building a new reef? You might have to add a lot more base substrate to create enough protective void space to provide an equivalent amount of essential fish habitat. And adding base substrate in the form of artificial reefs is typically the most expensive part of a coral rehabilitation project. Also, when you stray away from areas where corals are naturally growing, you must pay a much greater attention to water quality issues. Perhaps corals are not growing where you want to build a new reef because they can’t exist in that location.
In the end, you should be able to determine what is right for your project by reviewing your work in steps 1 & 2, but take into account the timeframe before work will actually occur. If you are having trouble determining this, wait until the next steps (assessment of damage and site selection) are completed as they may provide clues to guide you. And, as usual, if you need an expert opinion just contact us.
Step 3: Damage Assessment
If your project is attempting to rehabilitate a specific damaged or degraded coral reef, read this section. If not, skip to the next step, site selection. If you have an keen interested in monitoring, you might want to read this section just for novel monitoring ideas.
An assessment can be done in a variety of ways and the method used depends on the reason for the assessment and project goals. Below is a list of quantitative and qualitative methods most often used for damage assessment.
Quantitative Measures:
Square Area of Bottom Impacted
The square area of impacted bottom is the most simple
measurement simply reflecting the footprint of the damaged area. It is useful for determining the logistics
of the project. It is a lousy
measurement of the amount of ecological impact except for the most homogenic
systems (for example many sea grass systems, or non-diverse live bottom habitats).
Cubic Volume of Reef habitat Lost
-Can be enhanced with complexity
levels
This method is also fairly easy to compute and is definitely better for describing coral reef damage. An accurate map of the damaged area must be surveyed and the original average height of the reef is multiplied by the square footage/meters of the impact. This can be a bit complicated when the original height was highly variable or unknown. This measurement can be important because impacts to taller, typically more mature coral reefs are much more severe than impacts to smaller, typically less mature reef systems even when the footprint of the damage is the same.
Coral Head Size and Density (non-impacted adjacent areas)
Surveying nearby adjacent non-impacted areas can be useful to estimate the coral head size and density lost. This is helpful in planning the proper levels of void space restoration. This measure can sometimes be strengthened further by doing the analysis on certain high value coral species…. particularly the large void space providers.
Diversity of Corals/Fish/Invertebrates/Other Impacted
When your project has good monitoring capabilities, the most complete measurement is an inventory of species diversity and population densities. For most coral reefs, this can be an exhausting task and it is best to focus on the specific species that are most important to the goals from steps 1-3.
Number of Coral Colonies Impacted
-Can be enhanced by size or age estimate categories
Some projects may only be concerned with the coral. For example, projects that are instigated because of coral damage. Or projects addressing specific threatened corals such as Elkhorn (Acropora palmata) and Staghorn (Acropora cervicornis). In these projects it is appropriate to focus solely on the corals of interest. The extra focus can allow categorization of size or age estimates of the colonies to help focus rehabilitation efforts.
Semi-Quantitative Measures
Although these methods are based on quantitative study, they involve factors that vary for different reef species. These factors such as void space and biologically active surface area are totally different if you are a tiny creature or a large one. Nonetheless these factors are critical to understanding meaningful rehabilitation. To be most useful, these analyses need to be tailored to your project goals. For example, if your interest is in juvenile fish production, void loss should be examined from a small fish perspective whereas if you are looking at adult fish populations for fishery purposes the analysis should be from an adult fish size perspective. Similarly, the biological surface area from the perspective of a lobster is different that the biological surface area for a tiny copepod. Small surface holes and wrinkles make a big difference for copepods but do little for lobster.
Protective Void Space Loss
Think of protective void space as the habitat that coral reefs create for fish. Just like trees give land animals shade, hiding space and wind protection.
The most critical function that coral provides to fish is protective void space. A protective void space is an area that protects fish from larger predators and provides shelter from energy draining currents. All reef dwelling (as opposed to pelagic fishes) need protective void space. The amount of protective void space provided by a coral reef helps to determine the reef fish carrying capacity of the reef. Higher capacities will also support higher pelagic populations that feed on reef fish. Protective Void space is created by corals both in the interior of the coral structures, in holes and cavities of the eroded coral base rock, and areas around the reef where eddies and back currents form. During low current times, the void space expands to the largest distance a particular fish can be away from the reef and return for safe haven when its particular predators abound. (Therefore note that void space is different for different fish types and sizes). Void space shrinks during storm events and high currents. At these times the space is limited to interior cavities and close to the edges of more solid reef structures capable of creating an eddy. Rehabilitation of void space IS CRITICAL to restoring fishery resources to coral reefs and is often overlooked. It is rare to find reef associated fishes outside of a protective void space except when they are displaced, migrating for spawning, or for certain species when foraging in nearby sandy areas. When larval fish settlement to the bottom occurs, death is nearly certain for reef fish that don’t find protective void space.
Any rehabilitation effort that fails to create protective void space will have little, if any effect on fish populations.

The result of the computation will be the amount of Protective Void Space created for that species by the object studied.
Such measures can be
used to compare rehabilitation methods relative success for particular reef
species. Using a basket of indicator
species weighted by relative populations can be used to compare rehabilitation
methods success directly.
Biological Surface Area Loss
A theoretically quantifiable measure is surface area lost although it can be difficult to calculate. Even if one makes the calculations, one has to make assumptions about smoothness of an object. (If a surface is perfectly smooth, a standard CAD program can calculate the surface area…but on a real reef, surfaces are anything but smooth so depending upon what scale you define the surface the outcome changes greatly). For example, on a microscopic scale one coral might have 100 times as much surface area as on a scale with a resolution of 1 inch. Once again, this also depends upon which marine creatures you are judging for habitat purposes. It might be appropriate to judge a surface on a mm scale if looking at copepods. It is probably better to look at a 1 cm scale for coral settlement or assume a totally smooth surface for adult coral base space.
At best, this is a tool for theoretical debate but it can be quite useful for estimating the amount of impact when comparing areas as long as the resolution is kept the same for computations.
Qualitative Measures:
Loss of Reef Functions
-Fishery losses, recreational value
losses, loss of erosion control, ecological function loss, biodiversity loss,
etc.
Qualitative measure often cannot be defended precisely and are best used as tools for debate, reef managers, and experts. However, imprecise the measures may be, they do represent real issues that can over-ride quantitative recommendations. Not surprising, most rehabilitation efforts are decided upon using qualitative rather than quantitative analysis. Perhaps that will change in coming years as rehabilitation sciences continue to advance.
Expert Opinion
-Having a scientist, NOAA
assessment team, Senior Reef Ball Coral Team Member or other qualified expert
dive on the site and provide a written assessment report
-This can sometimes even be done
through underwater video or digital photograph
A true expert opinion can be quite valuable….but the opinion is only as good as the expert! If you go this route, we are sure you will select experts that you can trust. If you need a second opinion, just contact us. When choosing an expert, make sure they have local experience or else pair them with a local expert for better recommendations.
Conclusion:
Whatever methods you choose for damage assessment, it is helpful for you to document the “current” situation as thoroughly as practical so that when you make rehabilitation efforts you will be able to document your successes.
Step 4: Site Selection
Step 4a: Determining Sites for Surveying
By this point, most project organizers will have a ideal of the general area where they want the rehabilitation to occur, but many not know exactly where to do it. In this case, you must work to identify potential sites for detailed bottom surveys that can be narrowed down to a final choice. If you already know the exact location, skip to step 4B: Bottom Survey.
This is a process of elimination. The best place to start is a mariner’s chart with depths or other good maps/GIS systems. Goggle Earth (a free web based application that provides satellite images of various detail anywhere on earth) can be helpful in getting a system wide view. Add to that whatever data or studies that have been done in the area…it is useful to know currents, wave heights, tide ranges, etc. If you can, get the input of local people that spend time on or in the water…fishermen, boat captains, and scuba divers are often good resources for local information. Find out about water clarity, local pollution, traditional fishing areas, etc.
Now, go back to your marine chart and make a good Xerox copy. Next, get some highlighters and start marking up all the areas that ARE NOT suitable for your project.
Here’s a list from the US EPA on some additional areas to exclude;
Ø shipping lanes;
Ø restricted military areas;
Ø areas of poor water quality (e.g., low dissolved oxygen, dredged material disposal sites);
Ø traditional trawling grounds;
Ø unstable bottoms;
Ø areas with extreme currents, or high wave energy;
Ø existing right-of-ways (e.g., oil and gas pipelines and telecommunication cables);
Ø
sites for purposes that are incompatible with
artificial reef development
Just about any area like the above list is probably out of bounds and likely not permitable if you need permits for your work. Do not omit local artificial reef building restrictions. For example, inside locally designated marine reserves usually requires special permits.
You can usually eliminate a big swath of ocean by marking out areas too shallow for your project or too deep. Go through your project goals….add constraints that they impose. Talk with your experts…. …add constraints they suggest. Don’t forget about water quality. for example, do you know where sewer outfalls, river drainage, and other point sources of pollution or nutrients are located? Don’t forget about biology either, are there areas that have good reef now and don’t need rehabilitation? Sea grass beds to avoid?
You got the idea, and at the end of this you will have one messy map!
Now, reverse the procedure. From what is left over, where is it best to build? Do your goals or experts suggest an ideal depth?
From a substrate point of view, keep in mind that the easiest place to add substrate is an empty sandy bottom that has hard rock or firm bottom 10-20 cm below. Firm sand is okay. Hard bottom is fine if it does not contain a fouling community.
Your experts and goals will give you all sorts of good ideas such as sites where currents will carry the larval corals and fish generated by your rehabilitation efforts to places here they are needed. Go back to those goals one more time…what do they tell you about where to build? If you are doing an erosion control project they may be giving you some very tight tolerances as to where you can choose.
By the end of this process, you should have identified several areas that fit your project criteria. It will be easiest of you identify these locations by GPS coordinates (specify map datum). If you have done this then proceed to the next step.
Step 4b: Bottom Survey
At this point, you have one or more sites selected and you need to determine if the bottom is suitable for deploying a base substrate and to support corals.
This survey needs to be conducted by scuba diving…but it is possible on snorkel for shallow areas. In addition to your scuba/snorkeling gear, you will need the following equipment:
Ø Depth
gauge & Compass (even if snorkeling, but wrist mounted is
preferred for snorkelers) 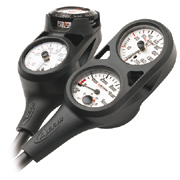
Ø 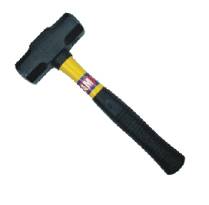 Small hand-held sledge hammer
Ø 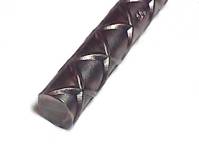 (2 or more )1 meter length of #5
rebar (5/8” or 1.59 cm) diameter iron rebar (If possible, mark the rebar
stakes so you can use it as a measuring tape)
(2 or more )1 meter length of #5
rebar (5/8” or 1.59 cm) diameter iron rebar (If possible, mark the rebar
stakes so you can use it as a measuring tape)
Ø 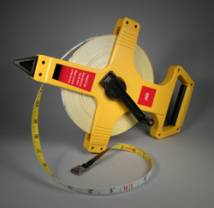 Fiberglass
tape measuring reel (50 Meters +)
Fiberglass
tape measuring reel (50 Meters +)
Ø
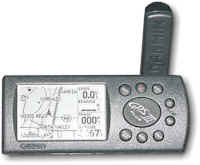 GPS (Handheld or Boat
Mounted)
GPS (Handheld or Boat
Mounted)
Ø 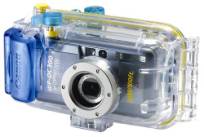 Digital Camera and Underwater
Case
Digital Camera and Underwater
Case
Ø Underwater
slate
Ø 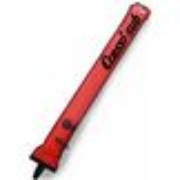
 4
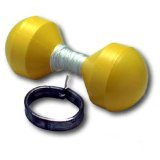
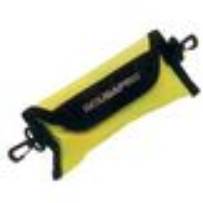
or more marking buoys (many
different types will work, even a milk jug tied to a dive weight). Whatever style you select, make SURE it is
stable enough for the wave conditions and has enough line for the depth so that
it does not move. Marking buoys made especially for divers with enclosed weight
such as the Scubapro buoy signal
4
or more marking buoys (many
different types will work, even a milk jug tied to a dive weight). Whatever style you select, make SURE it is
stable enough for the wave conditions and has enough line for the depth so that
it does not move. Marking buoys made especially for divers with enclosed weight
such as the Scubapro buoy signal
(shown below) are easiest to use.
Once you have your equipment ready, and when diving/boating conditions are good follow this procedure. Go to the site and anchor up so your boat is in the center location of the area you want to survey. When the anchor is well set, throw in a marker buoy and take a GPS reading. Dive to the bottom and start at the marker buoy (which should be the same place as your GPS reading). Look to see if the site contains enough open space to place your base structures and record the depth. If it is obvious right away that the site is not suitable, for whatever reason, abandon the dive now and go to your next site. Don’t waste the day surveying sites that you probably won’t use. If it looks good, ideally open sandy areas with hard bottom below and otherwise clear, then continue. If it is hard bottom, use the camera to record that there is no growth or fouling community on the hard bottom. If sand, take your rebar and carefully drive it into the bottom making even strokes counting them as you drive the stake. Your stroke should allow the hammer to fall under it’s own weight, guided by a little added pressure from a distance of about a foot (.3 m). Record the depth to firm bottom and the number of strokes it takes to get there. If you do not hit firm bottom, record the number of strokes to go two feet deep (.6 m). The idea is to be consistent so you get an idea of relative softness of the sandy bottom. This will help you determine when there is no hard bottom below the sand if it is firm enough to support your chosen base substrate or artificial reef.
[Note: Contact the supplier of your base substrate or
artificial reef designer to determine how firm the bottom sand must be to avoid
subsidence for your selected material if firm bottom is not found within
0-20 cm of the bottom surface. Do not
plant corals closer to the seafloor than the distance to hard bottom determined
by this survey]
Use your slate to start drawing a map with your current location being the center point. Leave this first rebar in the sea floor and lay your tape measure over the rebar. Decide roughly how big of an area you want to survey if it is less than the length of your tape. Then extend your tape out to this point heading in a compass direction of due east (or whichever point on the compass (N, S,E, or W) is more cross current to preserve your visibility) . Then, take your next sample by driving in the rebar and position & leave a marking buoy there. Mark your slate with the information and then do the remaining points (Either rebar or photographic method depending on bottom type). As you sweep around directions, use the tape measure to determine distance from the center and map any areas that are not suitable for deployment (such as on an existing coral head, or were the bottom appears too soft.). Take notes on anything you find unusual that could affect your project such as changes in depth. Take digital photos of the general area and any specific features as you go. Return to the center and retrieve your first rebar.
When you surface, remove the anchor and travel to each buoy location and take GPS readings and retrieve your buoy. Record which map datum your GPS is using, especially if you may use a different GPS for deployment day.
If you have a secchi disk, it is nice, but not required to record the water visibility. This helps when interpreting the accuracy of the findings and a low secchi distance is a sign of potential stress for corals.
At the end of the day, you will hopefully have found your site(s).
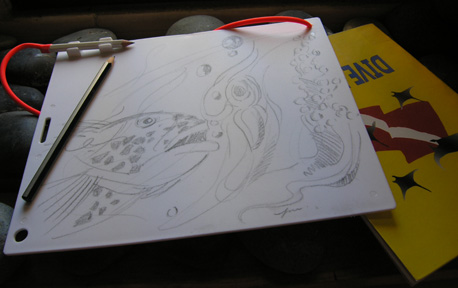
Transfer all of your data from the slate and digital camera into a computer and organize it while it is fresh in your mind. Everyone has their own methods for organization of the data. At headquarters, Reef Ball Foundation staff have found Google’s free program sketch-up to be very useful for making 3-d drawings of the actual and planned site. These can be geo-referenced to Google Earth. We have already created a large library of 3-d Models that can be imported into Sketchup for your use including scale models of all sizes of Reef Balls.
|
Helpful Tip: Many of the 3-d renderings of objects you will see in this manual were made with Sketchup and are available without charge. Go to the glossary under Coral Propagation Table for instructions to get Sketch-up and the models. Use other keywords like “Reef Ball” to find even more models |
Sometimes it takes a while to find the right place; sometimes you get lucky and find it on the first dive. Occasionally, there is no right place and if that is the case you are finished. If your selected site is within a like depth and conditions coral reef community and if you are only using broodstock from that reef, then you may skip to step 6: Base Substrate Creation, otherwise proceed to step 5: Check Water Quality.
Step 5: Check Water Quality
Now you have a site that is physically suitable, permitable and desirable from a goal stand point of view. The next thing is to make sure the water quality is suitable for your rehabilitation goals. If the water quality is not suitable you must either fix the problems affecting the water or go back to step 4 and start over with site selection.
First, look at your goals and determine what is the most environmentally sensitive species that are required to make your project successful?
Generally, most projects are looking at these broad classes
Fish
Soft Corals & Hardy Hard Corals, and non-coral reef builders (oysters, blue mussels, kelp, etc)
Sensitive Hard Corals
Specific Species (such as lobster, oysters, etc.)
Fish Only Projects
If your project is fish enhancement only, then water quality parameters may be very different than if you are planning on trying to do a coral reef rehabilitation effort with planted hard corals.
For fish, make sure dissolved oxygen (DO) levels can support fish and don’t go anoxic (without oxygen) very much if at all. Use Dissolved Oxygen (DO) Test Kit and see the glossary for information on its use. Salinity is important for many fish species and this can be measured with a hygrometer (specific gravity meter) or refractometer and again, see glossary for details. Temperature ranges and depth are also important. It will take your local experts to guild you for the particular requirements of individual fish species. Finally you want to make sure the area is not toxic to fish, and there are a variety of tests for specific pathogens (such as red tide) and contaminates, such as heavy metals.
However, the most important factor for fish is essential void protective space (EVPS). This is a combination of the size and complexity of the artificial reef chosen and its layout on the sea floor. Contact the artificial reef manufacturer or local fishery scientists for information on how to choose the right sizes, layout and styles of artificial reefs for fishery only purposes.
In general, if there are fish there now, more fish will be there once you add protective void space (via your base materials). Fish only projects do not need to have coral planting components and if any corals do grow on them it is recommended that this occurs via natural settlement so that project funding can focus on EVPS creation. These projects are better-termed artificial reef projects rather than coral reef rehabilitation projects. You can even consider material choices that we indicate are not suitable for reef rehabilitation in the next step. And if for some reason you don’t want any reef augmentation but do want to create EVPS for fish, FADS (Fish Attracting Devices) are designed just to do this. So is fish bait, enough said. If you REALLY only want fish, you can skip to step 6.
Soft Corals & Hardy Hard Corals, and non-coral reef builders (oysters, blue mussels, kelp, etc)
Okay if you have not skiped to step 6 year, we will assume you want fish, but you also want at least some degree of reef rehabilitation. Maybe not coral reef rehabilitation but at least reef rehabilitation. One must still take into account fish water quality parameters as in the prior section. Additionally, one also has to account for the water quality requirements of soft and hardy corals and/or other desirable reef building marine creatures (such as oysters, kelp, blue mussels etc.) one hopes will inhabit the chosen substrate to create a reef ecosystem.
This would be a common goal in non-tropical or subtropical areas and in tropical areas with high sedimentation, variable salinities, low visibility, deep water or other conditions that prevent reef building hard coral growth on firm substrates.
One would likely be concerned with this goal when you desire a more natural reef than with just a fish only orientation. Perhaps divers will visit the reef or perhaps the reef is being build for habitat rehabilitation purposes. Perhaps, even, you have a fish only project orientation, but realize that there might not be any extra cost to make the project more suitable for other benthic marine life. It is not too far of a scientific stretch to understand that when there is better marine life growth on an object providing fish with EPVS, that the habitat for fisheries will be strengthened.
Most likely, you can accomplish your goals by selecting materials that will encourage the growth of these organisms and you will not need to go to the time or effort to plant them. This is because soft corals, oysters, mussels, kelps and most other reef creating creatures adapted to these water quality parameters are fairly rapid growers. They tend to be this way because growth is often seasonal or conditions change rapidly and first colonizers have competitive advantages. For this type of rehabilitation, check with your module manufacturer or local scientists to determine what module features will help you achieve these goals. Things to consider are material longevity, complexity, available surface area, stability, cost, surface textures, ability to create EPVS and suitability to your project goals.
Water quality wise, you are going to need to look at some very species specific requirements. Oysters and Kelp have very site specific requirements. Many Soft and hardy corals need good quality water but can tolerate temperature changes and some turbidity better than there tropical reef cousins. Again, talk with your module manufacturers or scientific specialists for the reef building species in your area’s specific requirements.
If you are content with natural settlement and development on your modules skip to step 6: Base Reef Creation. If you still want to plant soft corals, hardy corals, or other marine life then continue to the next section and treat the chosen marine species in the same manner as hard coral species just know they will have a different set of tolerance limits.
Sensitive Hard Corals (Tropical Coral Reefs)
If you are reading this section, then your goals are more ambitious and include colony restabilization or coral propagation and planting to create a coral reef ecosystem. Water quality will indeed be a very important variable. But first, recall step 2. If you are rehabilitating a reef in its original location and only using brood stock from that location you may skip to step 6: Base Reef Creation. However, this section might provide you with some insight for later creating a coral planting strategy so it is probably worth a quick read on your way to step 6 keeping that in mind.
Take a quick review and make sure the project goals included selecting a site with the best possible water quality. Did that? Okay! If not review your site selection one more time and change it if you can to better water quality conditions.
You have your site, now the next step is to determine which corals you will be able to work with and plant with success. Corals cannot be planted in every desired location. Common sense will dictate that water quality, lighting conditions, and all other requirements of a coral species must be present before one can restabilize or propagate and plant that coral species with success. Often, if you can’t find a coral species on hard substrates in an area, you may not be able to plant that species with success. However, there are soft bottom areas where coral species may not be present but could be if hard bottom was supplied.
Start by assuming that any coral that you can find within 30 miles of your site has the possibility of being planted or stabilized on you sight.
Then narrow down the list using the following variables:
Water Depth/ Lighting Level Range
Water Temperature Range
Saliently Range
Current/ Wave Climate Preferences
Biological Tide Line
Sedimentation Tolerance
Corals that are not Worth the Propagation Effort
Corals that are not Cost Effective to Propagate or stabilize
Corals that cannot be Propagated or stabilized
Water Depth/ Lighting Level Range
The first variable, water depth range, was already recorded in your survey. By looking at the natural reefs in these depth ranges, you will get an idea of which coral species you might be able to propagate and plant. Lighting ranges are critical for corals and are mostly determined by depth but affected by water turbidity. In optimal light corals can thrive, in sub optimal light they can survive, below that range they slowly whither away and die. Conversely, if too much light (or too quickly a change from darker to lighter conditions happen) they will sunburn which can also be fatal. Lighting on the reef is made up of two primary components; depth and visibility. Treat corals just like you would a plant…learn what lighting levels are correct for the individual coral or “plant” and make sure it is in those conditions. You would not put a house plant in the full sun nor try to grow tomatoes in dim lighting. Show the same consideration with corals. If your team has a good expert on corals, they can probably give you good advise about what lighting levels are appropriate for individual species. Knowing the depth range of a species locally can give you good clues as well. If you really want to be sure, you can buy a light meter that measures lux, lumen or candlepower and have an underwater case built for it. There are several underwater light meters for underwater photographers that can be adapted for this purpose. Just take a reading from were you are sourcing your broodstock and when you plant place the fragment or stabilize the colony in closely matched lighting levels. (Take all readings at the same time of day in clear skies or make appropriate adjustments).
Water Temperature Range
Water temperature range is critical. If you have an open water site with similar depths the range is probably similar to other open water sites at the same depth but this is not always true. Upwellings, oceanic currents, and other factors can affect a particular site’s temperature range. There are a host of services that can help you determine the Sea Surface Temperature (SST) range but it is much harder to find ranges at depth were your corals will be planted.
However, if you are close to shore or in a lagoon or bay that is subject to hotter temperatures it will limit you to corals that survive in those conditions.
Salinity range
If you are in the open ocean, you won’t need to worry about salinity either, but if you are near the discharge of a river chances are there will be less corals you can work with. The extent and suddenness of salinity changes determines this. We have even seen this as a local effect, off the coast of the Riviera Maya in Mexico there are numerous cenotes (or underground springs) and many coral species cannot be placed within the influence range of these springs. You must be careful in these situations because the influenced area may grow exponentially during the wet season…same is true for rivers.
Current/ Wave Climate preferences
Biological Tide Line
Sedimentation Tolerance
Corals that are not worth the propagation effort
Corals that are not cost effective to propagate
Corals that cannot be propagated
Now, review your planting goals (or natural recruitment goals) and your selected site location….can your goals be met with the chosen location and are
Step 6: Base Substrate Creation (Artificial Reef)
Step 6a: Determine which artificial reef type or substrate type for planting coral fragments
Substrate
Requirements
Our coral propagation and planting system requires coral adapter plug receptacles on fresh clean substrate. Typically, this means recently deployed artificial reef modules, limestone boulders, or sterilized hard bottom with either precast coral adapter plug receptors or underwater drilled holes.
This is necessary to be efficient, to provide a clean (non-competitive) substrate for long term coral basing, and to avoid mature fouling communities with abundant coral predators.
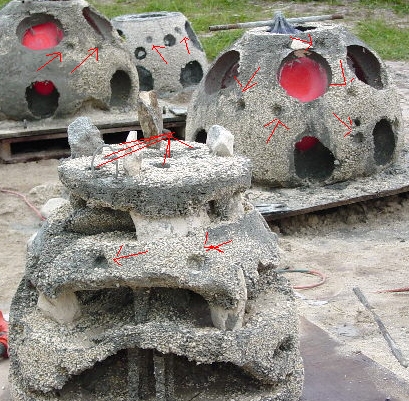
(Different
styles of modular reef bases all with coral adapter
receptor plugs built-in highlighted
by red arrows)
In general, you have between 30-90 days maximum, depending upon season, after you deploy a new reef to have finished all coral planting activity. The same is true for recently exposed sterilized hard bottom. Experiments with planting corals after that time indicate that the fouling community competes too heavily for the basing space and that there are increases in coral predation from members of the fouling community. It is always best to plant corals immediately following deployment activities.
We recommend Reef Balls as a choice of module but it is possible to use other designs provided they are stable (will not move during storms), able to have coral adapter plugs incorporated, designed without iron rebar, and made from materials that will last at least 50 years (more is better…Reef Balls are designed to last over 500 years). PH neutralized concrete and a roughened surface texture, (patented features of Reef Balls) are NOT necessary to support propagated corals but without them, there will be less natural coral settlement in areas not planted with corals.
The following modules/artificial types meet the requirements for this method provided coral adapter plug receptors are present. There may be others designs we have not reviewed and we will be happy to review any design you might be interested in using to determine if it is suitable for this rehabilitation method.
Ø Reef Balls (all sizes, all styles when deployed as recommended)
Ø 
Ø
DERM Modules (not for sand only substrates)
Ø
 Natural
Limestone Boulders (when drilled to create coral adapters and deployed in
stable configurations with a minimum weight of 3 tons).
Natural
Limestone Boulders (when drilled to create coral adapters and deployed in
stable configurations with a minimum weight of 3 tons).
Ø Poured
Concrete Seawalls or Pilings (when placed BELOW the coral
biological tide line and when adapter plug holes can be added during
construction).
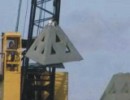
Ø Solid
Concrete Tetrahedrons (when deployed in stable configurations) 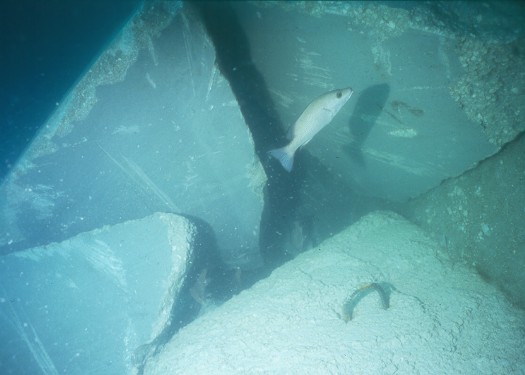
Ø Geometrical
Designed Precast Modules (there are a large variety of geometrical modules,
hollow squares, boxes, octagon shaped Reef Ball mimics, pyramids, etc. In general, they can be used if stable and
the design does not require iron rebar).
Ø 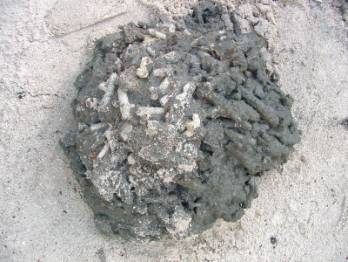 Reef Forms. (Simple concrete
blobs cast in various shapes in carved moist sand molds and affixed with coral
adapter plugs. Must be heavy enough for stability and deployed where they will
not subside. Inexpensive to make and deploy but does not provide much EPVS,
similar to that of sterilized hard bottoms.
Note: Reef Forms were developed by Reef Ball Foundation for leftover
concrete waste use when casting Reef Balls).
Reef Forms. (Simple concrete
blobs cast in various shapes in carved moist sand molds and affixed with coral
adapter plugs. Must be heavy enough for stability and deployed where they will
not subside. Inexpensive to make and deploy but does not provide much EPVS,
similar to that of sterilized hard bottoms.
Note: Reef Forms were developed by Reef Ball Foundation for leftover
concrete waste use when casting Reef Balls).
Ø Sterilized Hard Bottom (for example, hard rock exposed after large ship grounding)…. possible with drilled adapter plug holes. Site must be free anti-fouling paint and firm enough for long term coral attachment. Note EPVS development will be VERY slow.
The following modules/artificial reef types do NOT currently meet the requirements for coral propagation and planting with techniques in this manual but may be suitable for fish only projects or with other coral rehabilitation methods.
Ø Biorock
Reefs [accretion technology] (Biorocks
are not directly compatible with coral adapter plugs. However, Biorocks can be
used to create coral nurseries and as a coral fragment generator for second
generation brood stock. Dr. Thomas
Goreau indicated that it would be possible to put a metal cage inside a Reef
Balls or other concrete modules at the time of casting to combine the systems
but this has not yet been tried). 
Ø  Eco-reefs (No adapter plug holes, but
Michael Moore of Eco-reefs indicated that with a large enough order it might be
possible to incorporate coral adapter plugs into the ceramic molds. Eco-reefs are designed to break down over
time so they would be compatible with selected basing corals but not non-basing
corals)
Eco-reefs (No adapter plug holes, but
Michael Moore of Eco-reefs indicated that with a large enough order it might be
possible to incorporate coral adapter plugs into the ceramic molds. Eco-reefs are designed to break down over
time so they would be compatible with selected basing corals but not non-basing
corals)
Ø 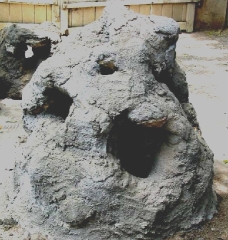 ARI
Fish Haven modules (iron rebar, prone to collapse, concrete walls too
thin…designed for fish only projects)
ARI
Fish Haven modules (iron rebar, prone to collapse, concrete walls too
thin…designed for fish only projects)
Ø Fish Houses and other hand made modules (usually based on steel or chicken wire for support, often lack stability analysis…some monolithically poured hand made modules might be suitable).
Ø “Florida
Special Pyramid Reefs”, “Grouper Gettos”,
and similar reefs designed for fish attraction (designs often use steel,
tires or materials of opportunity, designed specifically for fish only
projects, not corals or fouling communities)
Ø 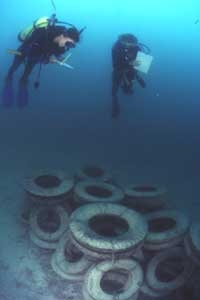 Modules with tires (lightweight
makes stability uncertain, rubber is not a suitable surface for coral basing
because it is flexible. Designed for fish only projects. STRONGLY discouraged due to environmental
damage potential)
Modules with tires (lightweight
makes stability uncertain, rubber is not a suitable surface for coral basing
because it is flexible. Designed for fish only projects. STRONGLY discouraged due to environmental
damage potential)
Ø Natural Live Bottom (not suitable due to coral predation and displacement of existing animals…see Sterilized Hard Bottom above for alternative) Acceptable (and preferable) for restabilization in original location of a displaced adult coral colony.
Obviously, we believe that Reef Balls are one of the best choices for use as base substrate for coral reefs for grassroots organizations because they are designed specifically for that purpose, but we don’t want this manual to sound like a “sales” pitch, So, If you want to learn more about Reef Balls, go to our website listed on the cover of this report. Most other reef manufacturers have websites too to investigate their products. If you need to understand how easy (or difficult) making Reef Balls will be we have included an abbreviated construction-training manual. Even If you decide to use other substrates, we are sure you will find many of the suggestions in the construction-training manual are useful. There is also an appendix with our concrete mix design for coral friendly concrete that you may find useful for any base substrate creation project.
Whatever base substrate you choose, do your research and choose wisely. When you are going to plant corals, you are going to be putting an animal that is attached and that can live as a colony for thousands of years. Once you choose your substrate/artificial reef(s) proceed to step 6B: Number and Sizes
Step 6b: Base Modules: Number, Sizes and Layout
[From now on in the guide we will refer to the base material/artificial reef as modules…if you are using a non-modular material you will have to adjust your thinking just a bit but the concepts are the same]
Now you need to determine how many modules and of what sizes you will need. There are a number of ways to do this, based on the way in which you did your damage assessment and the size of your selected site(s).
The basic rule of thumb above all else is to do your best to mimic the nearby natural reefs that are providing the functions you are trying to rehabilitate. So if you are mimicking a widely scattered patch reef with small coral heads, do the same with similar sized modules over your selected area. Remember, if you are planting corals, you have to take into account the growth rates and expected sizes of the adult colonies in your thought processes.
Concentrate, at first, more on the appropriate density and sizes for your goals…not on the total number of modules. This is because in most projects, the total number of modules is more likely to be determined by your budget or size of your permitted sites than by rehabilitation goals. In most projects, you will typically want more modules than you can afford or have space for…. reefs are valuable assets and for the most part oceanic ecosystems benefit from more rather than less reef. Perhaps this is because we have destroyed so many of our natural reefs? Perhaps it is because reefs are the most diverse ecosystems on earth.
Several measures can be used to calculate appropriate density and sized either in terms of average number of coral heads per a specific reef footprint sorted by coral head size or more sophisticated EPVS measurement analysis. Expert opinion is also appropriate, and you may be impressed by the accuracy of local reef users in understanding the requirements needed to restore specific reef functions.
EPVS analysis can give you an idea for an optimal layout of reefs too. But this tends to be rather species specific so it is only appropriate when your goals are rather species focused. Basket EPVS analysis can be a useful tool but just mimicking mother nature will probably help you achieve your goals equally well without so much brain work.
Step 6c: Construction of Modules
Construction methods vary according to which module types chosen and your project goals. However, a few things are required in all cases to make the coral planting process efficient. All modules will require receptor plugs. These are basically holes in the material that you will be inserting corals or coral plugs. Most corals can be planted with a standard coral plug which is the size of a medicine cup with the bottom chopped off. Some corals can be direct planted without a plug in holes the size of a pencil, particularly Gorgonians. Some corals require very special adapter plugs such as drilled brain coral plugs. The size of your drilling equipment determines the hole size needed. For example, refer to the picture below of Montastrea cavernosa made with a 4-inch core drill.
The point is, you need to know what you are going to be planting to know how to construct your modules to make underwater work most efficient.
For specific construction guidelines, consult your module manufacturer. For Reef Balls, check out the appendix or contact us.
Step 6d: Deployment and Anchoring
Step 7: Coral Rescue
When corals are been damaged by physical factors or are about to be destroyed they can be rescued.
There are 2 basic rescue types…
1) Restabilization or movement and restabilization of adult colonies or
2) Rescue and replanting of fragmented portions of each colony to be re-grown into a genetically identical adult colony.
The types of corals impacted may be your best guide as to which method or methods is/are best for your project. If the impacted corals are high value, difficult species to fragment, or very slow growing, then restabilizing may be the best option. If the impacted corals are medium to fast growing, easily fragmentable, or very large volumes, then propagation and replanting is likely best. In many cases, you will face both types and may need to use a combination of methods to achieve the best result.
Unfortunately, Restabilization is often a difficult, costly and time-consuming activity unless the project is very small scale. Results from these projects can also be disappointing because many colonies will not survive the restabization process…especially if they must be relocated. Yet there are instances were very simple restablization techniques can be highly effective. For example, after a hurricane, up righting brain corals can save thousands of colonies with very little effort. Free living (not attached) corals (such as rose corals or many pencil corals) can be easily removed from areas where damage is expected (for example before dredging channels). The Reef Ball Foundation has not developed any “magic bullets” for restabilization and there is much published information on various methods including the most commonly used method, hydrostatic cement reattachment. Our Coral Teams are trained in this method, but The Coral Team does not use it very often because it is typically impractical. One of the main disadvantages to restabilization is that it ignores much of the biodiversity that makes up a reef…in fact; if one only restores corals much of a reef function can be lost. Often, you must rebuild the base of the reef before the addition of corals to create a truly dynamic reef habitat….unless you are willing to wait decades or centuries for results.
This manual was written to focus on the second rescue method. The balance of this manual with therefore focus on coral propagation and planting techniques on prefabricated artificial reefs as a grassroots method for coral reef rehabilitation. This combination provides immediate habitat to compensate for adult coral colony complexity losses…and works to preserve a wide range of coral colony genetics to allow for long-term recovery. Using this method, even partially failed planting attempts will still eventually return to natural coral reef status via natural recruitment. Something that restabilization alone cannot guarantee.
With coral propagation, one can also create new reefs. It takes a very small volume of imperiled corals to create a new reef. It would be very rare to find any coral reef that did not have enough imperiled corals to create a new reef. Even seemingly minor impacts, such as small anchor drops, create enough imperiled corals to start a project. Even in pristine reefs, storms usually provide enough imperiled corals through natural processes. If you are building a totally new reef, what may be lacking are imperiled corals of specific desirable species.
To overcome this, there are safe methods, used by reef rehabilitation professionals, to take a cutting from a healthy adult colony to be propagated to establish that species in a new location. We don’t allow that on the Reef Ball Coral Team unless 1) The Team has a coral propagation expert or scientist trained in this procedure, 2) There are no alternatives to obtain the desired species from imperiled stock, 3) There is a monitoring plan to check that no damage was made to the original coral colony, and 4) local governmental approval for this procedure has been obtained.
If you want to be even more conservative, just propagate a few of the desired species then as these colonies grow use cuttings from them to make more. A disadvantage to this approach is that it limits the genetic variability of your colonies, so if you use this approach start with the best available genetic stock,
Step 8: Gathering Imperiled Corals, Fragmenting, Propagation and Planting
Coral Propagation Ethics
|
Before we can launch into the steps for coral fragmentation and propagation, one must first learn the ethics involved in this work. As medical doctors take an oath to “First, do no harm” these ethics are in place to ensure that enthusiastic grassroots efforts don’t harm the very ecosystems they so eagerly work to help. These ethics may seem too stringent, particularly for people who have worked in coral propagation In scientific research where ethics are rightly waived in the name of research as these projects are typically small and don’t have sizable impacts. Reef Ball Foundation projects can be quite large, planting tens of thousands of corals and therefore any mistakes can have potentially large consequences. Whatever your perspective, please understand that these ethics are designed to guide success and not to limit efforts. |
Reef Ball Foundation Ethics
These ethics apply to all Reef Ball Foundation PROPAGATION projects and are principles that we suggest should only be circumvented by scientific researchers or with very specific conditions.
1) In general, the only source for coral fragments that
should be used is an imperiled coral.
The definition of an imperiled coral is:
That it can be reasonably assumed that without assistance, the source coral
colony (or section of the colony used) will die within one year.
Examples include:
a) Loose or broken coral fragments or colonies OF BASING CORALS from storms,
groundings, anchor drops, etc. that have landed on non-firm bottom types where
it is expected that they cannot stabilize themselves to prevent sinking into
the soft substrate or constant overturning and dying.
b) Loose or broken coral fragments or colonies OF NON-BASING CORALS from
storms, groundings, anchor drops, etc. that are not large enough to be
naturally stable or are oriented incorrectly.
c) Loose or broken coral fragments or colonies from storms, groundings, anchor
drops, etc. of specific species that cannot reattach themselves naturally even
though they are capable of basing. For example, sea fans.
d) Corals that will be directly killed by dredging, marine construction, dock or pier building, or other human activities with the next year. (Note: be SURE the activity will actually take place and is not just in the planning phases)
Exceptions to this ethic include second or higher generation fragments
grown in open water nurseries or on Reef Balls from originally obtained imperiled
coral sources. (Note: aquarium kept
corals are NOT eligible for wild planting due to possible exchanges in zooxanthellae
and exposure to diseases). As mentioned
in the prior step, We do allow non-damaging clipping from non-imperiled healthy
corals only if the Reef Ball Coral Team meets the following conditions 1) The
Team has a coral propagation expert or scientist trained in this procedure, 2)
There are no alternatives to obtain the desired species from imperiled stock,
3) There is a monitoring plan to check that no damage was made to the original
coral colony, and 4) local governmental approval for this procedure has been
specifically obtained in writing.
2) Never work with or handle overly stressed, bleached or
diseased corals
3) Never work with corals when the NOAA Coral Reef Watch Satellite Coral
Bleaching Hotspot index is 3.5 or higher.
See http://coralreefwatch.noaa.gov/satellite/ge/
to get a current map linked to Google Earth.
Additionally, work should be suspended on days when dissolved oxygen levels are
less than 4.5 mg/l or if you do not have measuring equipment when water
temperatures exceed 30C (86 degrees Fahrenheit). (Note: Oxygen Redox Potential
or ORP levels can also be measured to insure the corals are not stressed
before or during propagation and planting procedures. An ORP reading with a minimum of 375 is required)
4) Never plant corals more than 30 miles (50 KM) from their original source. This is guided by the principle that a coral should not be planted at a distance where it could not have covered in its larval free-swimming stages. In the case where science indicates a broader or narrower range for a particular species the scientific range for that species could be used.
5) Never allow different hard coral species to touch each other, and avoid them sharing the same water in captivity (such as transportation cooler). This is to avoid “chemical warfare” that occurs between some types of corals.
6) Hands must be washed between handling of different coral species. Gloves are not recommended but may be required with some species (i.e. Fire coral or millapora) and in that case latex gloves that can be sterilized by washing or disposable are needed.
7) Coral fragment plugs must be planted to the chosen substrate before a significant fouling community develops. In some environments this can occur as quickly as 30 days…in cooler temperatures or in deeper water this may be longer. For planting, several conditions must be met:
a) Coral Adapter Hole must be clean enough so that
epoxy putty makes a good bond. (Where planting is delayed significantly after
deployment this can be accomplished by abrasive cleaning with a Battery
Cleaning Brush
or
Plug Hole Wire Brush).
b) Area adjacent to coral plug must be clean enough that the coral can
freely base over the Reef Ball without significant biological
competition from the fouling community.
(In some cases where planting is delayed, this can be accomplished by
abrasive cleaning with a wire Hand Brush).
c) The general fouling community needs to be in an early enough stage so
that it does not support significant coral predators (this varies by
location). Cleaning alone will not
likely be enough to ensure fragment success once the fouling community has
reached this stage. This is more likely
to be the case the closer to a natural coral reef the rehabilitation site is
placed due to increased coral predator loading from the natural
reef.
Note: Only a CORAL Team Leader or Co-Leader is qualified to make the decision to proceed with any cleaning activities. Therefore, it is recommended to plant corals on substrate within 30 days of deployment and ideally within days of deployment.
Skill based ethics
With the Reef Ball Coral Team approach, volunteers and non-professionals are asked only to perform within their skill limits.
These limits are two-fold coming in the form of a formal certification levels but also on individual projects as guided individually by Coral Team Leaders and Co-Leaders who are recognized as professional reef rehabilitation specialists. The Coral Team has five levels of certification levels in five different specialty tracks. Therefore, an individual can earn up to five different certificates.
The first 3 levels are automatically determined by a person’s participation on a Reef Ball Coral Team. In order to obtain Level IV, the individual must pass a written test as administered by any qualified Level V team member in that specialty field and must have demonstrated their skills to the satisfaction of the Level V Team leader.
Level V certification is bestowed by The Chairman and Executive Director of the Reef Ball Foundation and must be certified by the Reef Ball Board of Directors within one year of being bestowed.
Level V certifications do not expire but may be downgraded in the same manner they were bestowed. Level IV must be renewed every 2 years. Renewal can be in the form of a written test and does not have to be during project participation. Level III and below certifications do not expire.
Formal Definitions of Coral Team Certification Levels
 Level V: (Coral Propagation &
Planting) Is adequately knowledgeable about coral species and handling
techniques to function as a team leader or co/leader
Level V: (Coral Propagation &
Planting) Is adequately knowledgeable about coral species and handling
techniques to function as a team leader or co/leader
Level V (Mangrove): Is adequately knowledgeable about red mangrove plantings to function is a team leader or co/leader of a red mangrove planting project.
Level V (Monitoring): Is adequately knowledgeable about monitoring projects to function is a team leader or co/leader of a monitoring project.
Level V (Coral Rescue): Is adequately knowledgeable about adult colony coral rescue projects to function is a team leader or co/leader of an adult colony coral rescue project.
Level V (Artificial Reef Specialist): Is adequately knowledgeable about Reef Ball construction and deployment to function as a team leader or co/leader of a Reef Ball construction and deployment project.
Level IV: (Coral Propagation & Planting): Understands and can demonstrate skills in a Reef Ball Foundation Coral Propagation & Planting project. Can be a Coral Team Co-Leader if the other leader is level V.
Level IV: (Red Mangrove): Understands and can demonstrate skills in a Reef Ball Foundation Red Mangrove project. Can be a Coral Team Co-Leader if the other leader is level V.
Level IV: (Monitoring) Understands and can demonstrate skills in a Reef Ball Foundation monitoring project. Can be a Coral Team Co-Leader if the other leader is level V.
Level IV: (Coral Rescue): Understands and can demonstrate skills in a Reef Ball Foundation Coral Rescue project. Can be a Coral Team Co-Leader if the other leader is level V.
Level IV: (Artificial Reef Specialist): Understands and can demonstrate skills in a Reef Ball Foundation Artificial Reef project. Can be a Coral Team Co-Leader if the other leader is level V.
Level III: (Coral Propagation & Planting): Has participated in multiple Reef Ball Foundation Coral Propagation & Planting projects
Level III: (Red Mangrove): Has participated in multiple Reef Ball Foundation Red Mangrove projects
Level III: (Monitoring) Has participated in multiple Reef Ball Foundation monitoring projects
Level III: (Coral Rescue): Has participated in multiple Reef Ball Foundation Coral Rescue projects
Level III: (Artificial Reef Specialist): Has participated in multiple Reef Ball Foundation Artificial Reef projects
Level II: (Coral Propagation & Planting): Has participated in a Reef Ball Foundation Coral Propagation & Planting project
Level II: (Red Mangrove): Has participated in a Reef Ball Foundation Red Mangrove project
Level II: (Monitoring) Has participated in a Reef Ball Foundation monitoring project
Level II: (Coral Rescue): Has participated in a Reef Ball Foundation Coral Rescue project
Level II: (Artificial Reef Specialist): Has participated in a Reef Ball Foundation Artificial Reef project
Level I: (Coral Propagation & Planting) Has been demonstrated, trained or partially participated in a Reef Ball Foundation Coral Propagation & Planting project
Level I: (Red Mangrove) Has been demonstrated, trained or partially participated in a Reef Ball Foundation Red Mangrove project
Level I: (Monitoring) Has been demonstrated, trained or partially participated in a Reef Ball Foundation monitoring project
Level I: (Coral Rescue): Has been demonstrated, trained or partially participated in a Reef Ball Foundation Coral Rescue project
Level I: (Artificial Reef Specialist): Has been demonstrated, trained or partially participated in a Reef Ball Foundation Artificial Reef project
Bad Practices
Follow are a list of common mistakes or bad practices not listed in any order of importance.
Finger corals should be planted sideways, not upright to create a better base
Corals should not be subjected to rapid changes in temperature, salinity or lighting levels at any time.
Exposing corals to sunlight without shade when out of the water can cause “sunburn”
Do not touch corals without first fanning them to make sure polyps are fully retracted
Do not use fresh water to mix RBF Antiseptic dip. RBF Antiseptic dip must be diluted in fresh seawater, Additionally it must be kept at the same temperature as the sea, and may need to be buffered to the same pH as seawater if maintained longer than 2 hours. Salinity must also be similar to seawater, this will not be a problem if mixed with seawater at the rate of 1 teaspoon per 8 ounces of seawater..
Do not use too much water in plug cement (or the plugs will be too weak to function) (Use additional Adva Flow if needed to make concrete flow)
Do not make plugs without sufficiently thin / liquid concrete to form a level surface. (Otherwise, the coral is not sealed and infection or dislodging from plug can occur).
Do not gather more coral fragments than you can propagate and plant the same day.
Avoid plug nurseries except for the 24-48 hour Acropora RTN elimination nursery. Instead, direct planting after plugging is preferred.
Selecting and transporting imperiled corals
Fragmenting the Corals
Coral Propagation Table Operations
Step 9: Coral Planting
To be written
Step 10: Monitoring
A PVC camera guide marked with metric and English scales. Used to position the camera over coral plugs to take standardized monitoring photos. Advanced users will add movable “luggage tags” with numbers or letters to encode variables such as artificial reef module identifier, date, or coral colony identifier. Length of rod varies by camera used. Length should be adjusted with camera in wide-angle (non-zoomed) position. When taking monitoring photos make sure camera is in the same position. Most monitors prefer a frame that is neutral or slightly negatively buoyant. Gravel can be put inside the frame for this purpose. Frame should have small holes drilled into it for water to flow in and out.
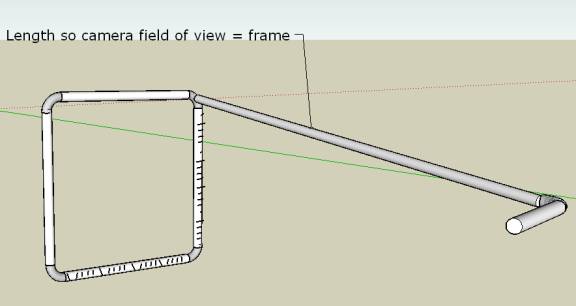
Glossary of Reef Ball Coral Team Terms
Acropora: A family of fast growing hard corals that require the highest level of quality standards to be successfully planted. Includes threatened Elkhorn and Staghorn corals in the Caribbean. The Pacific contains a wide variety including the spectacular tabletop corals. They are one of the most desirable corals for propagation and planting due to high growth characteristics but also one of the most sensitive to poor water quality.
Adva Flow: A high range water reducer and plastisizer added to cement to make it more liquid without degrading the concrete strength. (Too much water makes concrete very weak). This admixture is required in the RBF plug cement so that the concrete forms a perfect seal around the coral fragment to prevent bottom to top infections and dislodging of the fragment.
Antibacterial Soap: RBF Coral Team members must wash their hands between each unique coral colony they touch with an antibacterial soap. However, not all sites have fresh water facilities to get a clean rinse so team members often use surgery rated products that offer a clean rinse. An example is LAGASSE, INC.’s “Antibacterial Lotion Soap” Contains 0.3% Chloroxylenol (PCMX), a broad-spectrum degerming agent and offers gentle cleansing with a clean rinse.
Alcohol-based or waterless hand cleaners can also be used,
but they don’t work well to remove some coral slimes…particularly oily type
slimes. Generally they can be used between
handling different colonies of the same species but it is best to use a soap
based product when changing species types.
Base or Basing:
Certain corals (referred to as “basing corals”) have special survival mode when injured or dislodged from the substrate. This mode directs all energy of the colony to downward growth and re-attachment to the reef substrate. This means the coral will abandon upward growth and will actually remove calcium from its skeleton to redeposit it at the base to re-attach itself. In time lapse, a fragment will appear to melt into the substrate losing height by gaining a foothold. The process takes place very quickly…usually within 6 weeks, and then the coral will go into a brief rest mode before resuming upward growth. It is EXTREMELY important to encourage this process when planting fragments. If a good foothold is not developed, when the colony grows in height, the first major storm will cause it to break off of the substrate.
Encouragement of basing is accomplished in several ways. When planted into the fast setting plug cement, the cement will injury the colony at the base that will stimulate base formation.
Additionally, providing fresh artificial substrate without a competing fouling community further promotes basing. When placing a basing type coral into the plug mold, it is important that the fragment is placed SIDEWAYS, not upright as one would intuitively think. This helps to provide a larger contact area for basing and helps to signal the colony that it has been dislodged and needs to go into basing survival mode. This is one of the biggest errors we have seen in coral planting projects because 1) Basing is not an issue in marine aquariums because colonies are not grown large enough or exposed to storm wave conditions. 2) Field work is often not monitored long enough to reveal this issue. (It took over 4 years of monitoring in Curacao before we could see the results of improper basing).
A final important point to make is that a good base allows a colony to develop its own attachment to the artificial reef substrate provided. This means the colony does not have to rely on the coral epoxy putty to hold it. Note: when working with non-basing corals, the planters must make sure to have a very firm attachment with the epoxy because there will not be additional attachment by the coral.
 Battery Cleaning Brush or Plug Hole Wire
Brush: A small wire brush used to clean the inside of a coral adapter plug hole
if the artificial reef module has been deployed more than a few days before
planting a plug.
Battery Cleaning Brush or Plug Hole Wire
Brush: A small wire brush used to clean the inside of a coral adapter plug hole
if the artificial reef module has been deployed more than a few days before
planting a plug.
Biological Bottleneck: Many ecosystems cannot reach their full biological carrying capacity because there are resource bottlenecks. This is when any one resource limits other resources. In a garden, one could think of bottlenecks such as having enough sun, water or fertilizer. If you did not have enough water, no amount of sun or water would allow the plants to thrive. In reef systems, this can be more complex. A shortage of juvenile fish habitat may limit the number of adult reef fish. A lack of a band of reef in a certain depth classes, commonly shallow water after hurricanes, can impact the life cycles of many marine creatures. Linkages (or lack thereof) to sea grass beds and mangrove estuaries can also create resource limitations. This is a complex subject, best left to scientists, but it is important to understand that rehabilitation efforts can be focused to aid in bottleneck elimination that can greatly magnify the positive resource effects of a project.
Bolt Cutters: Bolt cutters are used to fragment thick corals such
as Elkhorn, pillar corals and for extracting propagation “tears” from brain
corals.
Bone Breaker: A tool used by surgeons to cut bone during surgery that is used in the fragging process. It is particularly well adapted to the thicker trunks of finger corals.
Broodstock: In aquaculture, the broodstock is a group of sexually mature individuals of a cultured species that is kept separate for breeding purposes. However, for the Coral Team we define it more loosely to mean both the imperiled corals that we intend on rescuing and the cache of imperiled corals in the fragmentation nursery waiting for processing into fragments that will later be plugged then planted.
Copepods:  Tiny marine crustaceans, usually
with a single eye, that are important to the marine food chain that are
ubiquitous to all of the sea.
Tiny marine crustaceans, usually
with a single eye, that are important to the marine food chain that are
ubiquitous to all of the sea.
RBF Coral Antiseptic Dip: To reduce rapid tissue necrosis and other bacterial infections that can occur due to the fragging wound, hard corals are dipped in an antiseptic solution just before plugging. The RBF version is a veterinary strength betadine or Lugol's solution. It is possible to use over the counter strengths but the amount needed will change the salinity of the dip and this must be adjusted with artificial sea salt (available at any marine aquarium store). Doing so will require a hydrometer (specific gravity meter) or refractometer. Do not use fresh water to mix RBF Antiseptic dip. RBF Antiseptic dip must be diluted in fresh seawater, Additionally it must be kept at the same temperature as the sea, and may need to be buffered to the same pH as the natural seawater if maintained longer than 2 hours. Salinity must also be similar to seawater, but this will not be a problem if mixed with seawater at the rate of 1 teaspoon per 8 ounces of seawater that is the normal dosing rate for an average growth rate coral. Very slow growing hard corals are dosed at a lower rate, Acropora and other fast growing corals may need a slightly higher dosage rate. Soft corals are not usually treated. The only part of the coral colony that should be exposed to the dip is the fragmentation injury site. This will be clearly visible as exposed white coral skeleton. Proper treatment will stain the white skeleton to a slightly yellow color. If a yellow color does not show up after dipping, it is possible the corals have been over handled and the protective slime coating generated during the handling has migrated over the exposed skeleton. It is not necessary to remove this slime to apply the dip because the slime itself is somewhat protective against RTN but advise all coral handlers to reduce the coral stress levels. Ideally, corals should only be exposed to air one time during the entire process (when they are set into the rapid setting coral plug cement). Typically, over-slimed corals can be tracked back to careless fragmenting…a procedure that must be carried out delicately to reduce coral stress.
NOTE: Fire Corals and Soft Corals should NEVER be dipped in iodine solution.
RBF Coral Epoxy Putty: A two part epoxy stick with a specific viscosity that allows for easy underwater mixing, yet stiff enough to hold coral plug in place until it hardens. RBF coral epoxy putty comes in a 10-minute and a 30-minute setting formulation. 10-Minute is better for larger fragments that are prone to dislodging during wave surges but requires more frequent mixing and is therefore less efficient and prone to waste. 30-minute formulation is standard. If you choose a non-RBF brand, be sure to test that they are not toxic to corals. (Testing can be done in a marine reef tank). (Do not use Devcon branded epoxy for that reason.) If the brand you choose is too thick, it will be very time consuming and difficult to mix underwater. If it is too thin, it will not hold the plugs in place. If it is too sticky, it will be difficult to remove from your hands. If not sticky enough, it will not bond well. Expect some staining of your dive suit and dive gear whatever brand you choose.
Coral Team: A group of people who agree to adhere to RBF coral propagation and planting ethics that will conduct the work of a coral propagation and planting project. Each group must contains at least one Level 5 certified RBF Team Member to be a team leader. The group is typically composed of local people who have initiated the project, and international experts or trained volunteers. Anyone is qualified to join a Coral Team and to become eligible for certification, however nearly all team members should be scuba certified. Teams are organized on project-by-project bases and there are already hundreds of people worldwide that have been certified. There are 5 specialty fields and 5 levels of certification within each field.
Coral Team Activation: Whenever a project is required…often on short notice after disasters, all Coral Team members are notified by a posting to the Reef Ball Foundation myspace.com group bulletin posting. Additionally, Coral Team leaders often contact members with specific skill sets relevant to the specific project directly. Coral Team members typically keep a Coral Team Member Resume or C.V. on file that is posted to our websites to help team leaders identify appropriate skill sets for a given project. The project sponsor has the option of offering whatever incentives are available to encourage higher skilled team members to participate. This can be in the form of compensation, daily stipends, accommodations, meals, etc. Compensated projects typically attract top experts. Usually, the most economical choice is a mixture of a few paid experts and some less skilled volunteers. Coral Team Leaders must always be compensation, but for worthy needy projects the Reef Ball Foundation will cover this cost. If higher quality work is required, a project sponsor can specify a minimum certification level before participation is allowed.
RBF Coral Tool Kit: An orange colored tool kit that contains items such as fragmentation tools (bone cutter, wire cutter, wire stripper, bolt cutter, hack saw, etc.) , latex gloves, RBF Coral Antiseptic Dip, RBF Coral Epoxy Putty, RBF Plug Cement w/ADVA Flow, mixing sticks, container for mixing plug cement, medicine cups, container for water/ADVA Flow mixture, submersible thermometer, container for antiseptic dip, oil free sun block, antibacterial soap, battery brush, hand brush, plug twine, dissolved oxygen (DO) test kit and other misc. items that may be required for coral propagation table operation.
Coral Curing and Planting Tray:
A wooden tray designed to hold plugs during curing under the coral propagation table and doubles as a carrying tray when inserted into a plastic laundry basket or egg crate for planters. Embedded dive weights make the tray negatively buoyant. (diagram below)
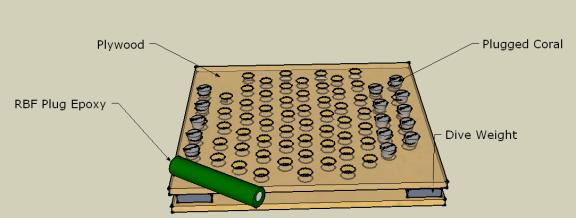
Deployment: A word used to describe the act of placing an artificial reef into the sea. Reef Balls can be deployed from a barge or they can be floated out with their internal bladders called a “Floating Deployment.”
Coral Diseases: There are a number of specialized websites that provide information on coral diseases and bleaching such as
http://www.coral.noaa.gov/coral_disease/cdhc.shtml
http://www.unep-wcmc.org/marine/coraldis/cd/types.htm
RBF Coral Team members should familiarize themselves with all common diseases and bleaching from a visual identification perspective. Simply stated, grassroots efforts should not attempt to touch or work with diseased corals in any way. Treatment for coral disease requires exact identification of the pathogen and specialized treatment knowledge. It is easy enough, however, to look at a coral fragment and to distinguish between a healthy and sickly colony. Any sign of stress, such as bleaching, means that fragmentation success is less likely and any sign of disease could mean fragmentation procedures could contaminate additional corals. Although many divers are tempted to “help” a sickly coral…they will likely do more harm than good in trying.
Coral Genetics: Propagation is a form of genetic cloning. Because creating a new coral colony will create a genetically identical colony there are unique opportunities for coral reef rehabilitation efforts. For example, when a disaster leaves thousands of adult colonies in peril, taking and replanting just a few fragments from each adult colony can preserve the entire genetics of the imperiled corals.
Other unique opportunities include cloning of corals that appear to have a better resistance to emerging threats such as heat resistance, sedimentation resistance, disease resistance, predator resistance, or any other threat that can be curtailed by genetics.
Additionally, it is now possible to create genetic coral banks. Reserves of propagated corals maintained in an area apart from the original colonies so that if disaster strikes, a replanting could take place to re-establish lost corals.
It is becoming increasingly clear that coral reefs will have to face changes in there environments. It is unclear if they can adapt genetically fast enough to cope. However, we believe that science will make it possible to identify those corals with traits that will allow them to survive and propagation represents the best technology to multiply such individual corals quickly.
Propagation and planting has another significant advantage for reef rehabilitation in that specific corals and be located where they will be more likely to have reproductive success. Success can be increased both from a physical jointing of more eggs and sperm and from being in locations most likely to transport larval corals to areas suitable for settlement and growth.
The Reef Ball Foundation will look to coral scientists for new research and findings to help achieve these goals.
Coral Polyp: 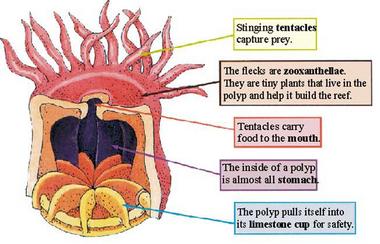 The
soft fleshy part of a coral that extends out of the limestone cup or coral
skeleton. Viewed closely, they may
appear as “hair” or tiny flowers on the corals. Before handling any coral, one must disturb the coral enough so
that it retracts the polyp into the limestone cup. (Usually gently fanning above the surface of the coral with your
hand but not actually touching the coral accomplishes this easily).
The
soft fleshy part of a coral that extends out of the limestone cup or coral
skeleton. Viewed closely, they may
appear as “hair” or tiny flowers on the corals. Before handling any coral, one must disturb the coral enough so
that it retracts the polyp into the limestone cup. (Usually gently fanning above the surface of the coral with your
hand but not actually touching the coral accomplishes this easily).
Coral Plug
Predation: A major threat to fragment health during the first 90 days after
planting is death or stress by coral predators. Specifically parrot fishes, crown-of-thorn starfish, corallivorous nudibranches, corallivorous snails, corallivorous crustaceans (like
acropora red bugs) and corallivorous
worms such as fireworms.
There are several defensive strategies to reduce this threat.
The first form of
defense is to plant corals on newly laid artificial reef substrate…not
natural bottom. This will help to
eliminate most nudibranch, snail, crustaceans and worm threats that hide from
their predators in the fouling community.
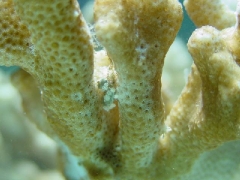
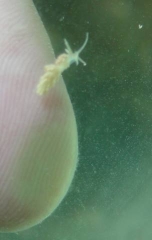
(Infestation of Corallivorous Nudibranch)

Flamingo Tongue (Cyphoma gibbosum) on Sea Fan
The second form of defense is processing the fragments with as little stress as possible because a healthy coral has its own defenses against predation. The main reason we switched our propagation methods from captive based (aquarium holding tanks) to open water based was to allow corals to be rescued and replanted within a few hours and to eliminate the stress of captivity. This alone greatly decreases coral fragment mortality.
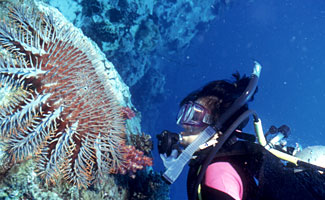 If crown of thorn starfish are present near
your deployment site, we recommend euthanasizing them
with an injection of Sodium bisulphate (also called Dry Acid). It is biodegradable and does not
affect other plants and animals on the reef. The chemical is applied by direct
injection into the central tissues of the crown-of-thorns starfish. Try to eliminate
these within 100 meters of your project area.
Use a long hypodermic needle because the spines of Crown of Thorn are extremely
painful if you bump into them.
If crown of thorn starfish are present near
your deployment site, we recommend euthanasizing them
with an injection of Sodium bisulphate (also called Dry Acid). It is biodegradable and does not
affect other plants and animals on the reef. The chemical is applied by direct
injection into the central tissues of the crown-of-thorns starfish. Try to eliminate
these within 100 meters of your project area.
Use a long hypodermic needle because the spines of Crown of Thorn are extremely
painful if you bump into them.
Some cushion stars and sea stars may also prey on
coral fragments. These just need to be
relocated to other areas (again, spread them out) and not euthanasized since they rarely get to plague levels unlike crown of
thorns starfish.
|
|
|
|
)
)
)
Figure 5. Coral eating sea stars, Left:
Acanthaster planci, Middle: Choriaster granulatus, Right:
Culcita novaeguinae.
Please note: This is one of the only exceptions the Reef Ball Foundation advocates for the killing of any form of marine life. It took our board many hours of debate and a review of extensive scientific literature to determine that Crown of Thorn starfish populations are excessive because they are benefiting from human interventions that stress corals. If you feel strongly about not killing these animals, relocation to an area away from your project is another option. However, be careful not to get injured handling them and do not put them all in one place, as they will destroy the corals in an area if over concentrated.
Parrot fish may nip, but usually do not wipe out fragments that have been handled stress free. If parrot fish populations are very high it is possible to build a temporary protective cage out of chicken wire. We have never had to resort to this and prefer keeping quality standards higher to ensure high quality fragments.
However, this procedure is most likely to be needed for certain delicate Acropora species, particularly high color varieties in the Pacific. In this case make sure the protective cages are in place until the base has completely formed and upward growth has resumed.
Coral Propagation Table:
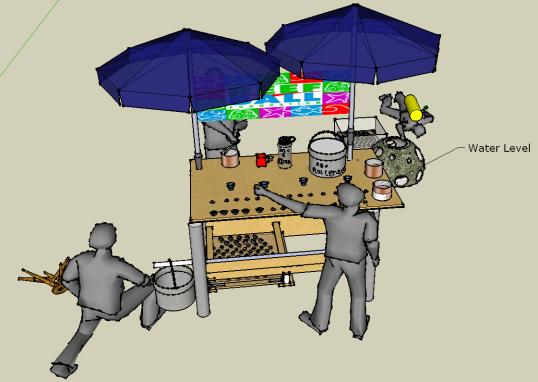
Either a beach based (as show above) or floating platform (as shown below) used for fragging, plugging and plug curing. A complete 3-d engineering plan can be obtained without cost by downloading Google’s free Sketchup (www.sketchup.com) then right clicking on the second icon from the right to “get model” and search for keyword “Coral Propagation Table.” An umbrella or tarp is necessary to shield coral fragments from sunburn. Careful attention should be made to ensure table stability in waves. We have made a wide variety of variations to accommodate individual project needs. It is important to consider the number of coral propagations you plan, the conditions at the work site, and the number of people that will be working before designing your table. A good table increases the comfort for human workers and makes higher volume outputs easier but it can take longer to build and be more expensive. A small table workspace can be made just about anywhere but may be uncomfortable and slow for production. If you are just demonstrating the technology for a school, that might be sufficient. If you plan to do tens of thousand of plugs.,.go high tech with all the bells and whistles. Cup holders are nice!
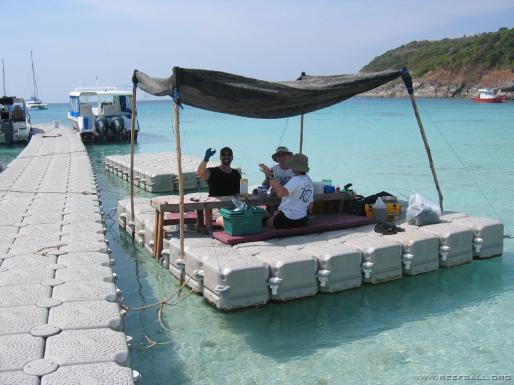
 Coral
Reference Books:
Coral
Reference Books:
 The
Coral Team uses Reef Coral Identification by Paul Humann and Ned Deloach
as a standard reference for the Caribbean and Corals of Australia and the
Indo-Pacific by J.E.N. Veron for the
Pacific. If you have deeper pockets,
Veron has a 3 volume Corals of the World series. Typically, the team will supplement with local reference books
depending upon location. Standard Coral Team culture is to use the common name
first, followed by the scientific name second, if known. This helps everyone to learn the scientific
names and does not embarrass those still learning.
The
Coral Team uses Reef Coral Identification by Paul Humann and Ned Deloach
as a standard reference for the Caribbean and Corals of Australia and the
Indo-Pacific by J.E.N. Veron for the
Pacific. If you have deeper pockets,
Veron has a 3 volume Corals of the World series. Typically, the team will supplement with local reference books
depending upon location. Standard Coral Team culture is to use the common name
first, followed by the scientific name second, if known. This helps everyone to learn the scientific
names and does not embarrass those still learning.
 Coral “Scream”: The sound a
coral makes when touched with its polyps extended, when it is fragmented,
when it is dipped in antiseptic, and the entire 30 seconds when it is exposed
to air for plugging (unless the Coral Team members also hold their
breath during this time to comfort the coral).
Corals are known to “scream” when sewer outfalls are built, when anchors
are dropped, as ships go aground, when red mangrove are cut, when nearby
beaches are filled with pumped sand, when dredges are operating, when water
temperatures exceed 30C (86F), when trawlers pass by, when cyanide is used to
collect aquarium fish, when dynamite fishing blasts go off, when golf courses
are built too close to them and even when plastic bags are dropped into the
ocean. Of course, corals don’t have
vocal chords (see diagram under coral polyp)…so it is now your duty to
scream for them when coral animals are in pain.
Coral “Scream”: The sound a
coral makes when touched with its polyps extended, when it is fragmented,
when it is dipped in antiseptic, and the entire 30 seconds when it is exposed
to air for plugging (unless the Coral Team members also hold their
breath during this time to comfort the coral).
Corals are known to “scream” when sewer outfalls are built, when anchors
are dropped, as ships go aground, when red mangrove are cut, when nearby
beaches are filled with pumped sand, when dredges are operating, when water
temperatures exceed 30C (86F), when trawlers pass by, when cyanide is used to
collect aquarium fish, when dynamite fishing blasts go off, when golf courses
are built too close to them and even when plastic bags are dropped into the
ocean. Of course, corals don’t have
vocal chords (see diagram under coral polyp)…so it is now your duty to
scream for them when coral animals are in pain.
Daily Coral Team Morning Meeting: Coral Teams meet every morning during a project so the Coral Team Leaders and Co-Leaders can develop a plan for the day. Meetings include thank you from the prior day’s efforts, daily team role assignments, discussions of specific issues affecting the project and give time for all team members to feed back suggestions for improvements.
Daily Coral Team Break Room Gathering: Coral Teams typically maintain a break room with refreshments and an internet connection. At the end of the day in the field, team members will gather in this room after showers and gear care. At this time, digital photographs are to be uploaded to the group computer, all of which may be posted to our internet site (be warned). Coral Team members agree to grant copyright license to RBF but may retain their own copyright rights to these photos if desired. Each team member is tasked with photo taking during every day of work. This room usually contains copies of the coral reference books and is generally where more experienced team members share their knowledge with newer team members.
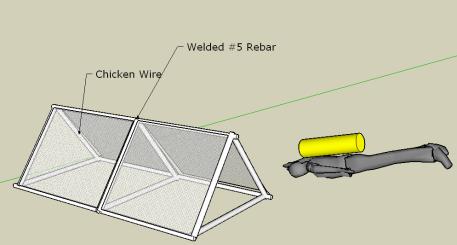 Disaster Nursery: After
storms, ship groundings, anchor drops and other disasters, there is often a
significant amount of damaged corals and no practical way to re-attach
them. In these cases, concerned divers
can create a medium term disaster nursery to preserve the coral genetics
impacted by the disaster. These
nurseries must be able to keep the corals alive long enough to build and deploy
the chosen artificial substrate and to activate a Coral Team. A Disaster Nursery is designed hold coral up
to about one year. The nursery is a
very simple welded steel frame with “chicken” wire across the upper surfaces. The shape is usually triangular so that it
can be tossed over a boat and will always lands upright. Deployment is best over a sandy, non-live
bottom because you may need to anchor the nursery if it will be needed for more
than a few weeks. Screw anchors
available at hardware stores for anchoring sheds can be used on sandy bottoms
and screw into the seafloor easily.
Disaster Nursery: After
storms, ship groundings, anchor drops and other disasters, there is often a
significant amount of damaged corals and no practical way to re-attach
them. In these cases, concerned divers
can create a medium term disaster nursery to preserve the coral genetics
impacted by the disaster. These
nurseries must be able to keep the corals alive long enough to build and deploy
the chosen artificial substrate and to activate a Coral Team. A Disaster Nursery is designed hold coral up
to about one year. The nursery is a
very simple welded steel frame with “chicken” wire across the upper surfaces. The shape is usually triangular so that it
can be tossed over a boat and will always lands upright. Deployment is best over a sandy, non-live
bottom because you may need to anchor the nursery if it will be needed for more
than a few weeks. Screw anchors
available at hardware stores for anchoring sheds can be used on sandy bottoms
and screw into the seafloor easily.
Try to collect enough fragmentable coral for 3 plugs from each adult coral colony that is impacted. If possible, create 3 separate nurseries, duplicating the original effort in case a storm or other unforeseen accident occurs on one of the nurseries. If possible, use digital still photography and a monitoring frame to record the donor colony and the fragable coral saved. Attach the coral to the chicken wire using zip ties or wire. Make sure each colony does not touch a surrounding colony, and allow for growth depending upon the length of expected nursery stay. Look for the healthiest coral tissues possible and do not nursery any diseased corals. You can use the area under and around the nursery to store smaller adult colonies that need to be re-attached by hydrostatic methods such as softball or smaller brain corals.
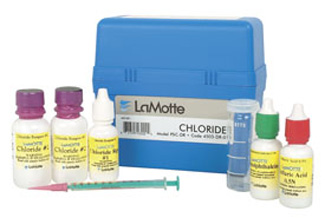 Dissolved Oxygen (DO)
Test Kit: Lamotte makes one of the
most easy to use DO kits and it typically can be found for under US$50. Be sure to follow instructions carefully to
get an accurate measurement. A dissolved oxygen test is used to confirm DO levels are over 4.5 mg/l in which case it is safe to conduct
coral fragmenting and coral table operations.
Dissolved Oxygen (DO)
Test Kit: Lamotte makes one of the
most easy to use DO kits and it typically can be found for under US$50. Be sure to follow instructions carefully to
get an accurate measurement. A dissolved oxygen test is used to confirm DO levels are over 4.5 mg/l in which case it is safe to conduct
coral fragmenting and coral table operations.
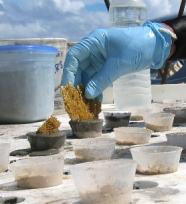
Dry hand dipper and placer: The person at the coral propagation table who handles dry fragmented corals first dipping them into RBF antiseptic and then placing them in the correct orientation in the wet cement in medicine cup molds. Some high-speed tables operate with 2 dry hand dippers and placers.
EPVS value (Effective Protective Void Space Value): EPVS is used to determine how much protective void space is being provided by a particular reef object for a particular species.
To determine the effective protective void space for any species of a particular object (coral head, artificial reef module, etc.) simply monitor the maximum distance the species will venture away from the structure during normal reef dwelling behavior. Monitor both horizontal and vertical distances then compute the volume of the area the species occupies and subtract the solid volume of the structure (if significant). In the case where the species will not go into a hollow structure, count that structure as solid for volume computations. Note that layout and spacing will impact multiple object calculations.
The result of the computation will be the amount of protective void space created per object studied. It is not always safe to extrapolate to multiple objects because of spacing and layout effects.

(Above shows an illustration of EPVS)
Such measures can be used to compare rehabilitation methods
relative success for particular species.
A basket of indicator species weighted by relative populations can be
used to compare rehabilitation methods protective void space creation directly.
Essential Fish Habitat (EFH): Congress defined essential fish habitat as "those waters and substrate necessary to fish for spawning, breeding, feeding, or growth to maturity." When dealing with Essential Coral Reef Fish Habitat (ECRFH). The Reef Ball Coral Team more precisely defines ECRFH by using quantifiable measures. For “those waters” we use water quality parameters that define the ranges that support coral reef growth. For “substrate” we use Effective Protective Void Space Value (EPVS) for individual species or a basket of species for the overall reef.
Fouling Community: The assemblage of marine invertebrates, algae, and other marine life that attached directly to hard substrate. When a newly laid artificial substrate is deployed, this community will develop over time in somewhat predictable patterns until it reaches climax as a mature reef. Typically, diatoms are the first colonizers followed by turf algae. Next is usually tunicates and hydroids and some shelled forms such as barnacles or scallops. In 3-6 months, with good water quality, coralline algae will form red, pink or purple patches that lay the groundwork for good natural coral settlement. These will be especially prominent when long spiny sea urchins (diadema) or other herbivores are present in good numbers. Some Corals can settle any time of year, but the mass fall spawning will create the most coral settlement in the late summer to early winter season. They can only be seen in the first 6 months or so using black light at night because corals phosphoresce in black light. After six months or so, a trained eye can spot tiny corals on the surface of the substrate. Without any coral plantings, properly built Reef Balls in the appropriate water quality will naturally develop into a coral reef in 8-25 years. Planting corals can speed this process up significantly. For example, the picture on the cover of this report was of a 5 year old Reef Ball.
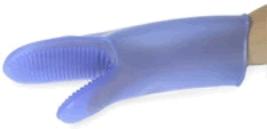 Fire Coral Mitt: Fire corals
(Millapora) are sometimes desirable to propagate due to the types of fish that
use them for protection. Simple latex
gloves can tear when performing hand fragmentation (fragmentation without a
fragmentation too). The Reef Ball Coral
Team occasionally uses a special silicon mitt for this task. Typically, Reef Balls are planted
monolithically with fire corals and only a few plugs are required because most
fire corals grow and spread very fast.
In a calm sea, just laying a few fire coral fragments on a Reef Ball may
be enough to get them started even without plugging.
Fire Coral Mitt: Fire corals
(Millapora) are sometimes desirable to propagate due to the types of fish that
use them for protection. Simple latex
gloves can tear when performing hand fragmentation (fragmentation without a
fragmentation too). The Reef Ball Coral
Team occasionally uses a special silicon mitt for this task. Typically, Reef Balls are planted
monolithically with fire corals and only a few plugs are required because most
fire corals grow and spread very fast.
In a calm sea, just laying a few fire coral fragments on a Reef Ball may
be enough to get them started even without plugging.
Flashing: The moment the RBF Plug Cement
“skins over”, usually between 20-60 seconds after pouring the cement. At this moment, no new coral fragments can
be added and it is time to initiate plug curing. Anyone at the coral
propagation table can call the world “Flashing” when it is observed to signal
the dry hand dipper and planter to pass the flashed plugs to the wet
hand coral handler for placement in the coral curing and planting tray
in the water below the coral propagation table. After placement, the wet
hand coral handler records the time so that the plugs can be moved to the popping
station after 20 minutes.
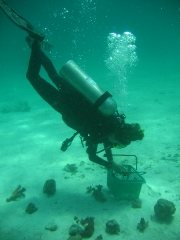
Fragging Nursery: An underwater area designated to bring imperiled corals for further processing into fragments by the fragger. Water temperature and water quality must be the same as the original source of the corals. A sandy bottom away from the reef is preferred because work will be done underwater that could disturb the bottom. The fragging nursery is often located between the source of corals and coral propagation table. A fragging nursery is temporary and corals are typically processed the same day they are collected leaving the area empty at night.
Fragging: The art of separating coral colonies into small fragments suitable for plugging and then planting. It is an art because each coral species has different tools and techniques required to achieve a viable fragment.
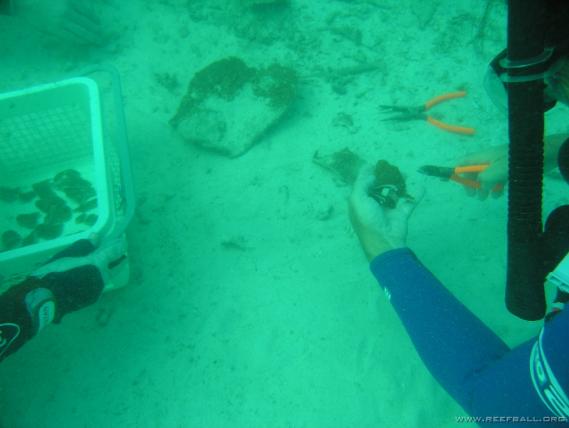
Fragment: A subset (small piece) of a larger coral colony that has been separated from the larger colony by mechanical means. A fragment contains the same genetics as the parent colony. If two fragments from the same colony are planted close together, they will re-fuse into a single colony. If two fragments from different parental colonies are planted close together, they will not fuse and instead will compete for space. This is true even within the same species. The only exception is when two different parental colonies that share the same genetics (i.e. they were originally part of the same colony or both were originally fragmented from the same parental colony) in which case they can still fuse together.
Fragmentor: The person who works below the surface, on snorkel for beach coral propagation tables or on dive gear for floating coral propagation tables fragging rescued imperiled corals to prepare them for the wet hand coral handler.
Hand Brush: 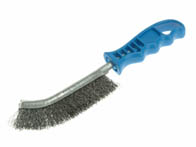 A
hand wire brush is used to clean the area adjacent to the coral adapter plug
whole before planting on an artificial reef module that has been deployed for
more than a few days. This provides
space for the coral to base and attach itself to the artificial substrate.
A
hand wire brush is used to clean the area adjacent to the coral adapter plug
whole before planting on an artificial reef module that has been deployed for
more than a few days. This provides
space for the coral to base and attach itself to the artificial substrate.
Hacksaw:  Sometimes
compression tools cannot be used and a hacksaw is needed for fragmenting. A hacksaw can also be used to make a scar
line so that compression cutting follows the line.
Sometimes
compression tools cannot be used and a hacksaw is needed for fragmenting. A hacksaw can also be used to make a scar
line so that compression cutting follows the line.
Hydrometer 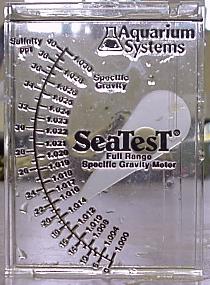 or
Specific Gravity Meter:
or
Specific Gravity Meter:
A hydrometer is an inexpensive way to approximate salinity or the amount of salt dissolved in seawater. You can get one at any saltwater marine aquarium store. It can be used to check the salinity of the Antiseptic dip if you are not using veterinary strength solutions. It can also be useful if you are working where freshwater runoff can affect the conditions at your nurseries or coral propagation table.
Hydrostatic Method: Traditional coral rehabilitation involves mixing hydrostatic cement in a plastic bag on the surface and sending it down for a diver to work it into a putty like consistence and then to use it to reattach adult coral colonies (transplantation). This method takes special, in field, training and practice to be able to perform this reliability. This method is time consuming, expensive and can disturb nearby corals due to lost fine sediments…therefore it should only be used when normal fragmentation methods are unsuitable.
Imperiled Coral:
Without assistance, a coral colony that will be dead within one year.
Examples include:
a) Loose or broken coral fragments or colonies from storms, groundings, anchor
drops, etc. that have landed on non-firm bottom types where it is expected that
they cannot stabilize themselves to prevent sinking into the soft substrate or
constant overturning and dying.
b) Corals that will be directly killed by dredging, marine construction, or
other human activities.
c) Loose or broken coral fragments or colonies from storms, groundings, anchor
drops, etc. of specific species that cannot reattach themselves. For example,
sea fans and in general all non-basing corals.
Juvenile Fish Nursery: Most marine fish are pelagic
spawners and in the larval stages the fish are widely dispersed. Studies have indicated that survivability
from settlement (when they first drop to the sea floor) to about 2.5 cm (1
inch) in size is a key factor in fish production. Small, low height, complex or widely scattered structures are ideal
for protecting fish at this stage. Red
mangrove roots, sea grass beds, and scattered patch reefs are good examples of
juvenile fish nursery areas. Artificial
reefs can be designed to mimic this function too.
Lux, foot candles, lumens or light Intensity levels: All different ways to express the amount of light over an area. Sometimes, light metering devices are used to make sure corals are not exposed to changes in lighting levels beyond their ability to adapt. Know what levels are acceptable requires species-specific knowledge.
Map Datum: GPS systems use a specific “map datum” to locally reference the GPS to the satellites. If you do not specify the same map datum for the coordinates you are given you may not end up at the same location. So be sure to set your equipment to the proper Map Datum specification. Unless otherwise specified, the Map Datum should be defined using "WGS 84", a default datum that is most frequently used to define coordinates in commonly used consumer GPS units.
Mixing: A term called out at the coral propagation
table by the table boss at the moment the plug concrete mixing is
initiated. At this point, the wet
hand fragment handler readies the coral fragments for passing to the dry
hand dipper and placer.
Microsilca: A concrete admixture added to reduce the permeability of concrete, neutralize the pH, and double the concrete strength. It is dosed at about 5%-10% of the total amount of Type II Portland Cement used or 15% of Hydrostatic Cement. Higher dosage rates provide an exponentially diminishing return with no increases in performance beyond 30% Microsilica/Portland ratio. Refer to the last 2 pages of the Reef Ball Training Manual Appendix in this manual for various brands of Microsilica available worldwide.
Monitoring Frame: A PVC camera guide marked with metric and English scales. Used to position the camera over coral plugs to take standardized monitoring photos. Advanced users will add movable “luggage tags” with numbers or letters to encode variables such as artificial reef module identifier, date, or coral colony identifier. Length of rod varies by camera used. Length should be adjusted with camera in wide-angle (non-zoomed) position. When taking monitoring photos make sure camera is in the same position. Most monitors prefer a frame that is neutral or slightly negatively buoyant. Gravel can be put inside the frame for this purpose. Frame should have small holes drilled into it for water to flow in and out.
Natural Recruitment: A properly designed base substrate or artificial reef will recruit and develop a fouling community over time and that community will include corals and other desirable marine life presuming the water quality and site location is suitable. In most cases, even without any effort for coral propagation and planting this will occur over time, maybe a long time but it will occur. When you make your planting strategy, you must take this into account. There are good reasons to plant fragments (such as speed of development, desirable species or genetics, rescue of coral colonies, etc.), but there are many projects that don’t need to make this additional effort to effectively rehabilitate a reef.
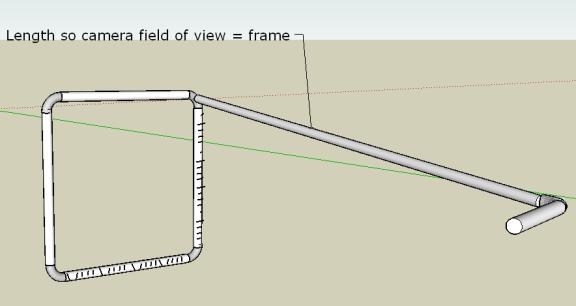
Oculina: A hardy coral species some can survive at great ocean depths and some can tolerates cold temperatures.
Oil Free Sun Block: RBF Coral Team members are required to protect themselves from sunburn. Loss of a team member function due to sunburn can disrupt typically tight project timelines. However, most sun care products contain oil that can contaminate the coral propagation table. Therefore, Team members are required to use Oil Free Sun Blockers (typically in spray formats that make frequent applications easier). A commonly used brand is Neutrogena Healthy Defense Oil-Free Sun block Spray, SPF 30 or higher.
“Pancake Syrup”: The term used when the plug cement is mixed to just the right consistency….a skill that takes practice and is one of the most important aspects of quality on the Coral Table.
“Popping” or “Popping Station”: After a cast coral plug hardens for 20-30 minutes, the coral curing and planting tray is removed from under the table and the “Popper” will remove the plastic medicine cups from the coral plug by pressing their fingers on the sand filled portion of the medicine cup until the plug “pops” up. This is done in a way to catch the plug from the side so that there is no need to touch the coral. The “popped” plugs are then re-placed in the tray and turned over to the planting teams. The medicine cups are recovered and returned to the coral propagation table for re-use.
“Popper” A Coral Team member trained to remove coral plugs from medicine cup molds without touching the attached coral fragment. (See Popping)
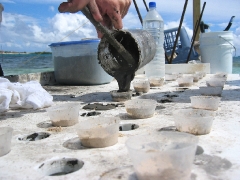 “Pouring”:
A term called out by the Table Boss when the medicine cup plug molds are
starting to be poured. This signals the
dry hand dipper and planter to begin treating the corals with an antiseptic dip
and then to ready them for placement into the fast setting plug cement. From the time the Table Boss sounds
“Pouring” it is typically 30 seconds until the concrete flashes
“Pouring”:
A term called out by the Table Boss when the medicine cup plug molds are
starting to be poured. This signals the
dry hand dipper and planter to begin treating the corals with an antiseptic dip
and then to ready them for placement into the fast setting plug cement. From the time the Table Boss sounds
“Pouring” it is typically 30 seconds until the concrete flashes
Planting: Affixing the coral plug into the coral adapter plug receptor hole with RBF epoxy
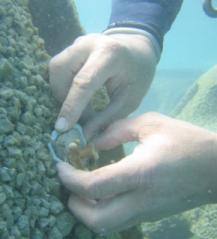 Planting Team: A dive team
that mixes underwater epoxy putty and plants coral plugs onto the Reef Balls or
other selected substrates. Sometimes
divided as a mixer and planter and sometimes each member does both tasks. In many cases, planting teams are not
permitted to wear fins when planting to avoid accidentally knocking off freshly
planted coral plugs. Even in shallow
water, dive tanks should be used to ensure careful slow movements needed to
plant corals without disturbing freshly planted plugs.
Planting Team: A dive team
that mixes underwater epoxy putty and plants coral plugs onto the Reef Balls or
other selected substrates. Sometimes
divided as a mixer and planter and sometimes each member does both tasks. In many cases, planting teams are not
permitted to wear fins when planting to avoid accidentally knocking off freshly
planted coral plugs. Even in shallow
water, dive tanks should be used to ensure careful slow movements needed to
plant corals without disturbing freshly planted plugs.
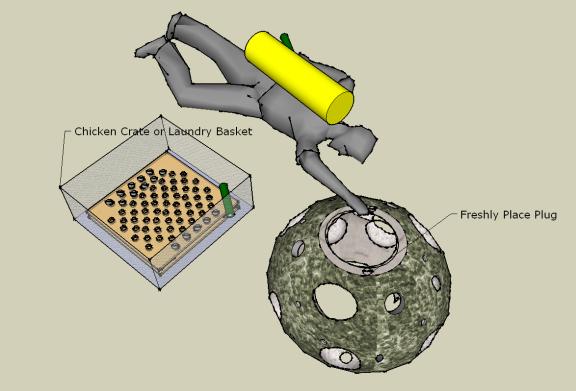
Planting teams need to be trained on the project’s planting strategy to know where to plant which coral plugs. Planting errors can take years to show up and avoiding them can be important for long-term success. A well-trained planter in good sea conditions can plant 100 or more corals per hour. An experienced and skilled planter uses much less epoxy putty per coral than a newly trained beginning planter. (A beginning planter may get 5-7 plugs per epoxy stick, whereas a skilled planter can get 20 or more). When computing the amount of epoxy putty needed for a project, take this variable into account.
Planting Strategy: A planting strategy must be developed to allow the base materials to develop as closely as possible to the species diversity and population densities of natural nearby reefs as they grow into a reef. Developing this strategy takes a level of skill that is beyond most volunteer teams. Typically, we will develop a planting strategy using RBF experts guided by as much local expertise that can be accessed. Todd Barber, John Walch, Lorna Slade, Marsha Pardee and Mario Van Der Buick are currently the RBF experts that have the level of understanding needed to develop good planting strategies. There are probably some coral restoration specialists / scientists that have similar skills, particularly ones that know specific local environments well. We also hope to develop more talent but this type of training takes years, not months. We can share some of the complex factors that go into this planning:
Environmental needs of the particular species (lighting, currents, sedimentation resistance, salinity, temperature changes, feeding requirements, depth limitation, etc.)
Warfare or fusing of coral colonies.
Expected growth rates of various species
Expected natural settlement on the artificial reefs
Water quality, present and expected
Wave climate expectations
Goals of the individual project (for example aesthetics, specific use, etc.)
Capabilities of the project (how many corals can be planted, etc.)
Preferences for threatened or endangered species.
RBF Plug Cement: A mixture of hydrostatic cement and microsilica and optional proprietary ingredients used for plugging. Here’s the label on the bucket:
RBF Disk & Plug Mix
· Makes Disks or Plugs for use with the
Special holes created in your Reef Balls
by the coral attachment adaptors
· Can
also be used to attach plaques, scientific
markers, etc. to Reef Balls.
· Can be used for in situ coral resetting (Hydrostatic Method)
· Contains WR Grace Force 10,000
· Sets
in 3 minutes
· Can be used for one step creation of a plug with a live coral fragment embedded in the
mix.
|
Warning! Skin and eye irritant. May contain silicon dioxide, silica fume, very finely ground Portland cement, crushed coralline algae, calcium hydroxide, sugar and/or Adva Flow. Your skin may be sensitive to cement. Wearing rubber gloves is recommended. Avoid contact with eyes or prolonged contact with skin. In case of contact, flush thoroughly with water. For eyes, flush with clean water for at least 15 minutes and get prompt medical attention. Keep out of reach of children. Warning! Contains silica fumes and silicon dioxide, do not breath dust. Prolonged exposure to silicon dust can lead to siliceous of the lungs. We recommend wearing a dust mask when working with silica fumes or this product. Eye protection is also recommended. |
For use at an
RBF Coral Table to embed corals, use mixing instructions from your table boss
for the specific type of coral you are working with.
For making plugs
for non-embedded attachment of corals::
Add 3 drops of W. R. Grace ADVA
FLOW high range water reducer and super-plastisizer (contained within the
package in a 1 oz bottle) to 3 oz by volume of product. Prepare your disk or plug mold (4 disks or 2
plugs) and then add with 1 oz of water.
Mix rapidly and completely and pour IMMEADIATELY into your disk or plug
molds. De-mold in 3 minutes and place
in fresh water for curing overnight before attaching hard or soft corals.
Attaching Corals
to Disks or Plugs that CANNOT be embedded:
Disks prepared
with this product can be used as a base to attach hard and soft corals with a
variety of methods. These include RBF
Super Glue Gel, Bridal Veil method (fleshy soft corals), monofilament method,
and others. For all these attachment
methods, allow coral to grow out over the plug for a natural attachment in a
protected area before attaching plug or disk to your Reef Ball.
Restabilization: Reattaching an adult coral colony back to the sea floor after it has been dislodged. Typically using the Hydrostatic Method or some other anchoring method. Can be as simple as up righting a coral head that has been overturned.
Plug Curing: Setting a freshly plugged coral, still in the medicine cup after flashing into the sea for 20 minutes or more until the plug is hard enough to separate the coral & plug from the medicine cup and sand.
Plug Nursery: Sometimes, it is not practical or possible to plant plugs immediately after plug curing. In these cases, a temporary plug nursery can be made which is a protected area where the coral plugs can be safely stored until it is time to plant them.
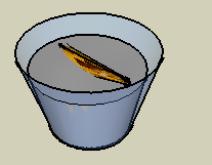 Plugs: A
coral fragment embedded in a small concrete disk so that it can be easily
attached to the artificial reef substrate and to promote a good base
formation.
Plugs: A
coral fragment embedded in a small concrete disk so that it can be easily
attached to the artificial reef substrate and to promote a good base
formation.
Plug Twine: Some corals, most notably sea fans, are difficult to epoxy into a coral adapter plug hole because the slightest sea surge causes them to pop out of the hole before the epoxy has a chance to harden. Therefore, a temporary cotton string is used to tie the plug into the surface of the artificial reef module until the coral epoxy putty hardens. The twine is then removed.
Plugging: Imbedding of small coral fragments into a standard medicine cup filled first with 1/2 inch of sand and then filled to the top with a 30 second setting concrete RBF cement mixed with water and Adva Flow.
Pouring: When the table boss has determined the concrete mix is acceptable the boss exclaims “pouring” meaning they will start pouring the concrete into the medicine cup molds…saying “pouring” is the signal that it is time for the wet hand fragment handler to pull corals out of the water and pass them to the dry hand dipper and placer.
Propagation: The act of creating multiple coral colonies from a single colony. (This is functionally equivalent to cloning plants).
Propagation and Planting induced Coral Fragment Death:
In the first 48 hours the major cause of fragment loss is Rapid
Tissue Necrosis RTN or failed epoxy bound, from 48 hours to 90 days the
major cause is coral predators, and beyond 90 days losses are usually
related to improper basing or incorrect placement (too much or too
little light, incorrect depth, too close to sediments or improper orientation
to currents). Survival rates of
propagated fragments are variable based on how well the techniques in this
manual are practiced. Properly handled
propagated fragment death rates can be as low as the death rates of natural
corals in the area and this is the goal every project should strive to
achieve. A monitoring program
should be established to determine if this goal is being achieved. When a monitoring program establishes that
fragment death rates exceed that of natural corals by more than 10%-20% (of
similar sizes in the same area) then procedures need to be reviewed and corrected
before additional propagation and planting. If specific strategies can be
documented to eliminate part of this gap they should be reported to the Reef
Ball Foundation for addition to this manual.
This is one of the most critical roles of grassroots based
monitoring. Currently, our projects are
overall averaging about 80-90% compared to natural mortality, which is quite
good, but there is still room for improvement.
Note: Even though there is an expected mortality rate in
fragments above that of natural corals the net number of new colonies is always
higher than without propagation efforts.
This is because corals are propagated, not transplanted. That is the basis of this being a Reef
Rehabilitation process.
Propagation “Tears”: Many brain corals, lettuce corals and encrusting soft corals develop tear shaped lobes as they naturally try to propagate themselves. These “natural” fragmenting lines can be used to create fragments on corals that typically cannot be fragmented easily.
Protective Void Space: The most critical function that coral provides to fish is void space. A void space is an area that protects fish from larger predators and provides shelter from energy draining water currents. Void space is created by corals both in the interior of the coral structures, in holes and cavities of the eroded coral base rock, and areas around the reef where eddies and back currents form. During low current times, the void space expands to the largest distance a particular fish can be away from the reef and return for safe haven when its particular predators abound. (Therefore note that void space is different for different fish types and sizes). Void space shrinks during storm events and high currents. At these times the space is limited to interior cavities and close to the edges of more solid reef structures capable of creating an eddy. Rehabilitation of void space IS CRITICAL to restoring fishery resources to coral reefs and is often overlooked.
Release Of Liability & Consent to Share Photos and Image Form: All Coral Team members must sign a release of all liability noting they are accepting full risk for participation in projects. This is critical because many government-based projects do not allow diving activities without special certifications due to liability. Additionally, members must agree that we can use their likeness or image in our publications, website, etc. Also, the team members must agree that they will share all project related photos (not personal photos) with Reef Ball Foundation and allow there unrestricted use.
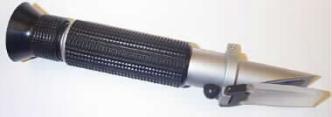 Refractometer: A
refractometer is a more sophisticated way than indirect specific gravity meters
to measure exact salinity or the amount of salt dissolved in seawater. They
don’t suffer from different reading in different temperature ranges either.
They are available from professional environmental monitoring suppliers. It can be used to check the salinity of the
Antiseptic dip if you are not using veterinary strength iodine solutions. It can also be useful if you are working were freshwater runoff
can affect the conditions at your nurseries or coral propagation table. A refractometer is very useful for Red
Mangrove projects because salinity must be closely monitored. Simply put a drop on the lens of the water
you want to sample and look into the scope for the reading. Note: Must be calibrated with distilled
water before use.
Refractometer: A
refractometer is a more sophisticated way than indirect specific gravity meters
to measure exact salinity or the amount of salt dissolved in seawater. They
don’t suffer from different reading in different temperature ranges either.
They are available from professional environmental monitoring suppliers. It can be used to check the salinity of the
Antiseptic dip if you are not using veterinary strength iodine solutions. It can also be useful if you are working were freshwater runoff
can affect the conditions at your nurseries or coral propagation table. A refractometer is very useful for Red
Mangrove projects because salinity must be closely monitored. Simply put a drop on the lens of the water
you want to sample and look into the scope for the reading. Note: Must be calibrated with distilled
water before use.
Rapid Tissue Necrosis (RTN): A rapidly spreading bacterial infection distinguishable by a very distinctive smell, fast movement of white tissue across the colony and colony loss very quickly, usually hours. It starts as an area of white coral tissue…usually at the site of fragmentation or when the coral has been injured by handling…and typically consumes the entire fragment within 24 hours. The cause of RTN is a simple formula:
STRESS+INJURY+BACTERIA=RTN.
Prevention is the only option for RTN.
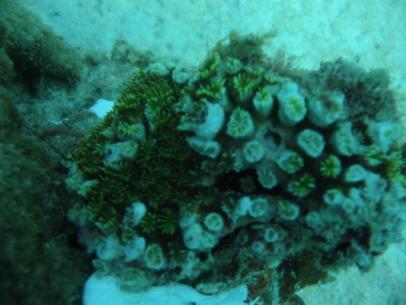 There
is no treatment for RTN and once identified in a fragment, the fragment should
be destroyed and anyone handling the fragment must thoroughly wash hands and
disinfect any tools with alcohol or other sterilization measures because it can
be infective, especially to stressed or injured corals. RTN is common in Acroporas, occasional in
medium to fast growing corals and rare in most other corals. It has not been
documented in soft corals. However,
soft corals can succumb to bacterial rot that does the same thing, just slower
(usually taking 1-3 weeks to completely kill a plug).
There
is no treatment for RTN and once identified in a fragment, the fragment should
be destroyed and anyone handling the fragment must thoroughly wash hands and
disinfect any tools with alcohol or other sterilization measures because it can
be infective, especially to stressed or injured corals. RTN is common in Acroporas, occasional in
medium to fast growing corals and rare in most other corals. It has not been
documented in soft corals. However,
soft corals can succumb to bacterial rot that does the same thing, just slower
(usually taking 1-3 weeks to completely kill a plug).
RTN can be caused by a number of different bacteria that are common in the marine environment. It can best be understood by considering it as an infected wound, just as an untreated cut can infect a human. Remember that corals are animals and are susceptible to the same kinds of infections that affect all animals.
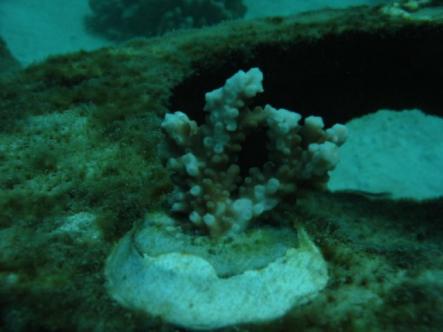
(This plug has developed RTN in Thailand and needed to be removed. When an RTN nursery is not used, a 48 hour
monitoring is required and using a screwdriver and hammer all plugs with RTN
must be removed and destroyed)
RTN Prevention Strategies: We know the formula for
RTN is STRESS+INJURY+BACTERIA=RTN
Therefore effectively dealing with RTN involves best practices to reduce stress
levels in corals, antiseptic treatment of injury sites and good hygiene by
those handling the corals. In terms of
stress levels, this manual is full of tips such as gradual changes in
temperature, light and water quality conditions. Handling practices such as ensuring polyps are contracted before
contact is important. All transport
procedure should insure corals don’t come in contact with each other and are
not exposed to additional injury. Corals are ideally exposed to air only one
time during the procedures. People in
contact with the corals or water that coral is kept in should only use oil free
suntan lotion. Dissolved oxygen levels
should be maintained at the highest possible levels and never allowed to drop
below 4.5 mg/l. These strategies not
only prevent RTN but also will create stronger coral fragments that are more
resistant to coral predation.
Runner’s Socks: Due to the high incidence of feet
blisters when working in sandy areas, RBF Coral Team members are sometimes
required to wear double-layered socks under dive booties to prevent
blisters. These are commonly available
to runners with a common brand being ”Wright Sock.” One can also obtain lykra socks from Scuba Doo but two pair will
need to be worn for the best protection. http://www.cococheznaynay.com/ is the
Scuba Doo website. They also produce a
Reef Ball “Doo Rag” popular among team members to shield heads from sunburn.
RTN Nursery: A temporary holding area for acropora plugs (the corals most prone to RTN development) for a 24-48 hour quarantine period before planting on Reef Balls to identify fragments that succumb to Rapid Tissue Necrosis (RTN) from fragmentation and plugging stress. This helps to eliminate planting plugs that will not survive and avoids a 48 hour monitoring with screwdriver and hammer in hand to remove bad plugs. 5-10% loss of acropora plugs is typical unless conditions are perfectly managed and therefore slightly more plugs should be made than are needed. Recent advances in quality control by the Coral Team may have reduced this problem but replication is needed to confirm results.
“Runner”: In some logistical set-ups, a “runner” is a diver or snorkeler that transports full coral plug trays from the coral propagation table to planting teams and returns empty trays to the coral propagation table. (In some operations, planting teams do their own running). Divers with aerobic sport training are ideal for this task.
Sea Surface Temperature (SST): SSTs are used to help predict bleaching events and to help determine temperature ranges on a reef. Remember, SST is a surrogate for reef water temperature, but they are not always the same due to thermoclines.
Secchi Disk: An 8 inch disk with alternating black and white quadrants used to determine a standard visibility in water.
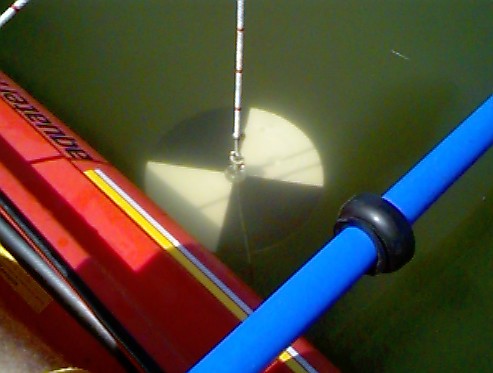
Markings or knots on the rope normally signify distance. The disk is lowered into the water until it disappears and the depth recorded, then raised until it re-appears and the depth recorded. The two depths are averaged and this becomes the Secchi visibility. Usually, the color of the water is also noted.
Scuba Certification Card : Nearly all Coral Team members are Scuba certified. Coral Team members must send an electronic scan of their certification cards to the Reef Ball Foundation for our files before they can participate on Reef Ball Coral Teams. Team Leaders make assignments based on your highest level of certification plus your demonstration of scuba skills in the field. Note: we also recommend that you keep an electronic copy of your passports on file with us in case you loose your passport on a trip.
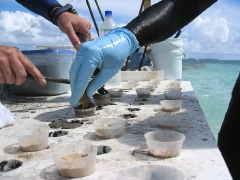 “Setting”:
The art of laying a coral fragment in the medicine cup mold after it is filled
with fast setting plug cement. It is an
art because there are several factors that must be considered including a “top”
and “bottom” side to many coral species such as Elkhorn and Lettuce corals,
sideways orientation required for finger corals to stimulate better basing, and
knowing just how deep the coral needs to be placed for proper adhesion. Some corals, such as Soft corals with woody
stems (gorgonians) require exact depth placement with the flesh only touching,
but not below the concrete surface.
During “Setting” the dry hand dipper and setter must judge the concrete
setting time exactly and not place a coral during or after flashing. Some species require special “setting”
techniques such as having some part of the coral braced against the side of the
medicine cup mold. Medicine cup mold modification may be required for larger
fragments, ask your coral team leader about this if required.
“Setting”:
The art of laying a coral fragment in the medicine cup mold after it is filled
with fast setting plug cement. It is an
art because there are several factors that must be considered including a “top”
and “bottom” side to many coral species such as Elkhorn and Lettuce corals,
sideways orientation required for finger corals to stimulate better basing, and
knowing just how deep the coral needs to be placed for proper adhesion. Some corals, such as Soft corals with woody
stems (gorgonians) require exact depth placement with the flesh only touching,
but not below the concrete surface.
During “Setting” the dry hand dipper and setter must judge the concrete
setting time exactly and not place a coral during or after flashing. Some species require special “setting”
techniques such as having some part of the coral braced against the side of the
medicine cup mold. Medicine cup mold modification may be required for larger
fragments, ask your coral team leader about this if required.
“Sterilized” Hard Bottom: Areas of freshly exposed limestone rock typically from a large ship grounding, tsunami, hurricane or other physical event. This type of bottom can be drilled to create coral adapter receptacle holes and used for coral planting. Freshly exposed sterile bottom from sand movement is not recommended because the sand can return and smother the planted corals. Note: With out the addition of artificial reefs, it will take much longer for these planted reefs to develop the complexity of a mature reef. However, this approach is often suited for organizations that prefer not to use artificial reefs.
Submersible Thermometer 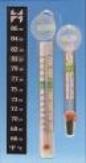 A thermometer is used to check the
temperature of the antiseptic dip and to check the nurseries & coral table
plug curing areas. The thermometer is
also used to take ambient water temperatures to make sure temperatures don’t
exceed 30C (86 degrees Fahrenheit) which is the point were fragmentation and
plugging activities need to be stopped unless a Dissolved Oxygen test can be
conducted to confirm DO levels are over 4.5 mg/l (in which case it is possible
to continue). If a DO test kit is not
available, a rule of thumb is that If it is windy and there is good circulation
it will probably be okay, if it is calm or poor circulation it is likely
dangerous to proceed. In fact, on calm
days or in low circulation environments DO testing should begin at 28 C or 81
degrees Fahrenheit.
A thermometer is used to check the
temperature of the antiseptic dip and to check the nurseries & coral table
plug curing areas. The thermometer is
also used to take ambient water temperatures to make sure temperatures don’t
exceed 30C (86 degrees Fahrenheit) which is the point were fragmentation and
plugging activities need to be stopped unless a Dissolved Oxygen test can be
conducted to confirm DO levels are over 4.5 mg/l (in which case it is possible
to continue). If a DO test kit is not
available, a rule of thumb is that If it is windy and there is good circulation
it will probably be okay, if it is calm or poor circulation it is likely
dangerous to proceed. In fact, on calm
days or in low circulation environments DO testing should begin at 28 C or 81
degrees Fahrenheit.
Subsidence: A term used to describe an artificial reef or base substrate sinking into a soft sea bottom type (typically sand or mud).
Sugar: Sugar acts to slow down the setting speed of concrete (retarder) and it can be used in cases where the fast setting plug cement goes off too quickly. Sugar water is used on concrete artificial reef molds to create a rough surface texture with exposed aggregates that encourages natural settlement of larval corals (the surface must be rinsed with water immediately after de-molding to gain this effect).
“Supply Stocker”: The person on the Coral Team designated to bring fresh supplies to the coral table including fresh water, moist sand, plug cement, etc. Often, the supply stocker will help ready planting teams, inventory material stocks, serve as a safety guard, arrange for snacks, meals or hydration, and make store runs for special needs. This position can be filled by a non-diving member of a Coral Team and is critical to overall efficiency. If the team has vehicles, the Supply Stocker is normally in charge of their use and allocation.
Table Boss or sometimes called “Boss” or “Mixer”: The person at the coral propagation table who handles mixing and pouring of the 3 minute setting concrete, cleaning of the mixing vessels and who gives directional commands to the other table workers. The Table Boss controls the pace of production and is responsible for quality control and safety.
 Thermoclines: Thermoclines
or “temperature layers” are distinct horizontal layers in the sea with
temperature differences usually getting cooler with each layer passed (if there
are multiple thermoclines) on the way to the bottom…sometimes marked. For coral teams, care should be taken not to
bring corals through thermoclines if possible…the temperature shock creates a
lot of stress on corals. Additionally,
if SST is used to determine reef temperature it should be adjusted if a
thermocline is present. A reverse themocline
is when the temperature on the bottom is hotter than the temperature on the
surface. As seen in the graphic to the
right, they can manifest in several complicated forms.
Thermoclines: Thermoclines
or “temperature layers” are distinct horizontal layers in the sea with
temperature differences usually getting cooler with each layer passed (if there
are multiple thermoclines) on the way to the bottom…sometimes marked. For coral teams, care should be taken not to
bring corals through thermoclines if possible…the temperature shock creates a
lot of stress on corals. Additionally,
if SST is used to determine reef temperature it should be adjusted if a
thermocline is present. A reverse themocline
is when the temperature on the bottom is hotter than the temperature on the
surface. As seen in the graphic to the
right, they can manifest in several complicated forms.
Transplanting: The act of moving a whole coral colony from one location to another location. This is much more difficult than propagation and planting fragment plugs. It requires a special level of certification on the Coral Team and should be considered a useful technique only for high value corals that cannot be easily propagated.

Waterproof Papers and Field Books: Coral Team members often need waterproof paper for underwater monitoring forms and field books for recording data. You will find these and other specialty field items like sand grain distribution sorters, refractometers, and survey equipment at http://www.forestry-suppliers.com/
Warfare (AKA Coral Warfare, Chemical Warfare): Some species of hard coral (most famously galaxia) have the ability to sting nearby corals to defend or create new territory for themselves. Being closely related to jellyfish, this is not surprising. Galaxia and other species have specialize stinging tentacles that can sometimes reach long distances (a foot or more). Other species have toxins in their slime coats which can affect their enemies. This is one of the reasons why hands must be washed between handling of different species to avoid (the other reason being sanitation). The implication is that hard corals must also be separated when handled in captivity. With expertise, one can learn that not all corals have this ability and it is “okay” to mix certain species but it is better to err on the side of caution and avoid this practice. Soft corals are not known to have this ability.
Wet hand fragment handler or sometimes called the
“Kneeler” or “Squatter”: The person at the coral propagation
table who handles wet fragmented corals and the plug curing process 

Wire Cutters: A tool used for fragging, typically for small finger corals.
 Wire Strippers: A
tool used during the fragging process for woody-stemmed soft corals
(gorgonians). This tool is used to
strip back the flesh at the base of a propagated stem exposing enough of the
woody stem to be embedded in the plug for a firm attachment. Care must be taken to hold the soft coral
broadly so that there is no crush injury.
Automatic wire strippers can be used on some soft coral types to avoid
this potential injury.
Wire Strippers: A
tool used during the fragging process for woody-stemmed soft corals
(gorgonians). This tool is used to
strip back the flesh at the base of a propagated stem exposing enough of the
woody stem to be embedded in the plug for a firm attachment. Care must be taken to hold the soft coral
broadly so that there is no crush injury.
Automatic wire strippers can be used on some soft coral types to avoid
this potential injury.
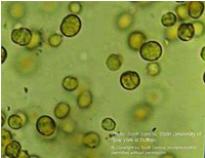 Zooxanthellae: According to
NOAA, “Most reef-building corals contain photosynthetic algae, called
zooxanthellae, that live in their tissues. The corals and algae have a
mutualistic relationship. The coral provides the algae with a protected
environment and compounds they need for photosynthesis. In return, the algae
produce oxygen and help the coral to remove wastes. Most importantly,
zooxanthellae supply the coral with glucose, glycerol, and amino acids, which
are the products of photosynthesis.”
Zooxanthellae: According to
NOAA, “Most reef-building corals contain photosynthetic algae, called
zooxanthellae, that live in their tissues. The corals and algae have a
mutualistic relationship. The coral provides the algae with a protected
environment and compounds they need for photosynthesis. In return, the algae
produce oxygen and help the coral to remove wastes. Most importantly,
zooxanthellae supply the coral with glucose, glycerol, and amino acids, which
are the products of photosynthesis.”
In regard to planting corals, the lighting requirements of the zooxanthellae must be maintained and rapid changes in lumen levels can shock or kill zooxanthellae. Additionally, if a coral is stressed by high temperatures and low dissolved oxygen levels, they can expel zooxanthellae from their body which is called “bleaching” and if the condition lasts long enough the coral will die.
Appendix A: Red Mangrove Restoration
Red Mangrove or 'Walking Mangrove' (Rhizophora mangle) are used by the Reef Ball Foundation in conjunction with reef restoration work because mangrove estuary systems work together with reef systems with a complex web of interactions. The roots of the Red Mangrove look like legs walking into the water which is why it is sometimes call the 'Walking Mangrove.' Red Mangroves are commonly grown by nurseries and their habitat value is well documented and appreciated by environmentalists. To stabilize the seedlings (propagules) in the ocean, one common method is to use split PVC pipes driven into the sediments. However, sediments can be too hard or waves can be to strong for PVC so various methods are used to stabilize seedlings including using prefabricated concrete Reef Balls as underwater "pots." The mangroves are normally planted in subtidal or shallow waters that benefit aquatic life and sometimes they are used to create a natural barrier to erosion.
Appendix B: Reef Ball Construction Training Manual
© 1995/1996/1997/1998/1999/2000/2001/2002/2006
Reef Ball Foundation Inc. Services Division
All Rights Reserved.
|
Goliath Ball, Combo Ball, Super Ball, Ultra Ball, Reef
Ball, Pallet Ball, Bay Ball, Mini-Bay Ball, Lo Pro Ball, Oyster Ball, Model
Ball and RBF Logos are trademarks of Reef Ball Foundation Inc., construction
techniques, and swiss cheese hole patterns are Patented or Patent Pending.
All sizes of Reef Balls are copyrighted 1994 (Reg. No. TXu 630-706) which is
recognized internationally except in Iran. This manual was
first published 7/4/95 and has been updated most recently in Aug. 2002. |
This is an abbreviated version of our training manual to give grassroots organizations an idea of what is involved in Reef Ball construction, please get the latest full version at www.reefball.com if you are using this for a project.
INTRODUCTION
Reef Ball mold systems are designed to create stable artificial reef modules that have variable sizes, shapes, hole sizes, hole patterns, hole shapes, surface textures and weights. Molds are also designed to accommodate a variety of concrete mix designs. Our research has concluded that variety is the most important factor in creating a reef with the highest amount of species diversity. Although your goals may be different, the Reef Ball Foundation Inc. Services Division measures the success of our reefs by the number of species that use Reef Ball reefs versus the number of species that use the natural reefs in the same environment. Although learning how to use the mold to consistently produce usable modules is easy, it is an art and takes practice to perfect the techniques that produce unique and interesting modules. It takes even more training to become very efficient at making Reef Balls, such as in the case of an Authorized Reef Ball contractor where many time saving techniques are allowed which we don't allow for regular mold users due to the more technical nature and higher level of error potential. However, even "failures" are not usually that bad and can often be used as reef material. As long as the bottom base of concrete remains intact, modules produced by our molds will still have the same stable characteristics as "perfect" modules. First, learn to perfect the basic casting techniques. Remember that concrete is like a cake mix. One must have a good recipe, mix the batter correctly, bake at the right temperature and cool the cake properly in order to make a nice cake. Short cuts can sometimes still make an edible cake, but too many changes can doom one to disaster. Also remember SAFETY first. Thanks for your interest and support of the Reef Ball Development Group and happy casting!
At the Reef Ball Foundation Inc. Services Division, we have now made more than 1/2 a million Reef Balls in over 3,500 projects...and there are nearly as many ways to build a Reef Ball. So please, understand that there are many ways to use your molds, but we can help you to use them with the constraints of the environment you are working in to get the best possible results from a variety of goal perspectives....least expense, highest construction quality, best for the biology, safest, quickest, and many others....just tell us what you want to do and we can help....That's why we recommend initial on site training for all of our clients...so we better understand exactly the goals and conditions you are working with to offer you the best possible advise.
TOOLS AND SUPPLIES RECCOMMENDED
FOR BUILDING WOOD BASES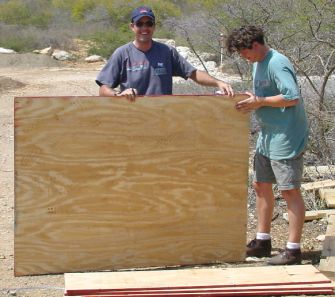
Circular saw
Power drill with 5/8 inch bit
1 1/4" inch flat wood blade bit (for countersinking)
Screwdriver (power recommended)
Philips oval head deck screws (1 3/4)
3/4" Plywood
4X6 boards (sometimes optional)
2X4 boards (sometimes optional)
Spray paint (3 colors)
1/4" bit (to mark mold fitted to base)
Plumbers Straps (to secure pins to base-optional)
Small box of drywall screws (to secure plumbers strap to base)
For Attachment Adapters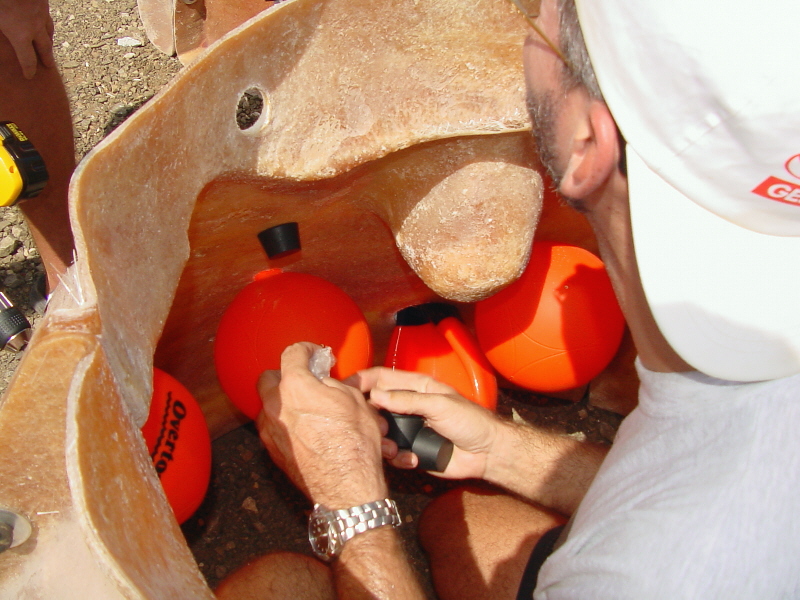
1/4" Drill bit (for attachment adapter assembly)
FOR CASTING and DEMOLDING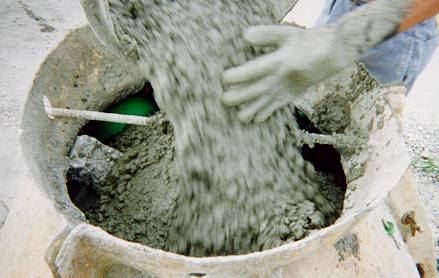
Rubber Gloves (concrete)
Work gloves
Rubber mallets
Plastic wedge (to break out finished modules if left in the mold too long)-optional
Sugar & fine mist sprayer (Garden sprayer or air powered paint sprayer is the fastest)
Flathead screwdriver (Power driven, especially if you have Pallet, Reef, Ultra or Super molds due to the larger number of polyform side bladders that have air added or removed by a screw cap)
Thermometer (if using concrete waste)
Air compressor or scuba tank with adapter to allow for controlled filling of air bladders.
trowel to direct the concrete into the mold
Hammer (Good quality hammers make things much faster, steel shaft is best)
Vacuum pump (A shopvac fitted with air line hosing with the intake blocked works well).
Extra Adva Flow (in cast the concrete in the truck is too thick)
5 gallon buckets (for moving concrete around)
Wheel Barrel (for moving larger amounts of concrete around
Duct Tape (to temporarily patch unused holes)
Newspaper (to stop a leaking mold)
Extra Polyform Screw Caps (to replace lost or damaged ones)
Concrete mixer and associated tools (if mixing by hand)
FOR MOVING REEF BALLS AROUND
Abrasion resistant lifting straps (available from Reef Innovations) [Optional but helpful when lifting equipment is used or for larger operations where normal straps would wear out from the tough Reef Ball concrete] You will need 2 straps for floating deployments if your equipment (such as a crane) is doing to place the Reef Balls directly into the water
Hooks, shackles, chains, grab hooks or other fittings for your moving equipment (often a front end loader or crane).
FOR FLOATING DEPLOYMENTS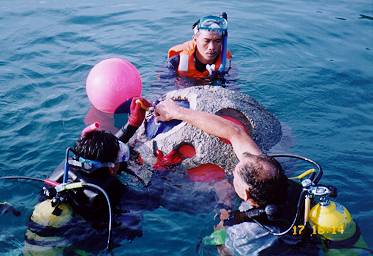
Knife
BCD inflator tip
Extra rope
Dive gear (optional)
Extra buoys
Flathead screwdriver
Anchor (optional)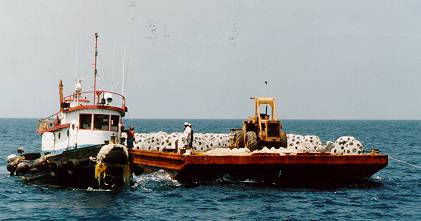
Extra Subslave 1000 lb pillow lift bags (optional for smaller units, required for breakwater or very heavy Reef Balls, Ultra Balls or Super Balls)
FOR BARGE DEPLOYMENTS
"Pelican" Release hook
Lifting sling & chain
Leather gloves
FOR MOLD SET UP, CHANGES AND MAINTENANCE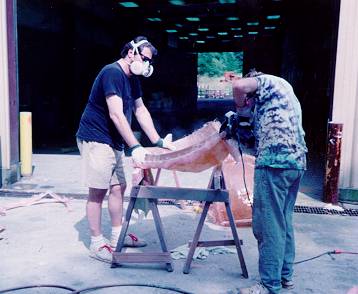
Needle value (to inflate tether balls)
1 1/4" Paddle bit (to redrill tether ball holes)
3 1/2" hole saw, (to redrill A-0 holes)
1" Drill bit to redrill hold down bar holes
3/4" drill bit to redrill side flange holes
1 can WD-40 to lubricate metal parts and keep them from rusting
Razor knife (to open boxes, etc.)
Hack Saw blade...to fine cut fiberglass when reshaping
Magnum 44 perm marker, to mark holes for re-drilling
Roll of Hi-Vis string (to set up tethered bleed pins, also useful for deployment layouts)
Fiberglass resin & activator
Glass roving or cloth
Sandpaper & drill
Power washer (or car wash) (or sand blasting equipment)
SAFETY EQUIPMENT
Comply with all OSHA and all other regulations. You'll need at a minimum safety glasses, rubber gloves, hard hat, lung protection, steel toed shoes, protective clothing, and first aid kit.
SPARE PARTS
We suggest the following extra parts as a "SAVE A REEF BALL KIT" Note that all molds systems sold after June 2002 have mold spare parts (bolded) automatically included.
Screw Caps
Tether Balls
Side Polyforms (A-0's)
Hollow Pins/PVC Collar
Wedges
Washers
Pins (5&3 inch)
Plates
Internal Bladders
Duct Tape
Ball of string
Fine mist sprayer (Garden pump up type is best)
Some old newspapers or empty concrete sacks (used to plug holes where concrete is leaking in case of a forgotten pin or base that is wearing out).
The following diagram will help you identify parts and part names.
Assembly
CONCRETE CONSIDERATIONS
|
What is Concrete Slump Concrete slump is a measure of how thick the concrete is. Imagine a cone used to mark highways that is 15 inches tall is filled with concrete. Place this on the ground and remove the cone....the number of inches that the concrete "slumps down" is the "Slump"...so a 9 inch slump is very liquidly where a 2 inch slump is almost clay like. Testing with a slump cone is one way to determine if you have the right slump for pouring your molds...but with experience you will know from how the concrete looks and pours into your molds. |
Molds can be used with any concrete mix that meets these basic requirements:
Type II or better concrete (only marine grades should be used or add an additional 10 pounds of microsilica per yard of concrete)
5-7 Inch Slump (Super Ball), 6-8 inch slump (Ultra Ball) 7-9 inch slump (Reef Ball and all smaller sizes) (to make the concrete flow into the mold easily) (Use ADVA flow 140 [6 ounces per 100 lbs of Portland cement] for slump to 8 inches or ADVA flow 120 [3.5 ounces per 100 pounds of Portland cement] for slumps over 8 inches. If ADVA is not available, a high range water reducer can be used but results....in particular biological results may vary. ADVA is used to maintain a high water/cement ratio for stronger concrete that does not contain too much water and ADVA aids in getting a complete concrete reaction so the pH of your Reef Ball is better for coral, oyster, and other fouling community growth
6% +or- 2% air entrainment (to pit the concrete for better marine settlement) (ADVA flow does this automatically or use an air entrainer with other water reducers)
Any size aggregate will do, but pea gravel/smaller aggregate is recommended for easy casting. (over 1 inch may make casting very difficult).
-Aggregate/Slump Adjustment
1) If Aggregate used is round and smooth, subtract 1 inch from recommended
slumps
2) If Aggregate is larger than pea gravel, but less than 1 inch add 1/2 inch to
the recommended slumps
3) If aggregate is over 1 inch, add 1 inch to recommended slumps
4) If aggregate is square or mixed in sizes and jagged, add 1 inch to the
recommended slumps
5) If final slump is higher than the recommended range for Super Ball pouring,
pour the super ball in two stages with 30 minutes-2 hours between pouring to
avoid a cold joint but to allow for less upward pressure on the center bladder
caused by high slump mixes. Use caution with Ultra sized Reef Balls with
high slump mixes as the center bladder might rise and make an Ultra Ball with a
very heavy bottom and thin top.
Limestone aggregate is best for coral settlement, granite or river rock has a higher density for projects where maximum stability is desired.
Harder aggregates are better for non-coral rich waters (they make stronger concrete)
PSI (compressive strength measured in pounds per square inch) at the time of use of at least:
|
|
Super/Ultra/Reef Ball |
Pallet Ball |
Bay Ball and all smaller sizes |
|
Floating Deployment |
8,500+ |
7,000+ |
6,000+ |
|
Barge Deployment |
7,000+ |
5,500+ |
4,000+ |
|
To remove from mold |
750+ |
750+ |
750+ |
|
To lift from base |
1,500+ |
1,200+ |
1,000+ |
THESE ARE RECOMMENDED STRENGTHS-NOT SPECIFICATIONS. THEY ARE INTENDED TO REDUCE BREAKAGE WITH TYPICAL HANDLING PROCEDURES. BARGE STYLE DEPLOYMENTS MAY TOLERATE LOWER STRENGTHS WHEN HANDLED PROPERLY. FLOATING DEPLOYMENTS SHOULD BE VERY CAUTIOUS OVER NATURAL REEFS WHEN STRENGTHS ARE LESS THAN RECOMMENDED REQUIREMENTS. EXPERIENCED USERS MAY FIND THAT REMOVAL FROM THE MOLDS AND BASES CAN BE ACCOMPLISHED AT MUCH LOWER STRENGTHS IF CARE IS TAKEN.
These recommended strength requirements assume standard weight modules. Heavier modules can get away with 5% less PSI for every increase of 10% in weight. Lighter modules should use these recommendations:
10% lighter Increase PSI by 15%
20% lighter Increase PSI by 35%
30% lighter Increase PSI by 60%
--More than 30% not recommended--
In general, the less Portland Cement used the better the pH will be, so if you can get away with a lower PSI concrete mix design and not experience breakage it is better for coral settlement. However you should always maximize microsilca use and minimize concrete use to get the desired PSI.
The concrete MAY NOT use any of the following:
Fly Ash, unless it is proven non-toxic and without elements that are biologically active
Any accelerator or mix design where it is possible to demold without breakage before 4 hours. 7 Hours or more is recommended to demolding and the concrete should still be soft to develop a good surface texture. Slower setting concrete yields a lower final pH and is better for biology. Concrete mixes that set up faster than 4 hours will ruin the molds and inflatable parts much faster due to the high heat buildup of faster setting mixes. NOTE: Authorized contractors, only, may demold in 2-3 hours if molds are attended and the accelerator or mix used is a "High Early" type. Modules must be cooled by water as soon as they are demolded and cured in a plastic wrap for at least 24 hours. This method will lead to additional mold wear and tear.
Surface Retarders except for table grade white or brown sugar and water is approved as a surface retarders.
Silicone Sprays (the propellant can damage the tether balls and the silicone can prevent certain types of marine life settlement)
Admixtures that contain toxins or biologically active elements (including iron and fertilizers)
Rebar, except for use in ocean environments where iron is not considered biologically active (abundant) [Fiberglass rebar CAN BE used. Bamboo, palm fronds (stem part), and other organic re-enforcement MAY be used) ]
Form oil or release agents/waxes, unless proven to be non-toxic and biodegradable before deployment. Use Lard for releasing agents for build in anchors or other non-biologically exposes surfaces if needed.
Dissolve in bags (except for W.R. Grace and Fibermesh bags that are proven non-toxic)
ANY OTHER PRODUCTS THAT CONTAIN PLASTICS OR PETROLEUM PRODUCTS (Failure to avoid plastics and petroleum can be considered a violation of the MARPOL act [USA ONLY])
The mix design could use the following:
Optionally, Non-Calcium chloride accelerator or W.R. Grace Daracell (added during cold weather or to speed up de-molding but not to speed up demolding earlier than 4 hours, NOTE: Authorized Contractors may demold in 2 hours with High Early accelerators and when molds are removed as quickly as possible, the Reef Ball must then be water cooled and wrapped in plastic for at least 24 hours)
W.R. Grace's ADVA Flow 120 or 140 is HIGHLY RECOMMENDED (add to achieve a 140 4-8 inch slump 120 for 4-9 inch slump) (ADVA gives good fluidity to the concrete making casting easy, adds the correct amount of air entrainment without another admixture, and give a better final pH value)
If ADVA is not available and another high range water reducer is used, you will need an air entrainers or Darex II by W.R. Grace (Add to achieve 4% +-2% air entrainment)
A coat of saturated sugar water sprayed from a fine mist sprayer( as a surface retarder and form release agent)
Microsilica (A.K.A. condensed silica fumes) or W.R. Grace's Force 10,000 (see note below)
A special note on the pH of concrete and microsilica:
Most concrete will come out of the mold with a pH of 12-16. Over time, in a fresh water bath or when exposed to rain, the pH will begin to fall. The pH of the ocean is between 8.3 and 8.4 and many marine species will not take up residence on the modules until the pH at the surface of the reef balls is at or near of the pH of the surrounding environment. This is particularly true for hard corals that are very pH sensitive in their larval stages. The use of microsilica at a MAXIMUM of 30% to the weight of the Portland cement used will bring the pH of reef balls submerged in an open oceanic system within range for nearly immediate settlement by corals (at 30% most calcium hydroxide will be reacted and the permeability of concrete is very low). However, 30% is not cost effective and through extensive testing, we have found that 10% is the most practical in terms of a cost/benefit ratio. Less than 30% by weight to Portland will still give a marked decrease in surface pH and is highly desirable. We recommend 50 pounds per yard to be used for deployments where hard corals are targeted for recruitment. When microsilica is not used, and you intend to place your modules in waters that support hard corals, several months in the rain or several weeks in a fresh water bath are suggested to increase coral growth...this will at least reduce the amount of unreacted calcium hydroxide which creates very high pH but it will not increase the permeability of your concrete. . Microsilica also has a strength benefit. Fifty pounds of Microsilica per yard of concrete will generally double the PSI of the starting mix. Anytime you use more than 50 pounds of Microsilica per yard of concrete, you should add fibers to the mix to avoid micro cracking that is common to high microsilica concrete mixes.
|
pH and Microsilica....a Scientific Explanation; The scientific explanation of why microsilica gives a better pH for coral settlement is a bit complex. There are two factors at work. 1st, when concrete reacts, it forms cement (pH of about 12) and a left over byproduct, calcium hydroxide (pH of about 14-16+). Microsilica directly reacts with calcium hydroxide to form a second kind of "glue" which is why microsilca concrete is stronger than regular concrete. This gets your concrete to a much lower pH to start with. However, Microsilica doe not change the pH of the concrete, per say, but rather affects the permeability of concrete which affects the rate at which negative ions (pH is a measurement of ion concentration) leach from concrete. Therefore, in a closed system microsilica would only delay reaching a pH equilibrium of the concrete, whereas in an open oceanic system, the delay results in lower pH at the surface of the concrete where corals settle. It has been scientifically documented (<--click here for report) that settlement by marine life is closer to natural settlement rates on Microsilica concrete compared to regular concrete. |
Some clients resist the use of microsilica because it can increase the price of a yard of concrete by as much as $20-30. However, there are a few other benefits that should be considered before making the decision not to use microsilica. First is the durability and abrasion resistance of concrete. Salt water ions are hard on concrete and over time will degrade concrete. Microsilica reduces the permeability of the concrete and helps it resist ionic attack. Microsilica also increases the abrasion resistance of concrete. For this reason, microsilica increases the expected life of the reef. With a full dose of 50 or more pounds per yard, one can expect the modules to last well over five centuries (engineering life) even in waters where hard corals do not exist to build up the modules (hard corals help the modules to develop natural abrasion resistance). With 25 pounds per yard, once can still expect durability to last over 2 centuries. With 10 pounds per yard, one could expect about 100 or more years. Without microsilica the durability of concrete can decrease in just 20-40 (5-15 for Type I concrete) years. Another important consideration is breakage. Heavy equipment and rough barge deployments (including dropping modules on top of each other) can break modules. The more microsilica used, the more resistance to breakage your modules will have. (This is more important with Reef Balls than other concrete structures that contain rebar for breakage resistance.) Given the time and effort it takes to build a reef, a small investment in microsilica can really payoff in terms of the number of modules that make it to the site intact.
Freshwater applications do not benefit as much from the reduced pH since
freshwater reefs function mainly as fish shelters or current reduction devices
rather than the basis for a food chain. However, algae and other life that
attaches to freshwater reefs may still be important and the other benefits of
microsilica certainly make it worth considering.
6
|
CASE STUDY- REEF BALL SCULPTURE PARK IN COZUMEL In Nov. of 1995, Reef Ball supervised the construction of 15 artistic sculptures to be used underwater along with 7 Bay Balls (two with sculptures but into the top of the bay balls). Reef Ball supervised the first 6 sculpture and the 7 Bay Balls, then we left the remaining 8 sculptures to be built by artists. In Aug. of 2002, we monitored the site. The 7 Bay Balls and first 6 sculptures all had 100% hard coral cover and were in perfect shape, the remaining 8 sculptures built after we left had all collapsed with only rubble on the ground. What happened? They stopped using Micro silica and the other Reef Ball admixtures to save money. The total project budget, using all volunteers was $50,000...1/2 the sculptures were lost within just a few years to save maybe $500 in concrete admixtures...get the point? |
CONSIDERATIONS FOR USING END OF DAY CONCRETE WASTE (POUR OUT)
Many of our clients use EOD (End of Day) waste to construct Reef Balls as a way of saving money on concrete, and as a way of using a material that would otherwise go to our landfills. Here are some general guidelines for EOD waste:
Do not accept concrete that has a temperature of over 115 degrees Fahrenheit. This means it is too old and will not develop the strength that is needed. Hot concrete also makes it difficult to achieve a 9 inch slump.
Make sure the starting mix was at least 3,500 PSI. -Always add microsilica (we recommend at least 50 pounds per yard) unless microsilica was already in the starting mix. This is because EOD waste may not have a complete concrete reaction that can push pH levels to 14 or higher.
Consider the addition of extra Portland if the mix has a slump of more than 4 inches without a superplastisizer or high range water reducer. Often, EOD waste has be watered down at the original pouring site and this will reduce the ending strength unless you add Portland to absorb the extra water.
Add superplastisizer (Adva Flow 120) until you get a 9 inch slump.
You may need to let EOD waste cure a bit longer than purchased concrete to make sure the minimum strengths for removal from the base are met.
HOW TO GET THE RIGHT MIX EVERY TIME
W.R. Grace and Company has made a commitment to sponsor Reef Ball projects around the world. As part of this commitment, they will provide Reef Ball clients with admixtures at substantial discounts. Additionally, W.R. Grace has offered to provide our clients with custom mix specifications given your project's goals and budget. Of course, they will specify Grace products in their recommendations, but they have been fully educated on the implications of concrete and artificial reefs by the Reef Ball Foundation Inc. Services Division and understand our special requirements. Because W.R. Grace is a world leader in admixtures and they are offering their admixtures at substantial discounts, it is unlikely that you will save any money by using alternative mix designs. W.R. Grace can help you talk with your local concrete producer to make sure they understand the complexities of our mold systems and special concrete considerations. For your custom mix, or if you have any concrete questions at all, please contact Rick Conlin at rick@reefball.com 708-924-4771. If you are not in the United States, Rick can put you in touch with a local W.R. Grace representative who understands your project's needs. NOTE: SEE APPENDIX C FOR SAMPLE SPECIFICATIONS
If you use non-Reef Ball approved admixtures, we cannot predict the performance of your molds or your reef balls.. Any admixture manufacturer is invited and encouraged to send us their products for approval. See the appendix on our concrete specifications about requirements to submit admixtures for approval. Once approved, they will be added to our concrete specifications as valid substitutes by brand name. If you use non-approved admixtures, mold damage or biological failures may result.
GETTING YOUR MOLDS READY FOR YOUR FIRST POUR
Your molds need to be set up since they will be disassembled for shipping. The first pour is usually accompanied by a Reef Ball trainer, but in the event one is not present note the following:
1) New molds have a wax left on them from the fiberglass manufacturing process, therefore the sugar water will not stick as well the first few uses. We recommend two coats of sugar water on the mold surfaces (allowing the first one to dry) before the first castings.
2) New molds will often make some cracking noises during the first few uses...this is normal as the flanges break in...they are designed with some spring to them to last longer in the field.
3) Inflate all inflatable before first use and check for leaks. We cannot replace defective inflatable parts once they have been used in concrete
The molds do not come with the base needed for use (shipping costs would be prohibitive). So your first task will be the assembly of a plywood, steel or concrete base. (See Appendix For Concrete or Steel Bottoms)
PLYWOOD BASE CONSTRUCTION
A base can be constructed of plywood, steel, or concrete, but plywood is often used because it is portable, relatively inexpensive, and can be made with readily available materials and tools.
We recommend the use of form
oiled plywood that is designed for building concrete forms and will not stick
to the concrete (sometimes referred to as Marine Grade Plywood). Additionally,
the oil inside the plywood resists weathering so your base will last for
hundreds of castings. (If form oiled plywood is not available, then we
recommend that you seal regular plywood with vegetable oil, lard, or other
non-toxic paint or finish.)
The first step is to build a flat surface of the following dimensions:
|
Super/Ultra/Reef Ball |
Pallet Ball |
Bay Ball, Mini-Bay, Lo Pro or Oyster |
|
8 feet Square |
5 Feet, 6 Inches Square or 8 feet Square |
4 Feet Square |
Since plywood is usually available in 4 feet by 8 feet sections, two Bay Ball surfaces can be built by cutting a single sheet of 3/4 inch form oiled plywood in half. Pallet Ball bases can be made with two butted up plywood sheets screwed into an old wooden Pallet. But for the Super, Reef or Ultra Ball you will need two sheet surfaces by overlapping sheets (double thick) and using deck screws to join them. We recommend 3/4 inch plywood but close metric sized will also work. You may need to counter sink the base pins in any plywood larger than 1/2".
NEW ADDITION: REEF BALL IS NOW SHIPPING PALLET BALL AND SMALLER MOLDS WITH SHORT PINS FOR THE BASE, THESE WORK DIRECTLY WITH 3/4 INCH PLYWOOD, IF YOU ARE BUILDING LARGER BASES WITH 2 SHEETS THICK, SANDWICH THE PIN AND WASHER BETWEEN THE TWO SHEETS, YOU MAY NEED TO COUNTERSINK THE HEAD OF THE PIN IN THE LOWER SHEET OF PLYWOOD. WHEN YOU ARE BUILDING ON A COMPLETELY FLAT SURFACE (SUCH AS CONCRETE) YOU DO NOT NEED TO ADD THE LUMBER ACROSS THE BOTTOM FOR SUPPORT. IF YOU ARE BUILDING ON SAND OR OTHER UNEVEN SURFACE THEN PROCEED WITH THE LUMBER INSTRUCTIONS BELOW.
(However, Super/Ultra/Reef molds come with both 3 inch and 5 inch pins so you can use either method of base construction. Use 5 inch pins and for a longer lasting base given the pressures exerted in the larger units or if you want to use the short pins you can use the sandwiched plywood method)
CALL LARRY AT 941-650-2519 IF YOU HAVE QUESTIONS ABOUT THESE NEW TIMESAVING TECHNIQUES.
These diagrams on the next few pages are one (very old) example of a way to build bases...note some of the " and ' markings are reversed by accident. We HIGHLY recommend that you wait for your trainers to build bases as redoing them is time consuming and sometimes a waste of materials..
or PUT TWO SHEETS OF PLYWOOD ON AN OLD WOODEN PALLET AND SCREW THEM DOWN TIGHT WITH FLAT HEAD SCREWS AND USE THE SHORT PINS.
The plans shown are suggested requirements to be able to construct a full range of Reef Ball sizes...in general if you are building heavier than normal Reef Balls you can get away with LESS WELL BUILT BASES, and if you are building lighter than normal reef balls you will need MORE WELL BUILT BASES (NOTE: THIS IS COUNTER INTUITIVE BUT IT IS BECAUSE LIGHT BALLS REQUIRE MORE AIR IN THE CENTER BLADDER THAT PUTS MORE PRESSURE ON THE BASES), and for long term projects these are often exceeded. Also note that higher slump concretes put more pressure on the bases than lower slump concretes.
These diagrams show various bases and will help you visualize how to make bottoms. If you find yourself standing on the edges, you can also re-enforce the overhanging plywood ledges with left over lumber. This is helpful on the larger Reef Ball where it is sometimes easier to work inside the mold from the platform. If you use 1/2 inch plywood, the re-enforcements are required for strength. (Bricks or cinder blocks can be used for temporary re-enforcement.)
After you have finished constructing the bases, look carefully for exposed nails, screws or splinters on the surface of your base. They can puncture the center bladder. Silicone glue will help cover screw heads. We do not recommend the use of nails as they tend to work their way up and can damage the center bladders.
Once your bottom construction is complete, you will need to put your mold together so it can be placed on top of your base to determine where to drill the holes for the pins. (NOTE: If you are "sandwiching" in the short pins, you will have to mark the holes for the pins and drill before you finish assembling your bases)
9
ATTACHING THE SIDE BALLS TO YOUR MOLD PANELS
We offer two different side balls, A-0 Polyforms and tether balls. Tether
balls fit the 1 1/4 inch holes drilled into the sides of the fiberglass mold
panels. Start from the inside of the mold and push the pin (bolt) attached to
the tether ball through the hole. From the outside of the mold, pull the tether
until the knob with a hole in it is 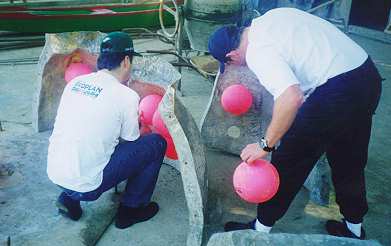 sticking
out of the hole. Put the pin through the hole in the knob and the tether is
locked in place.
sticking
out of the hole. Put the pin through the hole in the knob and the tether is
locked in place.
If you want to remove a tether ball to make a more solid wall, or if you are waiting on a replacement for one that has broken, just place duct tape over the hole on the inside and the outside. (Yes, that will really hold the liquid concrete in.) Polyforms need to be attached to the side panels. Polyform A-0s fit the larger 3-1/2 inch holes in the mold panels. To attach a Polyform, insert the top of an inflated Polyform (not over inflated, just with enough air to take the folds out of the ball) from the inside to the outside of the mold. Place a PVC collar around the knob from the outside of the mold and insert a hollow tube pin through the hole in the knob. It is helpful to have someone pushing on the Polyform from the inside to make insertion of the pin easy. A screwdriver for leverage and a hammer to tap the hollow tube pin is helpful.
HOW MUCH DO I INFLATE THE SIDE BALLS?
Tether balls are inflated with a needle valve and an air compressor. I
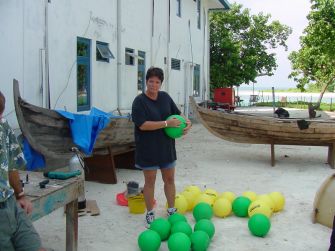
For mold use, the tethers should be at "normal" inflation
levels. Tethers should be soft enough to grab with one hand and you
should be able to squeeze the ball with one hand to make an indention. This
will insure an easy removal from the module.
If your mold has Polyform side balls, you don't need to worry about ease of removal because they are deflated before the mold panels are removed.
Polyform A-0s are inflated (to about 8-13 inches for the A-0) by unscrewing the screw caps and adding air by a compressor. The side Polyform balls have a one way valve in them so that they stay inflated even before you put the screw cap back on them. (However, always put the screw caps back on before casting because even a small leak can ruin the hole and perhaps trap the Polyform in the concrete.) Near the bottom of the molds, you'll want to inflate them a bit more to make sure the hole they create goes all the way through the module's wall. HOWEVER, ONCE YOU OVER INFLATE A POLYFORM, IT WILL DEVELOP A "MEMORY" AND WILL TEND TO INFLATE TO THE LARGER SIZE FROM THEN ON. If you want a large hole, you can put as much as 10% more air than normal to make them up to 14 inches across. Remember that it's a one way trip, so be sure that's what you want. WARNING: IF YOU ATTEMPT TO INFLATE A-0s TOO MUCH, THE VALVE MAY EXPLODE BACK AT YOU LIKE A BULLET. IT IS POSSIBLE TO GET MORE THAN 10 INCHES, BUT SAFETY PRECAUTIONS SHOULD BE TAKEN.
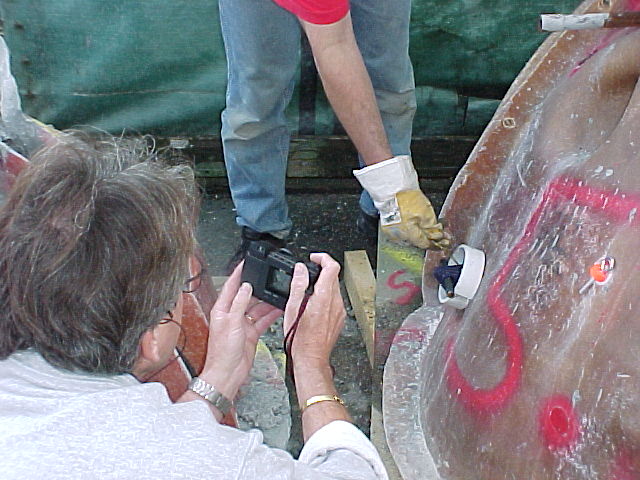
In order to let air out of the Polyform A-0s, just insert the
blunt deflation pins that come with your molds
(Don't use sharp objects as they can damage the one-way valve).
If you somehow manage to get a hole in one of your center bladders, Polyform does make a patch kit but it is doubtful (especially with Reef Ball or larger molds) that you will be able to use it again for center bladder casting...still it may be saved for marine bouy use.. If you need to get a patch kit, you should be able to find one in any local marine store that carries Polyform buoys. If you need to find the closest distributor to you, then call Polyform directly at (800) 423-0664. All of the folks out there in Kent, Washington are friendly and can help. We have also had some luck using Marine 5200 adhesive...any marine store should have it. Clean the hole well then scratch the surface with a knife. Then put one coat of 5200 on the hole with the ball deflated, wait 7 days, then inflate only to shape (not much pressure) and put a second coat. Wait 7 more days before using in your mold. They make a version of 5200 (Red) that sets up in a few hours...we have not tried that yet but it's probably a good bet if you are in a hurry to get back into production. We also usually put some Vaseline over the last layer of adhesive so that in the mold the concrete does not pull on it if you are going to try to re-use the bladder in a mold.
Note: A sales pitch for Polyform...In our development days we tried nearly everything possible for our center bladders. We even had custom lift bags designed to look like a space capsule. But, everything we tried failed. The lift bags leaked at all of the seams. We tried other buoys and they split at the seams every time. Then we found Polyform. Without a doubt, they make the toughest buoys on the planet. If you ever need a buoy for any purpose, then we highly recommend Polyform. (And by the way, they didn't pay us anything or give us any special discounts to say this...really.)
PINNING YOUR PANELS TOGETHER
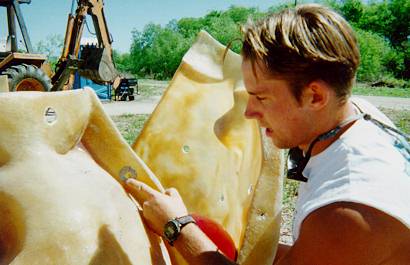 The first
step after the side balls are attached is to pin your molds together. New molds
are marked so that if you line up the "A" from one panel with the
"A" from the second panel, and so on, then your molds will be
together correctly. If they are used and the markings have faded, don't
fret--it's easy to figure it out since the holes will only line up one way.
Assemble the molds on a flat surface, preferably the new mold base you just
built. Put a washer on EACH side of the 3 inch pins and the insert the steel
wedge on the left side of the flange (right side if you're left handed).
Without washers on both sides, it is very possible to tear right through the
fiberglass flange during a pour. Don't tap the wedge in with a hammer until you
get the entire mold together. (If you do, then the last flange may be difficult
to get together without the help of another person because the mold is designed
to have some spring on it for easy removal from the concrete.) Now, go back and
tap each wedge down so the flanges are firmly together. (If you ever use a mold
vibrator or have to tap the molds excessively with a rubber mallet to get the
concrete in, then be sure and re-tap these pins afterwards because vibrations
can work them loose. But note we DO NOT recommend mold vibrators)
The first
step after the side balls are attached is to pin your molds together. New molds
are marked so that if you line up the "A" from one panel with the
"A" from the second panel, and so on, then your molds will be
together correctly. If they are used and the markings have faded, don't
fret--it's easy to figure it out since the holes will only line up one way.
Assemble the molds on a flat surface, preferably the new mold base you just
built. Put a washer on EACH side of the 3 inch pins and the insert the steel
wedge on the left side of the flange (right side if you're left handed).
Without washers on both sides, it is very possible to tear right through the
fiberglass flange during a pour. Don't tap the wedge in with a hammer until you
get the entire mold together. (If you do, then the last flange may be difficult
to get together without the help of another person because the mold is designed
to have some spring on it for easy removal from the concrete.) Now, go back and
tap each wedge down so the flanges are firmly together. (If you ever use a mold
vibrator or have to tap the molds excessively with a rubber mallet to get the
concrete in, then be sure and re-tap these pins afterwards because vibrations
can work them loose. But note we DO NOT recommend mold vibrators)
DRILLING HOLES IN YOUR BASE
Now set your mold on the base and center it up. You will need to drill holes in the middle of the oval hole in the hold down plates when they are spaced evenly and positioned tightly against the bottom of the mold overlapping completely the bottom mold flange.. Each mold size will require a different number of plates per fiberglass panel. The number of plates needed is as follows:
|
Super/Ultra/Reef Ball |
Pallet Ball |
Bay Ball |
|
4 (4") plates per panel |
3 (4") plates per panel |
2 (4") plates per panel |
|
(16 plates total) |
(9 plates total) |
(6 plates total) |
|
OR |
||
|
3 Triangular Plates per panel |
2 Triangular Plates per panel |
1 Triangular Plate per panel |
|
(12 Triangular plates total) |
(6 Triangular plates total) |
(3 Triangular plates total) |
NOTE: Triangular plates are heavier, but require a bit less labor. Determine which style you have before drilling your bases. Also, note with weaker bases you may need more plates, with stronger bases you might be able to slide by with less plates.
Mark your drill locations with a pen to be evenly spaced around the mold. Watch out for cross beams underneath your surface where you can't drill. Make sure you can reach your hand underneath your base to insert a 3 inch pin from the bottom after you drill. Put a plate over the marked location and make sure plywood is underneath the entire plate (do not let it overhang the plywood). DO NOT MOVE THE MOLD OFF OF THE BASE OR EVEN TURN IT YET. (You have to mark the position on the base with paint in a later step before it can be moved.) Now drill with a 1/4" inch bit midway in the oval shaped base plate hole to allow for minor adjustment later. After you finish all the holes from the top, turn your base over and use the 1/4" hole to countersink about 1/4" deep the same size as the washer that fits the 3" pin (1"). Next, turn the base back over and redrill the 1/4" inch hole with a 5/8" drill bit. Do not work the bit around a little bit to make the pins easy to insert, you want a snug fit. (Note: for single sheet bases, you can just drill the 5/8" hole directly in the middle of the ovals in the plates...make sure the plates are flush against the mold overlapping the entire mold seam and don't wallow out your 5/8" hole so the pins fit tight.)
NOTE: If you don't need to share the pins with additional bases, we have found it is easiest to secure the pins permanently to the base....use some plumbers strapping on the bottom of the base or wooden patches to lock the pin into the base. Make sure it is strong enough so that if someone happens to step on a pin sticking through the base it does not fall down into the base.
PUTTING THE HOLD DOWN PLATES ON THE BOTTOM FLANGE
Next, secure your mold to the base by putting a hold down plate on each 3 inch pin that you insert from the bottom of the base so that it is sticking up from your base. Depending on the thickness of your bottom (i.e. if you used 1/2 inch plywood), you may need to make some "square washer spacers." Just take some leftover plywood and cut it in into 3 inch square pieces. Then drill a 5/8 inch hole in the center. Slip the spacer over the 5 inch pin before you put it up through your base and the plate slot for the plate wedge will line up above the plate so you can get a snug fitting plate. You can make minor adjustments with the supplied washers. Always make sure there is at least one washer on the bottom of each pin to keep it from pulling through the plywood.
Put a wedge without a washer in the pin and tap it in tight. You may need to stand on the bottom flange in order to get the wedge in. (The bottom flanges are designed with spring built in too for a good seal.) Keep the wedge facing sideways so you can undo it with a hammer when you take the mold apart after casting. Your mold and base are now "fitted," and the last step is to mark the position the molds should be placed on the base for future uses. Just take a can of spray paint, and mark a line from the base to the mold panel (don't be afraid to paint the mold, it's just a concrete mold that will look like a gray concrete stain soon enough anyway...If your press coordinator wants a pretty picture, you better let them take it now). We like to use a different color for each side for easy mold set up. (We never did like looking for those stenciled "A" and "B" markings anyway.) Just use what works best for you to know where to place your mold on your base.
IMPORTANT TIP:
The paint markings will fade over time with concrete use. They need to be redone on a regular basis. It is important to mark the molds in a way that the concrete cannot fade them so that molds can be repositioned accurately for future painting. So, take a 1/4" drill and drill a hole in the bottom flange on panel one with a hole in your base right beside this, got to panel #2 and drill two holes in the flange and the base and so on....now your molds are marked in a way that concrete will not affect them. You can do the same thing for A A , B B, and C C to make putting the molds together after a long time easy.
TRIMMING THE BASE
Now, you may optionally trim your base along the trim lines shown in the base construction graphics. Make sure the hold down plates are in place when you do this step to avoid trimming too closely. This step does three things. First, it lightens the weight of your bases. This makes them easier to move around if necessary. Second, trimming the plywood puts less stress on the edges if people try to stand on the base while working with the molds. And third, you don't hurt your ankles and legs by running into sharp pointed edges.
Setting up your Attachment Adapter Plugs
Reef Ball mold systems now come standard with attachment adapter plugs.
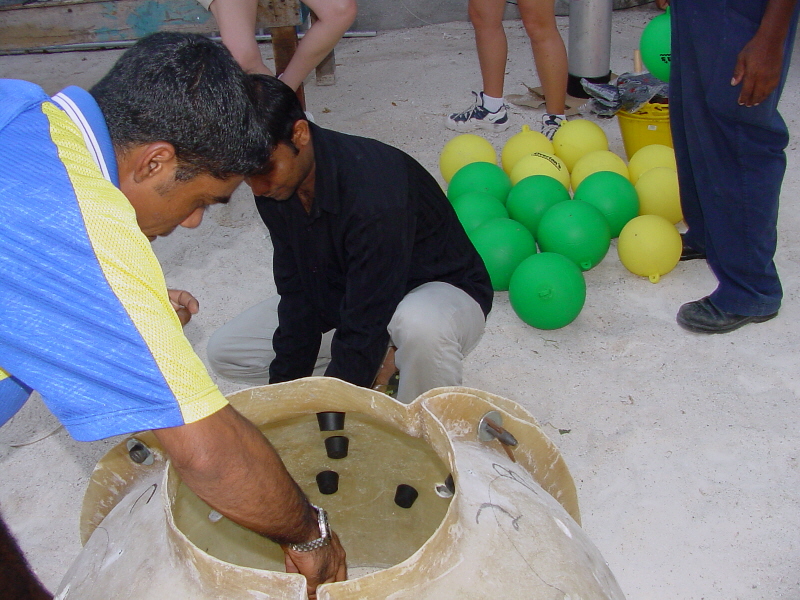

They are basically rubber stoppers screwed into your molds to make an indentation for underwater attachment of corals, signs, markers, or other objects that need to be added to your Reef Balls once they are underwater. Even if you don't plan on using them underwater...do it anyway because it costs you nothing and someone might want to add something to your Reef Balls in the future. You can put them in different places on every mold, but avoid placing them at an angle to demolding which will cause them to fall off when you demold. If one falls off during the first demolding, move its location. They are designed to pull free from the screw if too much pressure from the demolding process is exerted. To attach them to your mold you must first prepare the rubber stopper by drilling a 1/4" hole into the center of the rubber stopper. Next, break of the self taping tip of the placed dry wall screws and screw the drywall screw into the rubber stopper. Finally, drill a 3/8" hole in your mold where you want the rubber stopper to be placed then use the included screws to screw from the outside of the mold into the drywall adapter in the rubber stopper.
ADDING SAND & SUGAR!
Now mix up a solution of 1 cup sugar with a quart of warm or hot water. Put it in a spray bottle capable of making a fine mist. (We suggest a tight fitting cap to keep ants away.) Mist the inside of your mold but there is no need to mist the the side balls or center bladder. Make sure you get 100% coverage on all the inside fiberglass. This is easiest when the molds are apart.
[A garden style sprayer or air powered paint sprayer works fastest....another tip is to bend the end of the garden sprayer into a U shape so that you don't miss the underside of the fiberglass below the side balls and built in "Chickens"]
A nice, even, coat everywhere will keep your new Reef Ball from sticking to the mold and will give your Reef Ball a nice looking surface. Try to put the sugar water on in time to let it dry. You may need to add sugar again if it rains hard before you cast.
.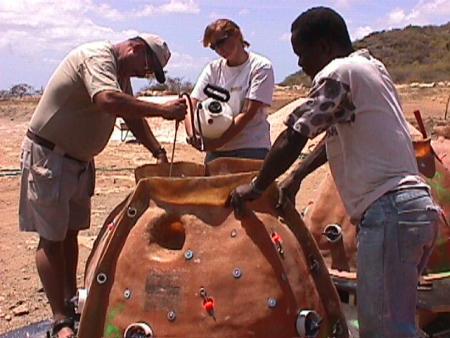
Next, put several shovels full of sand in the bottom of the mold.
1st, push a little sand around the edge of the mold where the plywood base meets the mold to help seal it from liquid concrete leaking.
2nd, make irregular mounds, often connected to the side wall for habitat for lobster, starfish, crabs and other ledge and bottom dwellers....you can do more and more in larger and larger sized molds. In Reefs and larger, the patterns should be quite extensive.
3rd Make sure there are at least 3-4 places near the edge of the mold where you can still see plywood. This makes sure your modules come out at full height. Visualize these low spots as "legs" for your reef ball and make sure they will allow the unit to site evenly on the ocean floor.
ADDING THE CENTER BLADDER
The Super Ball used a Polyform A-7 the Ultra and Reef Ball uses a Polyform
A-6; the Pallet Ball uses an A-5; the Bay Ball uses an A-4, the Mini-Bay
Ball uses an A-3, the Lo Pro Ball uses and A-2 and the Oyster Ball uses an
A-0). Look just below the neck of the bladder to find this number. Make sure
you are using the right size bladder for the mold. 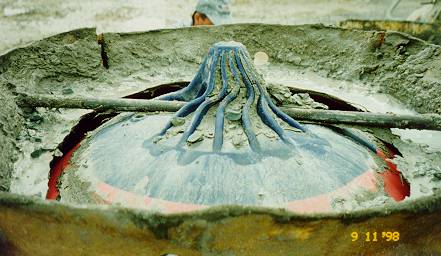
(Hold down bar)
Put the hold down bar through the hole in the top of the center bladder (a short bar for the Bay Ball or a long bar for the Reef and Pallet Ball). Make sure the bladder is deflated before you try to insert it. Put it into the mold, from the top, and position the hold down bar through the hold down bar holes. (After you have set your molds up for a while, you may find it easier to put the center bladder in before you pin the last panel together. This way you don't have to deflate the bladder all the way to insert it. If you use this method, make sure you put the sand in the mold first before you insert the bladder.)
Another tip, especially for the larger units is the lay the hold down bar flat across the top of the mold but not in the holes when you first start inflating it...when it is round, drop it down into the holes...this way, it is easy to make sure the bladder is centered in your mold.
READ THIS PARAGRAPH AFTER YOU HAVE MADE 5 SUCCESSFUL POURS , OTHERWISE SKIP THIS PARAGRAPH
TOYS.....TOYS....TOYS
Now is the time to play. Get out your texture balls or whatever else you are going to use to make interesting holes. Here is a list of some things we have tried, just remember to use non-toxic stuff and to keep a list of what you put in each mold so that you don't forget to find the items. Note: This is necessary for any latex product because turtles try to eat things like balloons (They think balloons are jelly fish) and it can kill them!
Texture balls, Boat fenders, Inflatable pet toys, Peppermint sticks or candies (Go easy, they make a bigger hole than their size), Dog food, Sand inside a brown paper bag (Great for lobster holes at the bottom of the mold), Blow up snake toy (Great for Moray Eel holes), Rubber door mats on the mold walls (Makes neat looking textures--like brain coral), Basketballs, footballs, beach balls etc. Balloons (Only helium grade and then only in the top--too deep and they will collapse), Surgeon's gloves (blown up and tied off, also only near the top), Wooden board (pinned between two side balls then removed with a hammer) makes a great plaque holder. Use your own creativity!
Here are some specific ideas for biology:
Octopus Dens: Make a 1" hole in your mold about 6 inches from the base. Get a wooden "dowel" (Often found at boat shops to plug leaks or make your own) and plug up your hole leaving wood sticking inside your mold. Get a GLASS soda bottle and fill it with water and then stick it onto your Dowel...make sure the mouth of the bottle is very close to the mold surface. Also, make sure it is in a location where the bottle will be fully covered in concrete (not touching a side ball). When you demold, take out the dowel before removing the sides. This will make a perfect hole for a female octopus to lay her eggs. You will know you are successful if when you dive your reef you see crab shells and other shells in front of the hole from where she has been eating.
Lobster Holes: Use sand in the bottom of your mold making mounds that touch the mold side and go back about 6 inches then turn to the right or left for another 6 inches...this makes caves in your reef ball that lobsters love.
Thick/solid Bases: Put a brick (6-8 inches thick) in the center of the bottom of your mold...this will keep the center bladder from going all the way down. This makes a solid bottom (good for areas where settlement is an issue) and then you can amplify your sand in bottom work to get even more complex bottom shapes.
NOTE: Be careful when placing too many extra holes in your Reef Balls for what we call "SHEAR LINES." If you make a continuous line of holes around the mold, then the top will simply fall off when you open your mold. In our early days, before the side balls were attached to the molds, this was our worst nightmare. Now, you just have to think about the placement of your extra "toys." Also, avoid placing "toys" in the "structure arms" of the Pallet Ball and the newest Reef Ball molds. "Structure arms" are the humps near the top of the mold that are intended to give the Pallet and Reef Balls extra resistance to anchor strikes and barge style abuses.
14
NOW IT'S TIME TO INFLATE THE BLADDER.
First, do a visual check to make sure all side balls are attached, inflated and sealed; that sand is in the bottom of your mold; that all hold down plates are secured and side flange pins are tight. Did you remember your surface retarder (sugar water)? Is the hold down bar in place? Okay, before you put air in the bladder, turn it so the inflation hole is not directly under the hold down bar. (This is important for both the Pallet and Reef Ball bladders since the hole would naturally line up with the bar--just twist the bladder a few inches to one side BEFORE you put air in the bladder.) As the bladder is inflated, you can move the side balls around a bit to get just the hole pattern you are looking for. Sometimes you can pull two side balls together to make an interconnecting hole that fish love. You can even pull three close side balls together for one large hole (great for large fish). As you inflate the center bladder, put in your "toys" so they stay pinned between the center bladder and the walls of the mold. Just before the center bladder is full, slide in your chickens. If you are working alone, some people
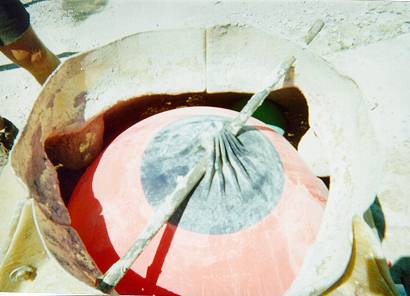
(This center bladder is UNDERINFLATED)
put a tie wrap around the chickens and secure them to the top pin in the molds (this must be done as you pin the mold together). Alternately, just rest your chickens on top of a side ball. Make sure your chickens do not stick out above the hole in the top of the mold or removing the center bladder could be difficult. As soon as your chickens are pinned to the walls, but can still be wiggled just a bit, then your bladder is full. For the Bay Ball, your chickens should be about as thick as a standard brick on its thin side (About 2 inches). For the Pallet Ball, your chickens should be about as thick as a standard brick on its thick side. (About 3 1/2 inches.) For the Reef Ball, your chickens should be about as thick as two standard bricks on their thin side (About 4 inches). In general, use a thicker chicken when the concrete is less than recommended strength, and thinner chickens when you are using stronger than specified concrete. (If you are using large aggregate sizes, then stick with thicker chickens.)
BEFORE POURING THE CONCRETE
Before you order the concrete truck, you should arrange the molds on the staging area so that it is easy for the trucks to come in and pour. Line all of the molds that you have up in one or two rows from the largest to the smallest. (This way the truck can just ease forward after finishing a mold, and if you run out of concrete it won't be as likely to be an incomplete pour with the smallest molds last.) Don't forget to turn your molds so that a forklift can pick them up easily if needed. It's also helpful to locate the molds near a source of water and electricity...bathrooms are nice too. Make sure the concrete truck driver is on the same side as the molds being poured for maximum efficiency.
FIGURING OUT HOW MUCH CONCRETE TO ORDER
When you order your concrete, you must not only give them a specification sheet (attached as Appendix C or call W.R. Grace), but you must tell them how much concrete you want. Here's the rule of thumb for standard sized modules: For each Bay Ball add 1/8 th of a yard of concrete. For each Pallet Ball add .4 of a yard of concrete. For each Reef Ball add 8/10ths of a yard of concrete for Ultras add .9 for Supers add 1.4. If it's your first time, you might error on the high side. Remember, you can influence the amount of concrete your molds require, so your actual usage may be up to 30% less or up to 50% more.
Metric Hint: Go to www.artificialreefs.org under technical specifications to get the measurements in Metric.
POURING THE CONCRETE
Before you pour, make sure you are wearing safety glasses, rubber gloves, old clothes and a hard hat; have a rubber mallet or two handy, and have a plastic trowel available to direct the concrete flow. The first step is to talk with the driver of the concrete truck to work out a set of hand signals about when to start the flow of concrete, when to stop the flow, when to move to the next mold and what signal to use for raising and lowering the concrete trough. Just a few minutes of conversation, especially with a new driver, can save a big mess. Make sure the concrete mix has a 7-9 inch slump (for smaller molds) and 5-7 inches for Super or Ultra Molds...do this. by having the driver put the first bit of concrete in a bucket rather than the mold. If the concrete does not flow quickly and easily to your satisfaction, have the driver add more Superplastisizer (Adva Flow). Never let a truck come for delivery of concrete without extra Superplastisizer (Adva Flow) on hand or keep some on site for yourself. (If you put thick concrete in the top of your mold without checking, it may clog the mold and make it impossible to continue the pour.) Now, have the trough positioned about 2 inches above the knob sticking out from the center bladder. (Never allow the trough to touch the mold, or to be so high above the mold that you get splashed in the face with wet concrete. Remember that the trough will sink about an inch and a half by the weight of the concrete when the pouring begins). Aim at the knob so that you can use the plastic trowel to direct the concrete flow around all sides of the bladder. Signal your driver to begin the flow...slow at first...then faster as you see the concrete flowing well. Don't let all the concrete flow to one side or the center bladder will shift and you will have uneven sides. Just before the mold is full, stop the flow and gently tap on the hold down bar with your rubber mallet (DO NOT BEAT ON THE MOLDS WITH ANYTHING OTHER THAN A RUBBER MALLET, OR YOU MAY DAMAGE THE MOLD) to help the concrete settle. If you see or hear voids in the mold (a hollow sound when tapped with the mallet), just tap on the mold at that point. You don't need to "over tap" the concrete because the irregularity of concrete that is not fully tapped into the mold makes very interesting textures and holes that are excellent for reef life. With experience you will get the concrete mix just right and not even need to tap the mold at all...this is actually ideal for the molds and the biology of Reef Balls and should be your goal.
15
After tapping, add a little more concrete (up to the level
of your chickens or about 6 inches below the hold down bar), and then move to
the next mold. After all of the pours are complete, go back and re-tap the
molds to make sure that the concrete leaves a large hole around the top part of
the bladder.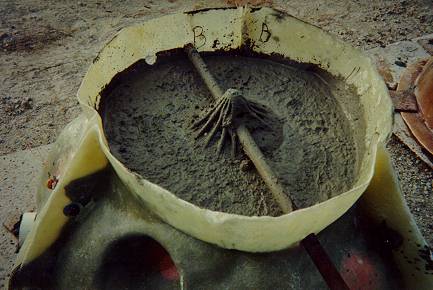
(This mold is filled up correctly, but make sure you can still get to the deflation valve on the center bladder)
This makes removal of the bladder easy. If excess concrete covers the bladder, remove it or push it up the walls to create a little extra height in the modules. Make sure the inflation hole is clear so it is easy to get to once the concrete hardens. This is a good time to check the screw cap in the center bladder to make sure that air is not leaking from the inflation valve now that pressure is on the bladder. A little bit of dish washing detergent and water on the valve will show any leaks as bubbles. Now, get out the garden hose and rinse the concrete that spilled out of the mold. This is much easier than cleaning off hardened concrete the next day--trust us. NOTE: Most concrete trucks carry a hose and water on board, and, if you are nice, they will usually let you use it.
When pouring, you may hear a few "popping" sounds. This is normal, especially with new molds. Inspect your molds often, and if you suspect weak spots are developing in older molds, then just hand lay up a fiberglass patch to the outside of the molds.
Do you still have concrete left over? If so, you can deflate a center bladder a bit and add more concrete to make heavier modules if you are using a barge deployment style. You can also make small forms for your chickens and make chickens for your next casting. (We make our chickens with a piece of string hanging out so that we can tie our chickens to the top pin when we put our molds together. This way it does not take two hands to inflate the bladder and hold the chickens in place.) It's always a good idea to have the driver pour a bucket or two of leftover concrete for you in case you find a void in the mold that needs filling after the truck has left.
Another idea is to create "Reef Forms"...just make molds in your sand pile to make small reef features that can be added to the inside of your Reef Balls for added complexity.
LETTING THE MOLDS CURE
Curing time varies greatly depending on the concrete mix, wall thickness, outside temperatures and use of accelerators. Ask your concrete supplier for recommended hardening times. In general, about 7-12 hours is required when no accelerators are used and temperatures are at least 70 degree Fahrenheit. With accelerators and warm days, as little as 3-4 hours is possible (we say possible, but it takes some skill). In cold climates, 24 or more hours may be required. If you are using accelerators, or if the weather is very hot (over 90 degrees or your molds are in direct sunlight), then we recommend letting a two second burst of air out of the center bladder at about 2-6 hours after the pour. (When the concrete reaction begins and the molds begin to generate excess heat.) This is because the center bladders get hot and the air in the bladders tries to expand. This can cause cracks in the concrete near the mold seams--especially with high microsilica mixes.
If you attempt to open the molds with minimal setting times, you may wish to take the pins off the side balls to accomplish a more gentle demolding. This costs set up time but can allow earlier demolding) In general, the earlier you can demold without breaking your balls, the easier it is to demold and the longer your molds will last.
OPENING UP YOUR MOLDS
Look at the concrete at the top of the mold. Is it hard, and not crumbly
when you break off a piece and squeeze it? Feel the mold. If it is still very
hot, it's probably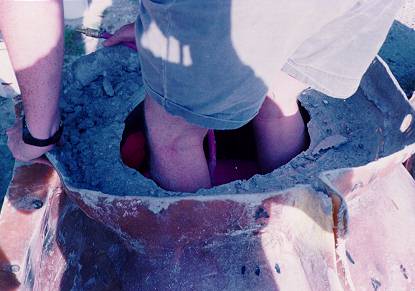 too soon. If everything looks good, then the first
step is to deflate the center bladder. Deflate it so that
there is no pressure on the side walls or side balls, or you may break your
reef ball when opening it. We use a wet/dry shop vacuum with the vacuum hole
closed off and standard pneumatic air lines fitted in its place to make
deflation of the center bladders fast in commercial production. (Reef
Ball Tool Kits come with Stinger Vacuums) You can also deflate by hand or even
by standing on the bladder. (However, once you gain a little experience,
you can leave just a little bit of pressure on the side
too soon. If everything looks good, then the first
step is to deflate the center bladder. Deflate it so that
there is no pressure on the side walls or side balls, or you may break your
reef ball when opening it. We use a wet/dry shop vacuum with the vacuum hole
closed off and standard pneumatic air lines fitted in its place to make
deflation of the center bladders fast in commercial production. (Reef
Ball Tool Kits come with Stinger Vacuums) You can also deflate by hand or even
by standing on the bladder. (However, once you gain a little experience,
you can leave just a little bit of pressure on the side  walls so the molds will pop open
themselves when the side pins are removed. But don't try this until you have
made at least five good castings.) Look inside at the concrete...still look
firm? Good. (Don't be fooled by the sugar's effect on the surface which may
still appear like uncured cement.)
walls so the molds will pop open
themselves when the side pins are removed. But don't try this until you have
made at least five good castings.) Look inside at the concrete...still look
firm? Good. (Don't be fooled by the sugar's effect on the surface which may
still appear like uncured cement.)
Next, remove the hold down plates by tapping out the wedges. (It's
good practice to put them in a plastic bucket as soon as you remove them.
Regardless, about every 10th use, apply a coat of WD-40 or other protective
lubricant to reduce rusting and corrosion.) Next, remove the pins from all of
the tether balls (after you have had experience, it is normal to leave tethers
pinned because they flatten out so much that they pop out of the concrete with
ease) and remove the screw caps from the Polyform side balls.
Insert a blunt pin in the hole to let the air out.
If you forget this step, then the mold panels will not come free from your module. Now remove the side pins, washers and wedges and put them in your plastic bucket for WD-40 treatment. Work around the mold in the same direction and remove the panels as you go. To remove the panel, gently pull on the mold. If it does not easily break free, use a plastic wedge or screwdriver and tap it with
16
the rubber mallet between the mold seams (side flanges). Slowly pull away the panel, making sure to feed the tether ball pins through their respective holes. You may have to stick your hand around the mold to free up stubborn Polyform side balls, especially ones that did not have too much air in them. The key is to be gentle so that you don't damage the side balls or the green concrete. Once all of the panels are removed, you may begin to remove the remaining tethers from the concrete module. Put the pin back into the knob and pull on the pin rather than the knob to remove the tether. Tapping on the edges of the holes with a rubber mallet will help open up the holes for stubborn tethers.
If you demold early enough, this won't be an issue and all the side balls will stay attached to the mold for quick re-setting times.
EXPOSING THE SURFACE TEXTURES
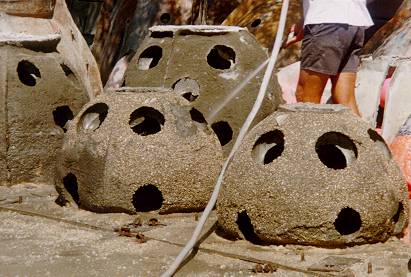
(Above foreground shows proper texture after sugar water is applyed and the ball is rinsed directly after demolding. Background shows balls just about to be rinsed)
Now, take a garden hose and rinse the module down with water. As you rinse, the sugar water allows the top layer of concrete to be removed, exposing the underlying rocks in the concrete. Be creative and sign your name if you like--(after all, you are the one saving the ocean). Any surface that you don't rinse will be hard in about a week, so you can experiment with stamping or shaping the surface any way you like. Don't forget to remove any "toys" you placed in your mold. A hammer will help you get hard to retrieve "toys" out of the concrete.
RESETTING UP YOUR MOLDS FOR FAST TURNOVER
You should let the module continue to harden as long as possible while still on the base before removal to reduce the chance of breaking the modules. (Concrete will continue to develop strength as long as the humidity is above 80%. So, it's a good idea to cover the module with plastic if it's not raining outside. Alternately, you can wet the module down with water every few hours to get quick strength.) Many of our customers build two bases for every mold--that way you can go ahead and set your mold up on the next base as you de-mold the first modules. This gives the modules an extra cycle before they are moved off of the base. Extra bases are a necessity if you are using accelerated mixes and expect a 3-4 hour turnover rate. They are also required in colder environments for rapid turnover.
MOVING AND STORING YOUR MODULES
For Reef Balls, we recommend at least a 4 inch wide sling and a large
forklift or back loader to pick the Reef Ball up from above.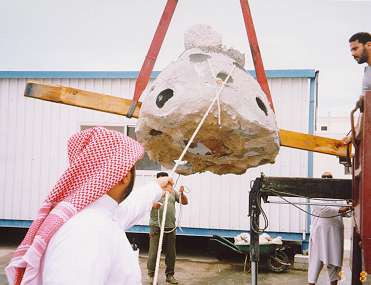
(Not the easiest way, but a useful techique if your lifting straps are too short to make a double loop).
Whatever you use, make sure the equipment can handle6000+ plus for the Super Ball, 5000 lbs+ for the Ultra Ball, 4,000+ pounds for the Reef Ball, 2,500+ pounds for the Pallet Ball and 600+ pounds for the Bay Ball. NOTE: A sling is almost three times as strong if it is attached at two points (both forks) rather than just a single point. Always use the bottom most holes for the sling (on any sized module). For Pallet Balls, a standard forklift can get under the module, or four people can even lift up the bottom, turn the unit on its side and roll it across the field. Three or four people can lift a Bay Ball and move it around too. It's easiest to lift up the base until the Bay Ball slides off before you move it. This way you are not fighting the concrete that sticks to your base. Whatever you do, never get underneath a module being moved AT ANY TIME.
Never pick up a module by the holes in the top of the unit or breakage and possible falling concrete hazards will occur!
Store your modules where they will be exposed to at least 80% humidity. A plastic tarp, sprinkler system or pond is excellent during storage. Black plastic in the sun can create a "forced cure" environment and can greatly reduce the curing time needed before deployment...this is highly recommended. At least leave them in the weather for the occasional rain. Avoid direct sunlight that can dry them out and stop the curing process unless you have plastic around them. You can cure them in saltwater too, but try to to cure them were barnacles and other high pH resistant animals can not colonize and keep future coral off the Reef Ball.
17
ENGRAVING OR MARKING YOUR MODULES
Most of our clients undertake some form of monitoring program to assess the success of their reefs. This is the main reason to add identification numbers to your modules. Other clients like to add things like their name, a company logo, or even a dedication to a loved one. Many techniques are available to mark your Reef Balls, but here are a few very simple ways that work:
--Purchase a concrete stamping engraver set. Just pick out the letters and punch in your message with a hammer. A light coat of anti-fouling paint will help keep marine life a bay so you can read your message. We have arranged a special deal on engraver sets for our clients through Ziegler Tools Inc. Just call and ask for Jerry Shackelford and he'll help you. The most often ordered sets are as follows:
3/8 Numbers Set, #08091 for $19.13 3/8 Alpha Set, #08271 for $57.38 1/2 Numbers Set, #09091 for $28.38 1/2 Alpha Set, # 09271 for $85.17
These prices reflect a 25% discount that Ziegler Tools Inc. is offering to Reef Ball customers. The contact information is as follows:
Ziegler Tools Inc. ATTN: Jerry Shackelford 711 Marietta Street, NW Atlanta, GA 30381 U.S.A.
From Georgia call (800) 282-5111 From Zone 1 call (800) 241-4555 or call (404) 892-7117
--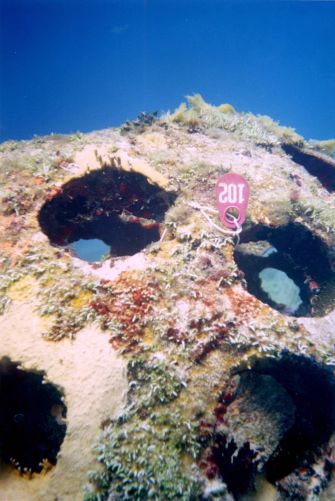 Have a plaque made up and attach
it before deployment. A concrete drill bit will make suitable mounting holes.
Be sure to use stainless steel bolts. (Brass plaques don't need anti-fouling
paint.)
Have a plaque made up and attach
it before deployment. A concrete drill bit will make suitable mounting holes.
Be sure to use stainless steel bolts. (Brass plaques don't need anti-fouling
paint.)
--Engrave (use your stamper) the hollow PVC pipe used as a chicken to make the module show up on sonar. (Use anti-fouling paint.)
--Spell a message with your fingers (wear a glove) in the top part of the mold while the cement is wet (it won't last long, but if you are lucky your message will appear with a different assemblage of marine life than the surrounding cement). A sharper message can be made about 4 hours after pouring by using a screwdriver to scratch in your message.
--Use a rubber mold in the Reef Ball mold to put a logo (like in the picture below) or other large message on every module that you produce. Rubber molds are available from Increte Systems at (800)-752-4626. Ask for Mike Richey. They charge about $150-$200 for the first "master" and $10-15 for each rubber plate afterwards. These folks can also make complete mold inserts with any texture or logo you desire, but they may cost a few thousand dollars for the master. You can also make them yourself by carving the image in a block of wax (you can get at any hobby store) then pour 2 part urethane rubber into the wax mold to make your insert. Attach this to the inside of your mold and it will come out like the picture below.
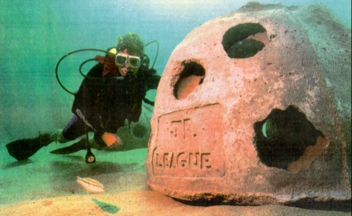
--Add markers via the Attachment Adapter System
Whatever you try, it is helpful to scientists if you include the date of casting, the date of deployment, special material composition (microsilica for example), and a contact name and number. ID numbers and an associated log of all the facts you can gather are also extremely beneficial. Remember, even if you never plan to study your reef, others might. After all, Reef Balls are the first standard design for artificial reefs being built world-wide on a large scale basis, and they will be around for centuries for future scientists to study.
We also recommend that you take a standard concrete cylinder with each concrete pour so you can check quality control later if you have any breakage or problems. Contact your local cement company for procedures used to document and test concrete.
DEPLOYING YOUR MODULES
There are many ways to deploy our modules. Some use floating deployments; some use a barge with the center bladders in place; some just throw modules over the side and let them land where they may.
Barge Deployments
We have learned that the ending position has much to do with the starting
position for barge deployments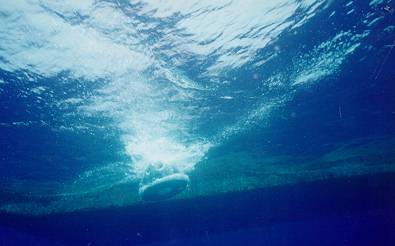 .
.
(Correct water entry for free falling deployment)
For the maximum percentage to land "bottom down" use a
"Pelican Release Hook" and lower the unit slightly into the water
before releasing. If you add a fully inflated center bladder you get 100%
bottom down each time.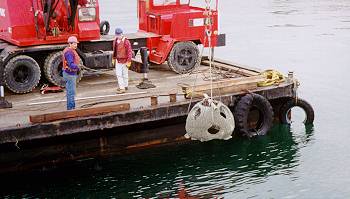
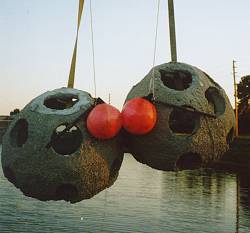
Look closely at the above photo and you will see one method to lower balls all
the way to the seafloor and then to have them release. Release is
accomplished by pulling on the smaller rope which is attached to the pull rod
and buoy. The buoy is to float the pull rod back to the surface.
The main lifting strap has a loop in the end into which the pull rod is
inserted...gravity and pressure holds it in place. When on the bottom,
gravity and pressure is removed so it is easy to pull the rod out of the loop
and thus both lines are returned to the surface.
How you deploy from a barge will largely depend on what type of equipment is on the barge.
Cranes: Best to lower the units to the bottom if you have enough cable. Spreader bars can allow for multiple units to be deployed in specific patterns. Common patterns are linear and star.
Front end Loaders: Best to use a Pelican Hook setup and lower the units over the side of the barge until the bottom of the Reef Ball is just touching the water then do the quick release with the Pelican.
No Equipment: Come-a-longs or round PVC pipes/pilings as rollers can be used to offload. You will typically get a higher percentage of balls the don't land upright with this method unless you leave a partially inflated center bladder in each unit to be retrieved by divers later. You can also upright balls on their side with divers using lift bags.
Winches: Same as Front End Loaders.
Call us with specifics about your deployment and we can offer suggestions based on our experiences with whatever equipment you have available.
19
FLOATING DEPLOYMENTS
Floating deployments require modules with higher strengths to make sure
modules do not break during transportation and end up in the wrong place. The
units must also be made with thin walls if you want them to float easily. At
their standard weights, the modules should just barely float. If your units are
over the standard weights, an additional buoy or two tied to the bottom of the
unit for extra floatation will help. (This may be required in fresh water since
the specific gravity of fresh water does not provide as much lifting forces.)
Tow your units with heavy line to avoid line breaks. Keep the units in close to
the boat when maneuvering around the docks and out the channels until in open
waters. Always have a surface buoy marking the towed units so that passing
boats will not accidentally run into the modules. When you arrive in open
waters, tow them away from the boat to avoid propeller wash drag. You will save
gas by towing the units slowly (about 2 knots). They take exponentially more
power to go faster, and they take about the same amount of power if you are
towing one or ten. Don't attempt floating deployments when seas are above 2-3
feet, in poor visibility conditions or if a storm is brewing. You must tow them
further than the depth of the water, or use a quick release knot on the boat so
that if a bladder were to somehow deflate, the line would not break the cleat
on the boat. When using divers, deflate the bladder until the unit is almost
ready to sink over the intended site. Some clients like to anchor the floating
units first, then sink them to insure proper placement. Climb onto the unit to
make it go down a few feet and then the water pressure will continue to make
the bladder smaller so the unit will sink. DO NOT HANG ON TO A BALL WHILE IT IS
DESCENDING. The accelerating speed is not one that Scuba divers are used to,
and ear damage may occur. Wait until the unit is on the bottom before moving
it. DO NOT EVER GET BELOW A FLOATING UNIT. Once on the bottom, 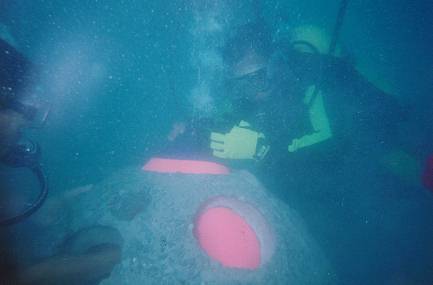 remove your
fins (and attach them to your BC--never part with your fins underwater), and
then pick up the ball and move it to the desired location. Another way to move
the unit is with standard lift bags. Once the units are in position, continue
deflating the center bladder. Push, using feet or arms on the bladder from the
side as it deflates to make sure the bladder does not form a
"mushroom" shape. This shape makes removal difficult.
remove your
fins (and attach them to your BC--never part with your fins underwater), and
then pick up the ball and move it to the desired location. Another way to move
the unit is with standard lift bags. Once the units are in position, continue
deflating the center bladder. Push, using feet or arms on the bladder from the
side as it deflates to make sure the bladder does not form a
"mushroom" shape. This shape makes removal difficult.
Another way to deploy the unit without divers is to attach a second bladder (of the same size as the internal bladder) to the top of the internal bladder. Then simply remove the cap from the inflation hole of the internal bladder and the unit will remain on the surface until the internal bladder is deflated and removed by the force of the unit pulling down. The unit will descend to the ocean floor without a bladder in it. Because the Reef Ball is already bottom down, this method has a high percentage of perfectly landed modules.
For long hauls, or when it is desired to tow several units at once, we recommend that you space the balls with 2 by 4 boards that are eight feet long with a hole drilled about 4 inches from each end. Tie your towing ropes through the 2 by 4's, but don't put the stress on the wood. You can still bring the units in close for maneuvering by "folding" them with lines on your furthermost units. Once at sea, let them out for faster towing. Covering each ball with a tarp, or using a long tarp attached to the tow line with floats on each side and a weight in the back will reduce drag to increase the maximum towing speed. With these techniques it is possible to get up to a five knot towing speed, but 3-4 is more efficient. Just as captaining a boat requires thought, so do floating deployments...be careful and think!
20
DEPLOYMENT REPORTING-Reef Ball Foundation Grant Participants
Reef Ball Foundation grants specify that you must report to the Reef Ball Group how many modules you deploy and when you deploy them. Reef Ball Foundation contracts also call for at least two video or photo monitoring events per year for 3 years (or other types of monitoring when video work is not practical). Don't forget to send us this information, or you may be charged for the fees that were waived in exchange for the monitoring and reports. We encourage all of our clients, even the non-grant recipients to send us any monitoring reports for our files and posting to our websites. It is only by a sharing of information that we call all learn who to better build reefs.
DEPLOYMENT PATTERNS
A question often asked by our clients is how to space the balls on the ocean floor. The answer is...IT DEPENDS. First, ask yourself, why are you building a reef? Fishing? Scuba Diving? Environmental Enhancement? Breakwaters? Lobstering? To Restore A Damaged Reef? Obviously, we recommend that the first step is to look at the natural reefs in the area and to try to mimic them. Mother nature often knows best. This is a long topic which scientists are just beginning to study. Remember, however, the more varied the reef, the more likely you will achieve our goal of species diversity.
One thing we have observed is that humans like to see things well organized (i.e. patterns) whereas fish don't care. What seems to be important to fish and marine life is the DENSITY of the deployment over a given area. This can depend on what is near the site (i.e. other reefs, sand flats, estuary systems, etc.). Dr. Bill Lindberg at the University of Florida has done some good work on density in relation to Gag Grouper. He is a good resource for fielding questions about density.
Another observation we have is that clusters tend to offer additional habitat for fish in that they use the area between the reef balls just like the inside of the Reef Balls.
So, our best recommendation is to determine what density is appropriate for your area then to randomly deploy clusters of Reef Balls until that density is met. Clusters range from 3-100 units typically. Even here, we suggest random cluster sizes.
Anchoring Systems:
NOTE: SEE APPENDIX F: FOR EVEN MORE ANCHORING OPTIONS
There are several methods used to anchor Reef Balls when they are used in high energy areas in less than 20 feet of water. First, note that you probably don't need anchors if you are deploying deeper than 20 feet. And you may not need anchors in less than 20 feet depending upon the bottom type (sand or soft bottoms are more stable than hard bottom when it comes to movement) and wave climate. Contact us for a recommendation to anchor or not to anchor and we will help you make an intelligent choice. If you choose to anchor your Reef Balls, there are a variety of methods. Double helix screw anchors are ideal for sand bottoms. They can be embedded in your Reef Balls before casting by covering the anchor head with a paper bag full of sand and coating the shaft with sugar water letting the anchor eye stick out of your mold seams (pre drilled) at about a 45 degree angle. Call us for details. Fiberglass rebar anchors are often used on hard bottoms (short) or soft bottoms (longer).. This is the strongest anchoring method for breakwater applications because it is particularly good at resisting shear forces. To use fiberglass rebar as an anchor, PVC pipes are embedded into the Reef Balls and a pneumatic drill is used to drill the bottom then the fiberglass rebar is then dropped into the hole (hard bottom) or the rebar is hammered in (soft bottoms) once the Reef Balls have been placed. . Again, call us for details.
MOLD REPAIR AND MAINTENANCE
Your molds should require very little maintenance. Once in a while, take them to a car wash or use a pressure washer to blast the concrete off of them. A good coat of hot car wax on the outside helps seal them from weather and keeps concrete from sticking to the outside of the mold. If you keep the metal parts well coated with oil, they should last for years. Once in a while, the fiberglass panels will need a re-enforcement along a seam or at a bolt hole, (especially if your molds are used often or are left in direct sunlight for long periods of time). Just go to a fiberglass supplier to get some fiberglass resin, roving or cloth, a paint brush, rubber gloves and some acetone for clean up. First, sand down the area to be patched. Always patch to the outside of the mold (the inside will have too much concrete residue to let the fiberglass stick). Then, add the activator to the resin as indicated on the container. Dip the roving or cloth (cut it first to fit the area you are strengthening) in the mixture and lay it over the area to be patched. Wear a good mask, latex gloves and old clothes. Use the paint brush to put the cloth in place with a dabbing like action. Work the cloth or roving with the paint brush until it is clear and smooth. After it hardens, sand it down and re-drill any holes you covered up. Any body shop can do the work for you if you don't like working in fiberglass (and we don't blame you...we hate it too).
FOR HELP
Your mold systems come with support from us. Just call or fax us at any time for a prompt response to your questions. IF possible, direct inquires to our e-mail (reefball@reefball.com) Otherwise, our phone number is 941-720-7549
:HAND POURING (INSTRUCTIONS FOR STUDENTS)
HOW TO BUILD A BAY BALL BY HAND
Step 1: INSERT TETHER BALLS Insert the tether balls into each of the three mold sections. Do this by first pushing the pin attached to the tethers through the holes in the mold from the inside. Pull on the pin and the string will bring the tether ball attachment hole to the outside of the mold. Then push the pin through the attachment hole on the tether. Place the green tether balls on the lower six holes and the yellow or orange tethers in the top six holes. (The green tethers should not be pumped up with air as much as the yellow or orange tethers so that they are easier to remove from the finished Bay Ball.)
Step 2: ASSEMBLE THE MOLD SHELLS Place 3 fiberglass shells together on top of the plywood base. Make sure they are in the correct order. Place pins in the side flange with the pinhead sticking out of the right side of the flange (the side with built in washers). Place a washer on the left side of the flange then insert the wedge. Put all the pins, washers and wedges in all the side flanges--then use a hammer to tap them into place.
Step 3: FIX SHELL TO PLYWOOD BOTTOM Spin the pinned Bay Ball shell around on the plywood bottom until it is lined up properly (the six holes in the bottom should all be about 1/2 an inch from the bottom lip of the mold). Insert the six remaining pins from the bottom (with the head of the pin underneath the plywood bottom). Place a hold down plate (looks like a big square plate with a hole in the middle) on top of the pins and overlap on the mold bottom flange. Then insert the wedges into the pins and tap them into place with a hammer.
Optional Step: CREATING A LOBSTER HOME To make a lobster hole, take a paper grocery bag and put about three quarts of sand in it. Roll it up like a "cigar," and bend the "cigar" slightly. Place it in the bottom of the mold with one end of the "cigar" touching the shell. When the ball is finished, use a garden hose to remove the paper and sand.
Step 4: INFLATING THE CENTER BLADDER Place the deflated central bladder into the center of the mold with the hold down bar secured by the two holes in the top lip of the mold. Inflate the center bladder until it is just touching all of the tether balls. Place three half bricks that is two or three inches thick about six inches down from the top lip along each mold seam line. (We call these spacers "chickens." That is a term used for items used to space rebar away from concrete forms before the concrete is poured.) Hold the bricks or stones (the chickens) in place while you continue inflating the center bladder until the chickens are locked in by the bladder. Now you have just the right amount of air in the center bladder to make the top of the Bay Ball be three inches thick. (You can use chickens with different thicknesses to control the thickness of the walls at the top of your Bay Balls.)
Optional Step: MAKING TEXTURE HOLES You can add "texture" balls to the mold at the same time you put the chickens in the mold. Try to place them where the bladder locks them into the side walls of the mold with the inflation hole being pressed against the mold wall. This way they are easier to take out of the finished Bay Ball by deflating them a little bit.
Step 5: QUALITY CHECK -Use the hammer to tap in all the wedges one more time to make sure the are tight -Look into the mold --Are the chickens locked in, but not so much that you can't wiggle them a little? --If you can't wiggle them, let a little air out of the central bladder. --Are there clear pathways for the concrete to flow easily into the mold? ---If not, remove the texture balls that block the path. --Are all twelve (count them) tether balls in the mold? ---OOPS...start over at step 1. --Is the hold down bar sticking out evenly from both holes? --If not, center it with a hammer. --Are all six hold down plates (two per side) in place and pinned? --If not, deflate the center bladder...go to step 4. --Is the mold where you want it for pouring, and it is level? --If not, four people can move it now.
22
Step 6: MIXING THE CONCRETE Check list: Make sure you have the following before mixing concrete -(8) sixty pound bags of ready mix concrete (required) -(1) one hundred pound bag of Portland cement (highly recommended) -two ounces of non-toxic air entrainment (optional) -one cups of non-toxic super plastisizer-ADVA FLOW (required) -one pound of non-toxic strengthening fibers (optional) -5 pounds of Force 10,000 (A.K.A. Microsilica or Condensed Silica Fumes) (required) -Access to fresh water hose (smart, water is heavy) -Concrete mixer or at least a large container for mixing with shovels and hoes.
OKAY...Now you are ready to make a Bay Ball!
NOTE: THESE INSTRUCTIONS ASSUME YOU CAN MIX ALL OF THE CONCRETE FOR THE BAY BALL (1/10TH OF A YARD) IN A SINGLE BATCH. IF YOU ARE MAKING MULTIPLE BATCHES, BE SURE THE PROPORTIONS ARE THE SAME.
Turn on the mixer and add five gallons of water to the bucket. -Put in five pounds of Force 10,000 (Microsilica) --Be careful, it is light and will blow away easily. Don't breathe the stuff! -Once the water looks like black swamp water with no lumps, proceed. -Put in the bags of concrete, one at a time. Add water as needed to make the mix flow. -Once the mix is totally wet and has the consistency of a thick paste, proceed. -Add the Portland cement until the mix is very stiff and barely wet. You should now have the consistency of almost a putty. Do not be tempted to add too much water as this will weaken your Bay Ball considerably. Give the mixer at least 3-5 minutes to make this well mixed without dry spots in the concrete. -Add two ounces of non-toxic air entrainment (Skip if you have Adva flow, use if you have another brand of superplastisize). Be careful as this stuff will stain your shirt. You will notice that the concrete looks like it flows a little better as the tiny air bubbles act like a lubricant. These air bubbles will not only make it easier to pour your Bay Ball, but they will also make tiny holes in the concrete surfaces that corals can attach to and begin to form a new reef. Let this mix for another 3-5 minutes (longer if you have time), so lots of air bubbles will form (you can't see them but they are there). -Now for the magic. Your mix should still be way too stiff to pour into the Bay Ball. If not, you have added too much water and should fix the situation with more Portland or bagged concrete. The mix should be as thick as you can make it without dry spots. Now, add the non-toxic super plastisizer. You might want to move the position of the bucket up a little so the concrete does not spill when it gets runny. PRESTO, your mix should look like soup. If it is perfect, you will see the rocks in the gravel just barely floating on the surface when the mixer is stopped. It's too runny if the rocks all go to the bottom. It needs more non-toxic super plastisizer if it is still too thick to pour easily from a bucket into the mold. In concrete terms, you want a 7-9 inch slump. This means if you put the concrete in a highway cone, then the cone on the ground, that the concrete would "slump" down 7-9 inches once the cone was removed.
Step 7: POURING THE CONCRETE Transfer the concrete to buckets and dump them into the mold. If the first bucket does not go down well, crank up the mixer, add more non-toxic superplastisizer, and then try again. Sometimes it is helpful to gently tap on the hold down bar with a hammer. This vibration will help the concrete to settle into the mold. You can even lift up the mold a few inches and drop it to accomplish the same thing. Try to pour the concrete evenly on each side of the center bladder. Be sure to avoid getting concrete on the hose connector used to inflate the center bladder. Fill the mold up to the level of the "chickens," but don't overfill or it may be difficult to remove the center bladder. Wear gloves when touching concrete, or rinse your hands immediately after touching concrete so your fingers do not end up looking like your grandmother's. Push the concrete at the top away from the center bladder and toward the sides of the mold to make a nice looking Bay Ball top. After the concrete is a few hours old, you can even scratch in a message for the fish at the top.
23
Step 8: CLEANING UP Now rinse down the outside of the mold with the hose. Try not to get any water inside of the mold. Rinse out the buckets and concrete mixer thoroughly. It's easy to remove wet concrete, but if you wait till it hardens...
Step 9: BLEEDING THE CENTER BLADDER After about 2-6 hours, less in the hot sun or more in the shade, the mold will start to get hot as the concrete sets. Touch the side of the mold and feel the heat. When it is very warm to the touch, let just a little bit of air out of the center bladder. About a 1-2 second burst should do. This relieves the pressure that the center bladder is building up because its air is getting too hot and trying to expand. This step is optional for night pours and other cool days, but becomes critical if you have the mold sitting out in the heat of the day or in direct sun.
Step 10: HATCHING A BAY BALL The concrete should have had at least 12 hours to set....up to 48 hours if you have the patience. FIRST, DEFLATE THE CENTER BLADDER. If you don't do this, your ball could explode into messy chunks of concrete rubble. Next, remove the bottom plates and side pins. Make sure the pins, washers, wedges and square plates are in a bucket. Give them a light coat of WD-40. Then, pull the center hold down bar out of the holes in the mold. NEXT, REMOVE ALL OF THE PINS SECURING THE TETHER BALLS TO THE MOLD. If you forget to do this, you will damage the tethers. Now, pull on the fiberglass shells to remove them gently from the Bay Ball. If they are difficult, place a large flathead screwdriver between the seams of the shells and gently tap the screwdriver with a hammer. If you had to do this, it's time to wax your molds again. (Use the special mold release wax provided with your system to wax the inside surfaces of the mold.) Now you should begin removing the tether balls. Put the pin back in the balls and use the pin as a handle to GENTLY pull them out of the holes. If they are stuck, use the hammer to break away the concrete around the tether balls. If you end up with a stubborn one, leave it in. It will deflate itself from the pressure when you place your Bay Ball in the ocean. Then it can be easily retrieved. Don't forget to remove all of the texture balls and lobster holes. Count them so you don't leave one in by mistake. You can shape the holes and the top entrance with a hammer if you want more open holes. Be gentle with the hammer so that you don't end up cracking your masterpiece. When you are finished opening and shaping, lift up one side off of the bottom plywood and gently slide the Bay Ball off. This takes at least three people, or two monsters. Now, clean up your mess and coat all of the other metal parts with WD-40.
Step 10B: Curing Your Bay Ball When concrete is newly poured, it does not have all of the strength it will ultimately need. Concrete continues to get stronger and stronger as long as it does not dry out. You can either place a plastic tarp around your Bay Ball and rinse it with the hose every couple of days, or you can put the Bay Ball in the water to continue curing. Either way, you should wait at least three days before further handling to avoid breakage. Be sure to store the Bay Ball where it doesn't get in the way, but where it is still easy to get to the boat for deployment.
24
REEF BALL TYPICAL CONCRETE SPECIFICATIONS
PART I - GENERAL
1.01 Section Includes
A. Concrete proportioning and products to be used to secure concrete, which when hardened will produce a required strength, permeability, and resistance to weathering in a reef environment.
1.04 References
A. ACI-211.191-Standard Practice for Selecting Proportions for Normal, Heavyweight,
and Mass Concrete.
B. ASTM C 260- Standard Specifications for Air-Entraining Admixtures for
Concrete.
C. ASTM-C 1116 Type III- Standard Specifications for Fiber Reinforced Concrete
or Shotcrete.
D. ACI - 305R -91- Hot Weather Concreting.
E. ACI - 306R -88- Cold Weather Concreting.
F. ACI - 308- Standard Practice for Curing Concrete.
G. ASTM C 618-Fly Ash For Use As A Mineral Admixture in Portland Cement
Concrete.
H. ASTM C 494-92- Standard Specifications for Chemical Admixtures for Concrete.
I. ASTM C 1202-91- Electrical Indication of Concrete's Ability to Resist
Chloride Ion Penetration.
J. ASTM C 33- Concrete Aggregates.
K. ASTM C 94- Ready Mix Concrete.
L. ASTM C 150-Portland Cement.
M. ACI 304- Recommended Practice For Measuring, Mixing, Transporting and
Placing concrete.
N. ASTM C 39 (Standard Specifications For Compressive Testing)
O. ASTM C-1240-93 (Standard Specifications for Silica Fume Concrete)
PART II PRODUCTS
2.01 Portland Cement: Shall be Type II and conform to ASTM C-150
2.02 Fly Ash: Shall meet requirements of ASTM C-618, Type F. And must be proven to be non-toxic as defined by the Army Corps of Engineers General Artificial Reef Permits. Fly Ash is not permitted in the State of Georgia and in most Atlantic States. (In October, 1991, The Atlantic States Marine Fisheries Commission adopted a resolution that opposes the use of fly ash in artificial reefs other than for experimental applications until the Army Corps of Engineers develop and adopt guidelines and standards for use.)
2.03 Water: Shall be potable and free from deleterious substances and shall not contain more that 1000 parts per million of chlorides or sulfates and shall not contain more than 5 parts per million of lead, copper or zinc salts and shall not contain more than 10 parts per million of phosphates.
2.04 Fine Aggregate: Shall be in compliance with ASTM C-33.
2.05 Coarse Aggregate: Shall be in compliance with ASTM C-33 #8 (pea gravel). (Up to 1 inch aggregate can be substituted with permission from the mold user.) Limestone aggregate is preferred if the finished modules are to be used in tropical waters.
2.06 Concrete Admixtures: Shall be in compliance with ASTM C-494.
2.07 Required Additives: The following additives shall be used in all concrete mix designs when producing the Reef Ball Development Group's product line:
A. High Range Water Reducer: Shall be ADVA Flow 120 or 140.
B. Silica Fume: Shall be Force 10,000 Densified in Concrete Ready Bags as manf. by W.R. Grace. (ASTM C-1240-93) or any of the permitted equivalent silica fume Brands as defined in the training manual Appendix K
C. Air-Entrainer: ONLY IF ADVA is not used: Shall be Darex II as manf. by W.R. Grace (ASTM C-260)
2.08 Optional Additives: The following additives may be used in concrete mix designs when producing Reef Ball Development's product line.
A. Fibers. Shall be either Microfibers as manf. by W.R. Grace, or Fibermesh Fibers (1 1/2 inches or longer) as manf. by Fibermesh. Either product can be in ready bags.
B. Accelerators: Any Non- Calcium Chloride or Daracell as manf. by W.R. Grace may be used. (ASTM C-494 Type C or E)
C. Retarders: Shall be in compliance with ASTM-C-494-Type D as in Daratard 17 manf. by W.R. Grace
2.09 Prohibited Admixtures: All other admixtures are prohibited. Other admixtures can be submitted for approval by the Reef Ball Foundation Inc. Services Division by sending enough sample to produce five yards of concrete, the current MSDS, and chemical composition (which will be kept confidential by RBDG Ltd.) A testing fee of $2,500 must accompany the sample. Temporary approval will be granted or denied within 10 days based on chemical composition, but final approval may take up to 3 months since samples must be introduced in a controlled aquarium environment to assess impacts on marine and freshwater species.
PART III Concrete Proportioning:
A. General: The intent of the following proportions is to secure concrete of homogeneous structure which will have required strength and resistance to weathering.
B. Proportions:
|
|
One Cubic Yard |
One Cubic Meter |
|
Cement: |
600 lbs. (Min.) |
356 kg |
|
Aggregate: |
1800 lbs. |
1068 kg |
|
Sand: |
1160 lbs |
688 kg |
|
Water: |
240 1bs. (Max.) |
142 kg |
|
Force 10K: |
50 lbs |
30 kg |
|
Grace Microfibers |
.25 bag |
.3 bag |
|
*Adva Flow 120 or Adva Flow 140 |
3.5-5 ounces per 100 lbs cement |
1 |
*NOTE: Adjust Adva dosage as needed to obtain workable, placeable mix (170-250mm / 7-10 inch slump), and to achieve .40 w/c ratio.
Fibers: 0-3# (Max.) as needed to reduce micro cracking 1# (Min.) required if Silica Fume exceeds 50#
Accelerator: As needed to achieve de-molding no sooner than: 3-4 hours for heavy duty molds (All Polyform side balls) 6-7 hours for standard molds (Molds with any tether balls)
27
NOTE: Silica Fume or Force 10K shall be dosed at a 10# minimum in Bay Balls and Pallet Balls while Ultra & Reef Balls shall require a minimum of 25#. All molds must use at least 50# for floating deployments. All mold sizes must use at least 50# for use in tropical waters unless special curing procedures are followed.* This product is being specified not only for strength, but also to reduce pH to spur coral growth, to reduce calcium hydroxide, and to increase sulfate resistance. It is a non-toxic pozzalan.
* Special curing procedures for tropical waters without 50# of Silica Fume per yard should include storage in a fresh water or high humidity environment for a minimum of 60 days or less with higher temperatures, or until the surface pH of the modules is below 9.5 pH when placed in seawater.
NOTE: End of day concrete may be used, but follow these additional requirements.
-Do not use concrete that has a temperature of over 100 degrees Fahrenheit -The original mix must have been at least 3,500 PSI -50# of added microsilica or more is required unless microsilica at that dose was already in the starting mix -Add additional Portland if needed to achieve a .4 w/c ratio. Take into account water added on site -Advise mold user to allow extra time for curing to achieve minimum de-molding strength. -Mold or module user must be notified that EOD waste was used.
NOTE: Fly Ash, when permitted, may be used as a substitution for cement up to a maximum replacement of 15% and as an additional substitute for microsilica at 30% to 40% of cementitious material. (Call RBDG for details.)
Part IV Concrete Testing Requirements:
A. Compressive strengths shall be tested in accordance with ASTM C 39. Compressive strengths shall reach a minimum of the following table at the time of use of at least:
|
|
Super/Ultra/Reef Ball |
Pallet Ball |
Bay Ball and all smaller sizes |
|
Floating Deployment |
8,500+ |
7,000+ |
6,000+ |
|
Barge Deployment |
7,000+ |
5,500+ |
4,000+ |
|
To remove from mold |
750+ |
750+ |
750+ |
|
To lift from base |
1,500+ |
1,200+ |
1,000+ |
B. Permeability of concrete shall be tested in accordance with ASTM C 1202-91. Coulomb requirement shall be 2500 coulombs or less at 90 days. End of day waste shall be 3000 coulombs or less at 90 days.
THIS SPECIFICATION SHEET IS ONLY A SAMPLE. CONTACT RBDG FOR CUSTOM SPECIFICATIONS.
STABILITY AND ANCHORING
Before reading this, review above section in the training manual on standard anchoring techniques.
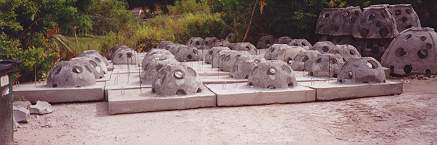
Many clients ask us how to anchor their Reef Balls. First, it should be
understood that Reef Balls were designed so that they would NOT require
anchors. In most cases, the weight distribution and hydrodynamics of the
modules will keep them in place through even the worst storms. Five reef ball
reefs have been hit with heavy tropical storms that were strong enough to rip a
heavily anchored airplane into two pieces and to move 14 ton concrete blocks
across the bottom. To date, there has never been a Reef Ball, Pallet Ball or
Bay Ball that has been reported to have moved. One of the Reef Ball reefs hit
by tropical storm Gordon was located in under ten feet of water, and it 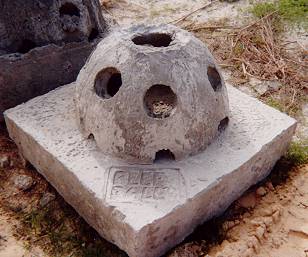
showed no movement. Reef Balls have also been proven in breakwater applications. However, any object in the ocean can move under extreme conditions. If you feel that your reef needs anchoring, we have developed several techniques to make it easy. To make attachment points, just use a 1/2 inch stainless steel I-bolt with a large washer attached to the end, and place it between the side flanges about 6 inches above the bottom of the mold. You may need to drill a hole right at the flange joints for large bolts. Leave the circle in the I-bolt sticking out of the flange. You can add as many of these attachment points as you need for anchors.
Now, you just need to select an anchor and attach it to the I-bolt. We suggest the use of stainless steel airplane cabling to connect the anchor to the I-bolt. House trailer tie down anchors are inexpensive, but may only last 10-20 years. Double helix anchors are available that have a much greater holding strength, but they also cost more.
Another trick is to wrap a house trailer tie down anchor (just the bottom screw part) in a paper bag with sand in it. Coat the shaft with several layers of sugar water, letting each layer dry. Position the anchor in the mold just like the I-bolt at a 45 degree angle leaving a foot or more sticking out of the flange. After casting, flush the shaft with a garden hose to make sure it breaks free from the concrete. On the ocean floor, just tap the shaft into the sand. Then screw it in tight.
STABILITY ANALYSIS NOW AVAILABLE FROM FLORIDA INSTITUTE OF TECHNOLOGY. CALL US WITH THE DEPTH OF YOUR UNITS AND THE ANTICIPATED 50 YEAR STORM SURGE WAVE HEIGHT AND WE CAN GIVE YOU THE EXACT MINIMUM WEIGHT FOR ANY MODULE SIZE FOR STABILITY!
PRESS
Many of our clients like to receive press coverage to let the public know
what their projects are all about. At the Reef Ball Foundation Inc., we have a
policy not to spend money on advertising so that every dime we earn can be
pumped back into mold systems, 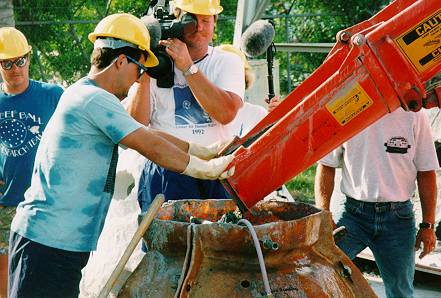 research or more projects.
Therefore, we rely on our clients to spread the word, and we rely the press to
carry our message to the public. We maintain press quality photos on our
website at
research or more projects.
Therefore, we rely on our clients to spread the word, and we rely the press to
carry our message to the public. We maintain press quality photos on our
website at
www.artificialreefs.org We also have at the office video footage of Reef Balls. Let us know how we can help you get good press coverage.
Reef Ball Tool Kits
Reef Ball now offers tool kits for about $500...they include everything below not in brackets [ ] with the assumption that you will have the bracketed items on site. This is a good checklist to go by before your trainers arrive even if you don't order a kit.
Reef Ball Tool Kit-Included [Supplied on Site]
1 Rubber Mallet [Additional Rubber Mallets]
1 Hammer-steel shaft [Additional Hammers]
[Wheelbarrow]
[2 flat head shovel, 1 spade]
1 Rubber or Nitrile Glove (For Concrete work) [Additional regular work gloves]
1 Phillips #2 Screwdriver
1 Flathead #2 Short Shaft Screwdriver [short screwdriver for diver]
2 drill bits 1/4", 5/8",
3 Paddle Bits, 3/4", 1", 1 1/4"
[1 3 1/2" Hole Saw]
1 18 ft Lift Strap (6000 lbs) with abrasion resistance
2 5 foot 3/8" chains
2 grab hooks (6000 lbs)
[Additional 18 ft lift Straps, 2 slip hooks, 2 3/8" shackles]
Small Box Drywall Screws
Box #8 Deck Screws 1 3/4"
2 Rolls Plumbers Straps
[Additional Rolls of Plumbers Straps]
1 Roll Duct Tape
1 Can WD-40 or other lubricant spray
1 Air Blower nipple with 3-4 inch nozzle
1 Scuba Air inflator fitting
1 Hack Saw blade
1 Magnum 44 perm. marker (or equivalent)
1 Pkg needle valves
1 razor knife
1 Garden Sprayer
1 Battery Powered Drill
1 package assorted bits (Philips or flathead)
[Dewalt or professional grade Battery Powered Drill]
[Electric or Pneumatic Drill]
[Electric or Pneumatic circular saw]
[Shop Vac and air hose and fittings]
air hose and fittings for [shop vac or stinger]
16 oz. Adva 120
10 Polyform Screw Caps
Roll of Hi-Vis string
Plastic Wedge
[3 cans colored spray paint]
[Thermometer (if using concrete waste)]
[Air compressor or Scuba tank and hoses]
[Water source and hoses]
[Wood for bases]
sugar (10 lbs or more)
2 5 gallon buckets
[electric drill with 1/2" chuck if using 3"1/2' hole saw]
[Other safety equipment, i.e. eye protection, steel toed shoes, first aid kit, eye wash kit, etc)
Appendix K: Permissible Brands of Microsilica
|
Company |
Brand Name |
Form |
Manufacturers |
|
Axim
Concrete P/S Code 6502-01 |
CATEXOL SF-D |
Densified |
Elkem Materials, |
|
Elkem
Materials P/S Code 6643-01 |
EMS-970 S |
Slurry- 52% |
Elkem Materials, |
|
Euclid Chemical
|
EUCON MSA |
Densified |
Elkem Materials, |
|
W.R.
Grace & Co. |
FORCE 10,000 |
Densified |
Norchem Concrete |
|
Hydration Kontrol P/S Code 6521-01 |
HY-KON EMS-970 S |
Slurry-52% |
Elkem Materials |
|
Master Builders, Inc. P/S Code 6528-01 |
RHEOMAC SF100
|
Densified
Slurry-52% |
Norchem Concrete Prod.
|
|
RussTech,
Inc. P/S Code 6546-01 |
RUSSTECH CSF |
Densified |
Elkem Materials |
|
Sika
Corp. P/S Code 6548-01
|
SIKACRETE 950DP |
Densified |
Elkem Materials |
In General, any brand of microsilca is acceptable as long as the label indicates that it is DENSIFIED. There are only two manufacturers of silica fume worldwide so all the DENSIFIED forms are essentially the same...go for the best price! Silica Fume is cheaper in Canada and Europe than in the USA.
Copyright ©1995, 1996, 1997, 1998, 1999, 2000, 2001, 2002, 2006 RBF, INC. all rights reserved. See brochure page footer for information on patents, copyrights, trademarks and service marks referenced, but not indicated, on this page.